Dynaflite DYFA3040 User Manual
Page 30
2-1/2"
SIDE SHEETING 1.1/4"
5"
13-1/2"
31"
36""
3"
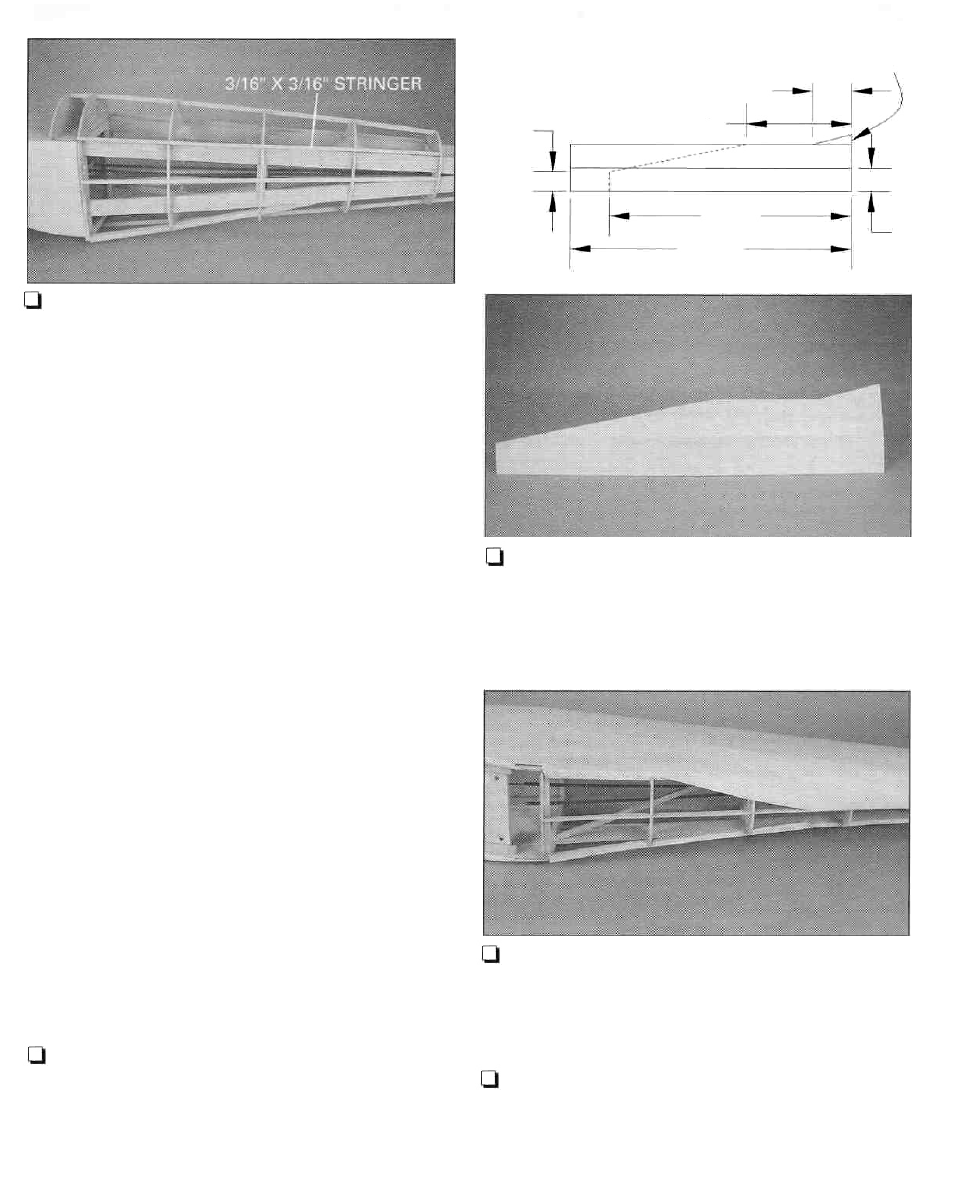
Q 2. Add a stringer to the fuselage from former
DT to HT. Use the supplied 3/16" x 3/16" x 24"
balsa sticks. Cut notches in top formers DT, ET,
FT, GT and HT, and add a stringer to each side as
shown in the photo above. This will provide a
gluing surface where the top sheeting meets
the side sheeting.
Before sheeting the rear of the fuselage you
should decide what technique you would like to
use. Some modelers prefer to add sheeting in
strips, going from stringer to stringer, one strip
at a time. This requires considerable sanding
once the sheeting has been glued into place.
Q 4. If you will be making skins to do the
sheeting, cut and fit the individual pieces from
3/32" x 3" x 36" balsa sheets. Glue them together
and sand them flat and smooth. Make two
skins, one for each side.
Our favorite technique is to fit the individual
sheets and then glue them together flat on your
building board to form a "skin." You can then
sand the skin flat and smooth before it is glued
into position.This requires a bit of finesse when
gluing the skin into place. Use a mix of water
and rubbing alcohol to allow the skin to bend
and conform to the curves more easily. This
technique will give a more consistent shape
and smoother finish.
t-1 3. If you will be sheeting the fuselage one
sheet at a time, sheet the fuselage sides using
the 3/32" x 3"x 36" balsa sheets. Then skip to
step 6.
Q 5. Glue the skin to the fuselage side. Wet the
balsa sheeting with water and alcohol to allow
it to conform to the shape of the sides and
bottom. See the note at step 7.
Q 6. Using some leftover 1/8" sheeting, glue the
small piece of side sheeting into place at
bulkhead D.
30