Mount the landing gear, Finish radio installation – Dynaflite GPMA0090 Butterfly User Manual
Page 35
35
❏
14.
Install the fuel tank and connect the fuel tubes.
❏
15.
Install the fuel tank hatch with the #2 x 3/8"
screws. The hatch should secure the tank, but if
necessary, place extra foam around the fuel tank
so it cannot shift during fl ight.
Mount the Landing Gear
❏
1.
Cut the covering from the landing gear holes
on both sides of the fuselage, then fi t the landing
gear in the rails.
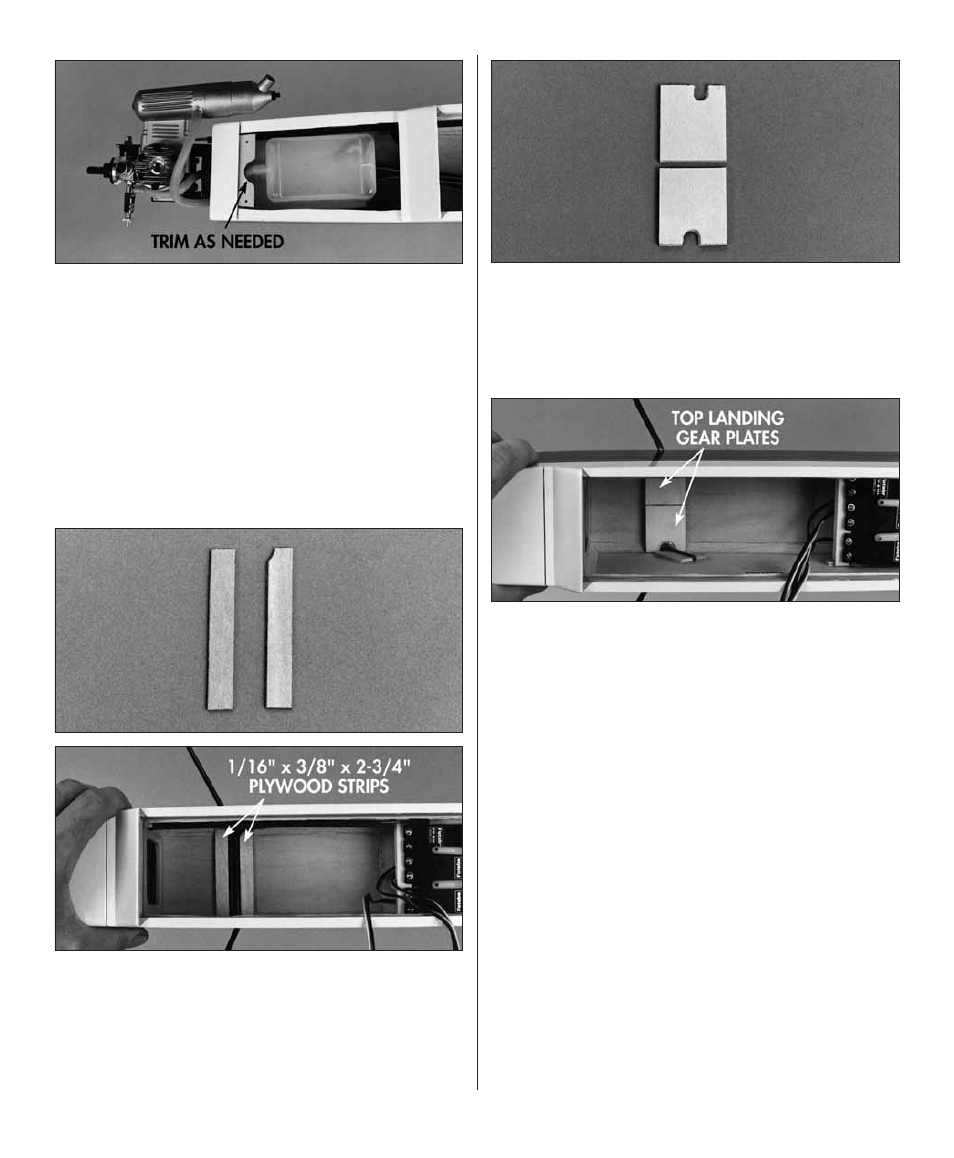
❏
2.
Use the 1/16" plywood leftover from the W-1
root ribs to make two 1/16" x 3/8" x 2-3/4" strips.
Chamfer the corner of one of the strips so it will
clear the “upright” part of the left landing gear in
the right side of the fuse. Glue the strips to the
top of the landing gear rails with 6-minute epoxy.
❏
3.
Cut the die-cut 1/8" plywood
top landing
gear plate
in half, then mark the location where
the landing gear wire contacts both plates. Use a
hobby knife or a powered hand tool to cut a notch
in both plates to clear the landing gear.
❏
4.
Thoroughly roughen the portion of both landing
gear wires that will be inside the fuselage with
coarse sandpaper. Use plenty of 30-minute epoxy to
glue the top landing gear plates to the 1/16" strips
you positioned in step 2.
❏
5.
Mount a 2-1/4" wheel on each landing gear wire
with 5/32" wheel collars (not included, GPMQ4306)
on both sides of the wheels.
❏
6.
Connect the servo cords and the switch to
your receiver, then wrap the receiver and battery
pack in foam.
Finish Radio Installation
Note:
Because the Butterfl y is a three channel
model (where the steering function is the rudder not
ailerons) connect the rudder servo to the “aileron”
channel of your receiver.