Dynaflite GPMA0090 Butterfly User Manual
Page 29
29
base color. Try just a single color base (usually a
lighter color such as white or yellow) with perhaps
a single stripe, your AMA number or some stick-on
graphics. A simple trim scheme will get you in the air
faster and look much better (not to mention give you
fewer headaches) than a model that was diffi cult
to cover because of a complicated trim scheme.
We will use the stabilizer as an example because
all of the techniques shown apply to the rest of
the Butterfl y too.
❏
1.
Here is a “rule of thumb” to keep in mind before
you begin: Wherever possible, apply the covering
so all seams face downward or rearward. This can
be done if you cover the bottom (of the wing, fuse,
stab, etc.) fi rst.
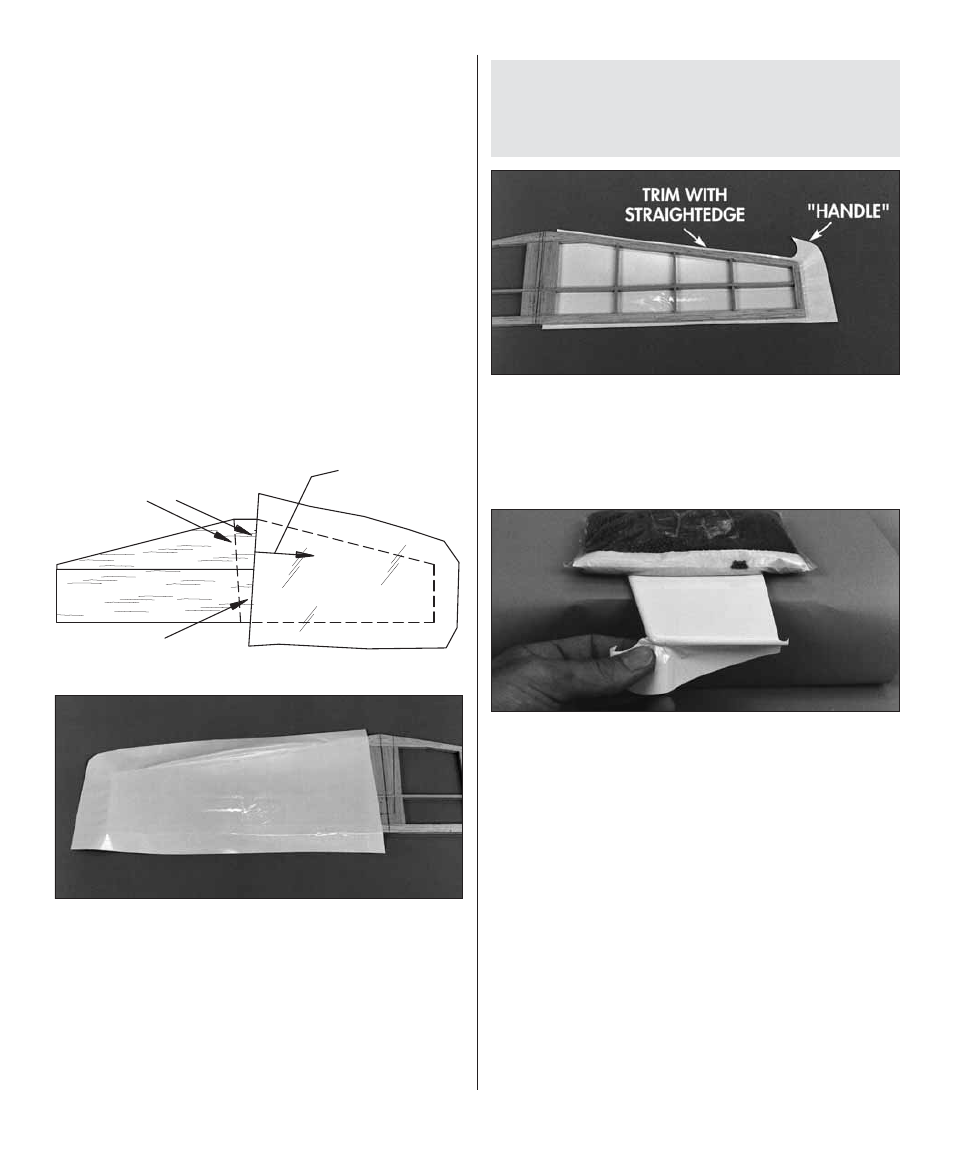
Lines marked at
edges of fuse
Cover only
to the lines
Start ironing at
the line and
work outward
Covering
Film
Stabilizer
❏
2.
Cut the covering for one half of the bottom of
the stab so it is approximately 1" oversize. Use a
straightedge to cut the end that aligns with the lines
you drew indicating the fuselage. Use a Top Flite
MonoKote Iron with a Hot Sock to securely bond
the covering to the perimeter (LE, TE, tip, middle)
of the stab but
do not
fully shrink the covering at
this time.
Never cut the covering after you iron it to the
wood except near the tips.
Modelers who do
this may weaken the structure which could cause
it to fail during fl ight.
❏
3.
Use a straightedge to accurately trim the
covering near the LE and TE, but leave a little
“handle” around the corner and the tip so you can
pull the wrinkles out of the covering and stretch it
around the tip and corner as you heat it.
❏
4.
Seal the front and rear of the covering to the
LE and TE, then heat the covering as you pull and
stretch it around the tip. It takes a little practice to
get all the wrinkles out so don’t be discouraged if
it doesn’t look perfect on your fi rst attempt (or the
second or third time). You can reheat and stretch the
covering many times. It helps to place the stab on
your workbench so the tip is over the edge. Place
a weight on top of the stab to hold it down. This
will allow you to pull the covering with one hand
and hold the iron in your other hand.