Dynaflite GPMA0090 Butterfly User Manual
Page 24
24
❏
11.
Cut the cross-grain
aft top fuselage
sheeting
from the 1/16" x 2" x 24" balsa sheet
and the remainder of the 1/16" balsa sheet you
used for the bottom of the fuse. Position and glue
(with medium CA) the individual planks between
F-7 and the marks you just made.
❏ 12. Trim, then sand the sides of the top sheeting
so it is even with the fuse sides. Sand the top
sheeting so it is fl at, even and smooth.
❏
13.
Make the
cabin sides
from the 1/4" x 1/2"
balsa sticks, then glue them to the top of the fuse
sides in the location shown on the plan.
❏
14.
Mount the engine mount to the fi rewall
with 4-40 x 1/2" machine screws and blind nuts
(not included).
❏
15.
Position your engine on the engine mount and
mark the location of the engine mounting holes. Drill
3/32" holes in the mount, then secure the engine
to the mount with #4 x 1/2" screws (not included).
❏
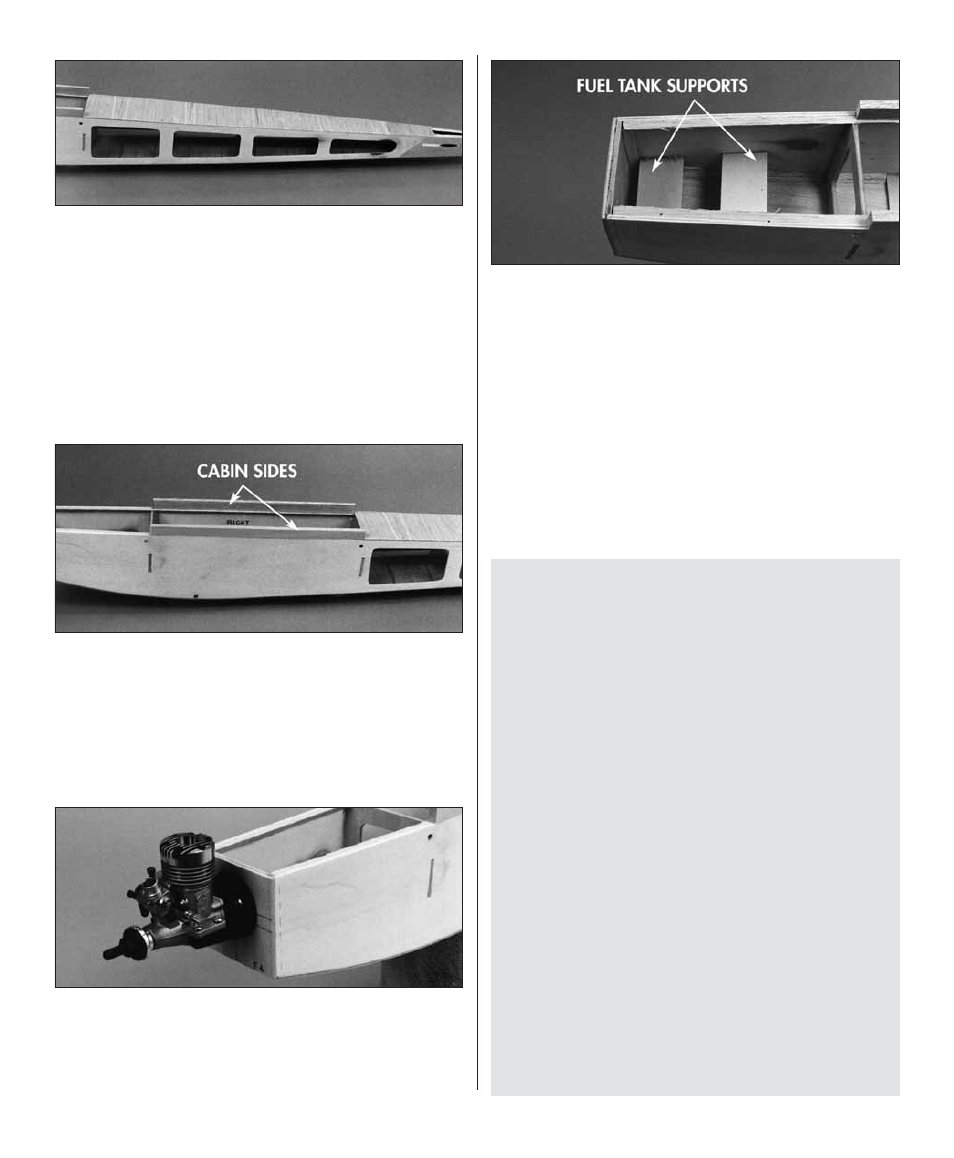
16.
See the information about fuel tanks that
follows, then test fi t a 4 oz. fuel tank in the fuselage.
You may support the tank with layers of foam (“R/C
foam” used to protect receivers and batteries and
cushion fuel tanks) or build
fuel tank supports
from leftover 1/8" plywood. Place one layer of 1/4"
foam between the tank and the tank fl oor.
A Crash Course In Fuel Tanks
A. In order for an engine to draw fuel from the
tank, three things are important:
1. The
pick-up
line inside the tank must be cut
to a length so it is as long as possible, yet does
not allow the “
clunk
” (the weight at the end of the
line) to contact the rear of the tank. If the clunk is
able to touch the rear of the tank, it may become
stuck in a position that is above the fuel level,
thus preventing fuel fl ow to the engine.
2. Position the fuel tank so its
centerline
is
as close as possible to the same level as the
carburetor
. This way, fuel fl ow will be nearly
consistent no matter if the tank is full or almost
empty.
3. Avoid
kinks
and
sharp bends
in the fuel line.
Position the tank inside the tank compartment
and drill the fuel line passage holes in the fi rewall
to allow the lines to exit without sharp bends. If
necessary,
loop
the fuel tubing inside the tank
compartment before it enters the fi rewall.