Covering, Prepare for covering, Covering sequence – Dynaflite GPMA0090 Butterfly User Manual
Page 28: Covering tips
28
❏
5.
Remove the wax paper, then lightly mark the
outline of the fi n on the fuse top and the stab with
a ballpoint pen.
❏
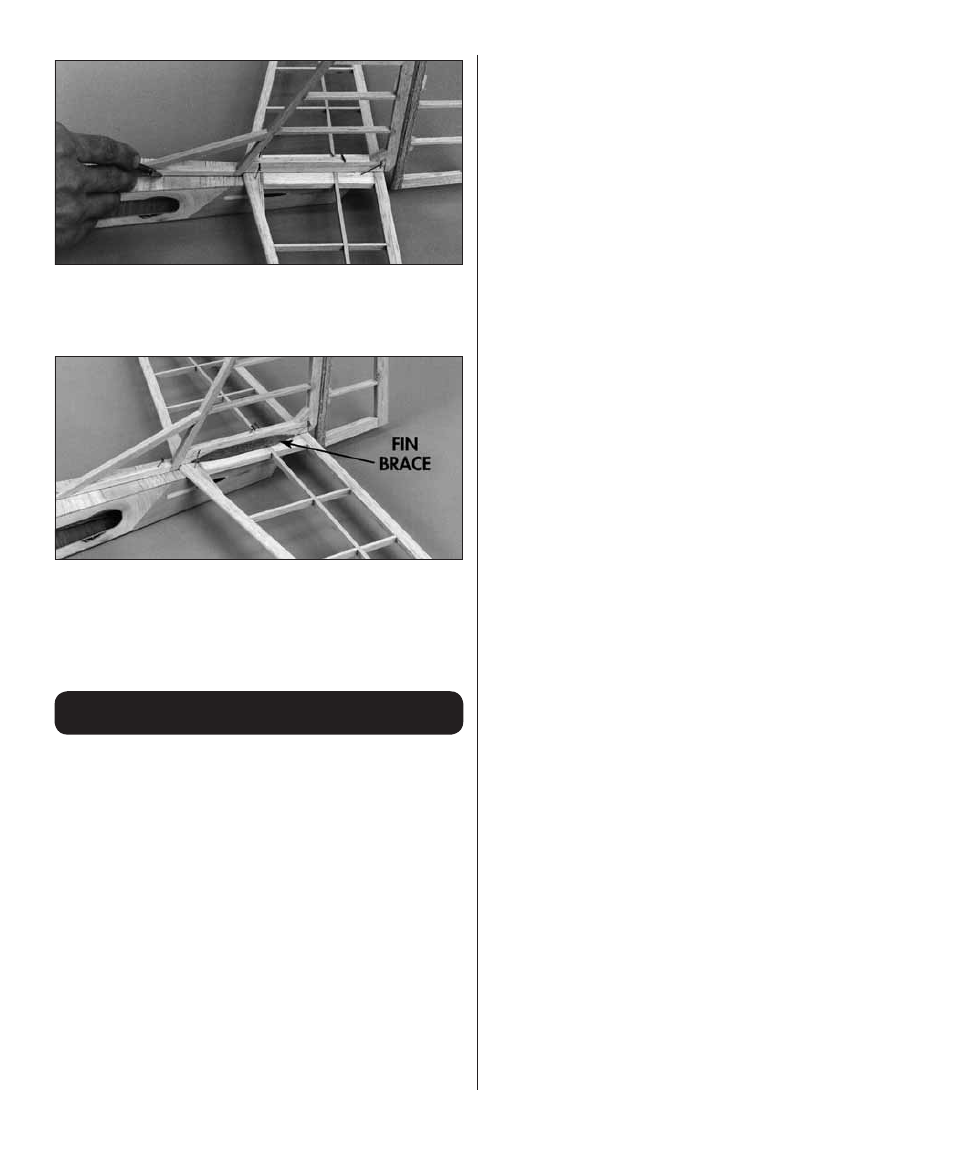
6.
Make the
fi n braces
from the remaining 1/4"
balsa triangle stock. Make the braces 4" to 4-1/2"
long and bevel the ends. Position the braces on
the stab and trace their outlines on the fi n and stab
with a ballpoint pen.
Covering
Prepare for Covering
❏
1.
Inspect the entire model for glue joints that
don’t look strong and reinforce them with medium
or thin CA.
❏
2.
Remove the fi n (with the dorsal fi n) and stab
from the fuse. Final-sand the tail surfaces with
320-grit sandpaper being careful not to break any
of the tail ribs or “thin” the balsa too much in any
one area.
❏
3.
Slightly round the top and bottom corners of
the fuselage and the triangle stock “windows” with
your bar sander and 220-grit sandpaper. Sand the
fuselage so it is smooth and even. Fill all dents,
scratches and imperfect glue joints that may show
through the covering with HobbyLite fi ller.
❏
4.
Use medium CA to glue the die-cut 1/8"
plywood
tail skid
and balsa triangle reinforcements
to the bottom of the fuselage or glue the skid in
position after you cover the fuselage.
❏
5.
Test fi t the wing in the fuselage and adjust the
front and rear “windows” if necessary so the wing
will fi t between them.
Covering Sequence
Read the Covering Tips fi rst, then cover your
Butterfl y in this order:
Tail Surfaces:
1. Stab bottom right, then left
2. Stab top right, then left
3. Elevator ends
4. Elevator bottoms, then tops
5. Fin ends
6. Fin right, then left
7. Rudder right, then left
8. Triangular fi n reinforcements
Fuselage:
1. Bottom
2. One side, then the other
3. Top
4. “Windows”
5. Fuel tank hatch
6. Firewall
Wings:
1. Root (center) ends
2. Tips
3. Bottom inner panel
4. Bottom outer panel
5. Top inner panel
6. Top outer panel
Covering Tips
If this is the fi rst time you have covered a
model refrain from attempting a complicated
trim scheme.
Add stripes, graphics and various
designs to your Butterfl y cut from different colors
of MonoKote fi lm, then iron them directly over the