Carrier EVERGREEN 19XR User Manual
Page 6
6
.
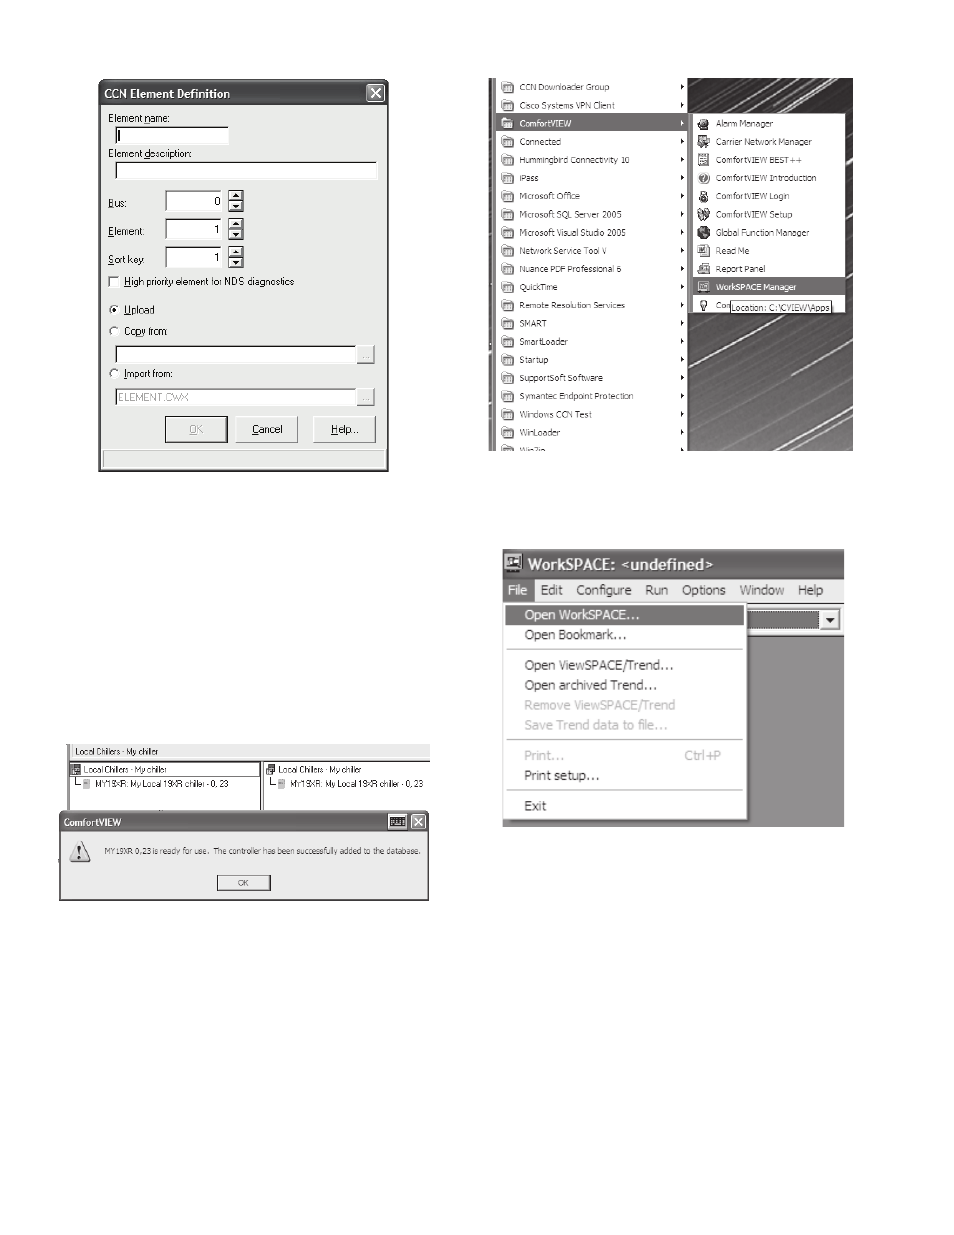
6. “Upload element?” prompt screen is displayed. Press
“Yes” to upload.
7. “Uploading element” screen is displayed. Wait for upload
to complete.
8. After uploading your chiller into the Local Chiller CCN
database (Fig. 13), press “OK” to the prompt. The tree
can be expanded for your chiller to select point and con-
figuration screens to verify communication. If preferred,
the configuration of an existing chiller database can be
used by performing the copy function rather than the up-
load function while adding your chiller to the Local Chill-
er CCN.
9. Once your chiller has been added, it is possible to clone
all of your workspaces and viewspaces for your local
chiller from one of the existing chiller databases. In order
to do this, start Workspace Manager (Fig. 14) as follows.
10. Select (tap) the Windows Start icon in the lower left cor-
ner of the screen.
11. Select “All Programs.”
12. Select “ComfortVIEW.”
13. Select “WorkSPACE Manager.”
14. From chiller display page, select “File” tab at the top of
the screen, then select “Open WorkSPACE” (Fig. 15).
15. From the “Open WorkSPACE” screen, open the default
workspace for the chiller that is the same version as your
local chiller (Fig. 16). It is important to use the same type
and version number of your chiller or the cloning tool
will not clone all the workspaces and viewspaces. Other-
wise, an error response will be generated indicating the
chiller versions do not match.
Chiller software version can be found on ICVC, under
“ICVC CONFIGURATION” or from the touch screen
using Carrier Network Manager under “Device Con-
figuration,” then “Controller ID.”
Fig. 12 — CCN Element Definition
a19-
1903
Fig. 13 — Local Chiller Successfully Added
Fig. 14 — Start Workspace Manager
Fig. 15 — Select Open Workspace