Carrier EVERGREEN 19XR User Manual
Page 5
5
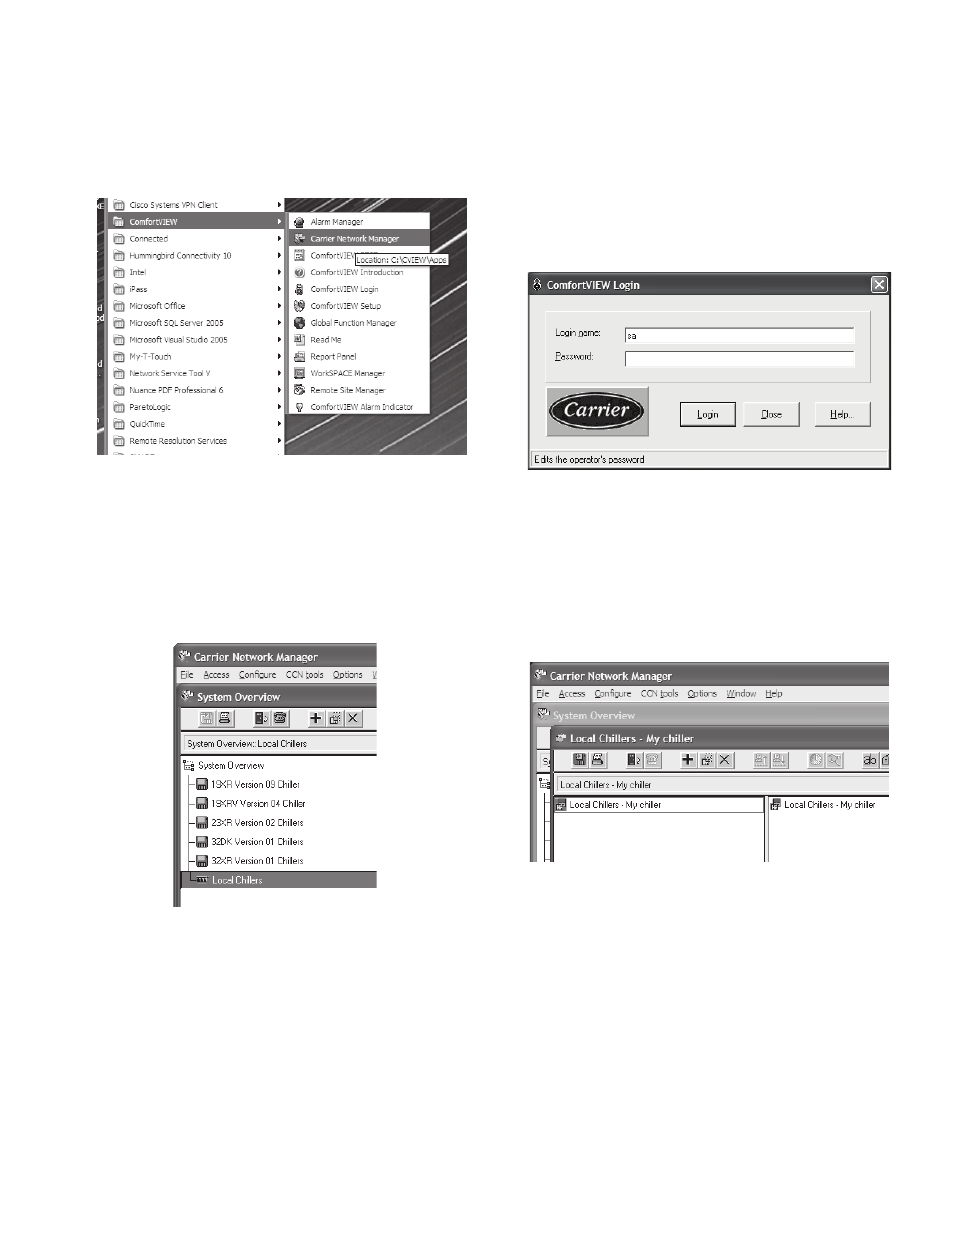
Start Carrier Network Manager
1. Minimize the expandable keyboard.
2. Select (tap) the Windows Start icon in the lower left cor-
ner of the screen.
3. Select “All Programs.”
4. Select “ComfortVIEW.”
5. Select “Carrier Network Manager” (Fig. 8).
Configure ComfortVIEW™ Software on Touch
Screen —
For ease of use, a default CCN database called
“Local Chillers” was created and set up for communications
through COM 1 port of the display. An example of the display
showing the default CCN databases and the Local Chiller data-
base is shown in Fig. 9.
The other CCN databases listed in Fig. 9 are provided as
templates of chiller versions. Each CCN database contains one
chiller database in Network Manager and associated workspac-
es in Workspace Manager. These files are provided to allow the
cloning of these workspaces for your specific chiller.
More CCN databases are planned for release to support older
software versions and future software releases.
If at any time, Carrier Network Manager issues the operator
message, “Your Access Level will not allow you to perform
this function” or if there is a problem during the configuration
procedure, it may be necessary to log out of ComfortVIEW
and log in again.
To login, use the local administrative account and password.
The username is “sa” and the password is “carrier”, both in
lowercase (Fig. 10). The username and password are entered
using the expandable keyboard. The keyboard can be displayed
by tapping the small keypad icon.
It will be necessary to upload your specific chiller into the
Local Chiller CCN database to be able to communicate with
your chiller.
1. Double tap on “Local Chillers.”
2. Double tap on “”Local Chillers - My chiller.”
3. Carrier Network Manager is started with “Local Chillers -
My chiller” is displayed, as shown in Fig. 11.
4. Select the “
+
” icon at the top of the “Local Chillers - My
chiller” screen.
5. “CCN Element Definition” screen is displayed. Enter
“Element name” (for this example we are using “My
19XR”) and “Element description” using onscreen key-
board, then press “OK” (Fig. 12). Enter “Bus” and “Ele-
ment” numbers.
NOTE: Default numbers are 0 for Bus and 1 for Element.
Fig. 8 — Start Carrier Network Manager
a19-1899
Fig. 9 — Default and Local Chillers Database
a19-1900
Fig. 10 — Login Prompt
a19-1901
Fig. 11 — “Local Chillers - My chiller” Screen
a19-1902