Darning, Writing and, Writing and monogramming – Kenmore 1250 User Manual
Page 37
Attention! The text in this document has been recognized automatically. To view the original document, you can use the "Original mode".
Page 1 3
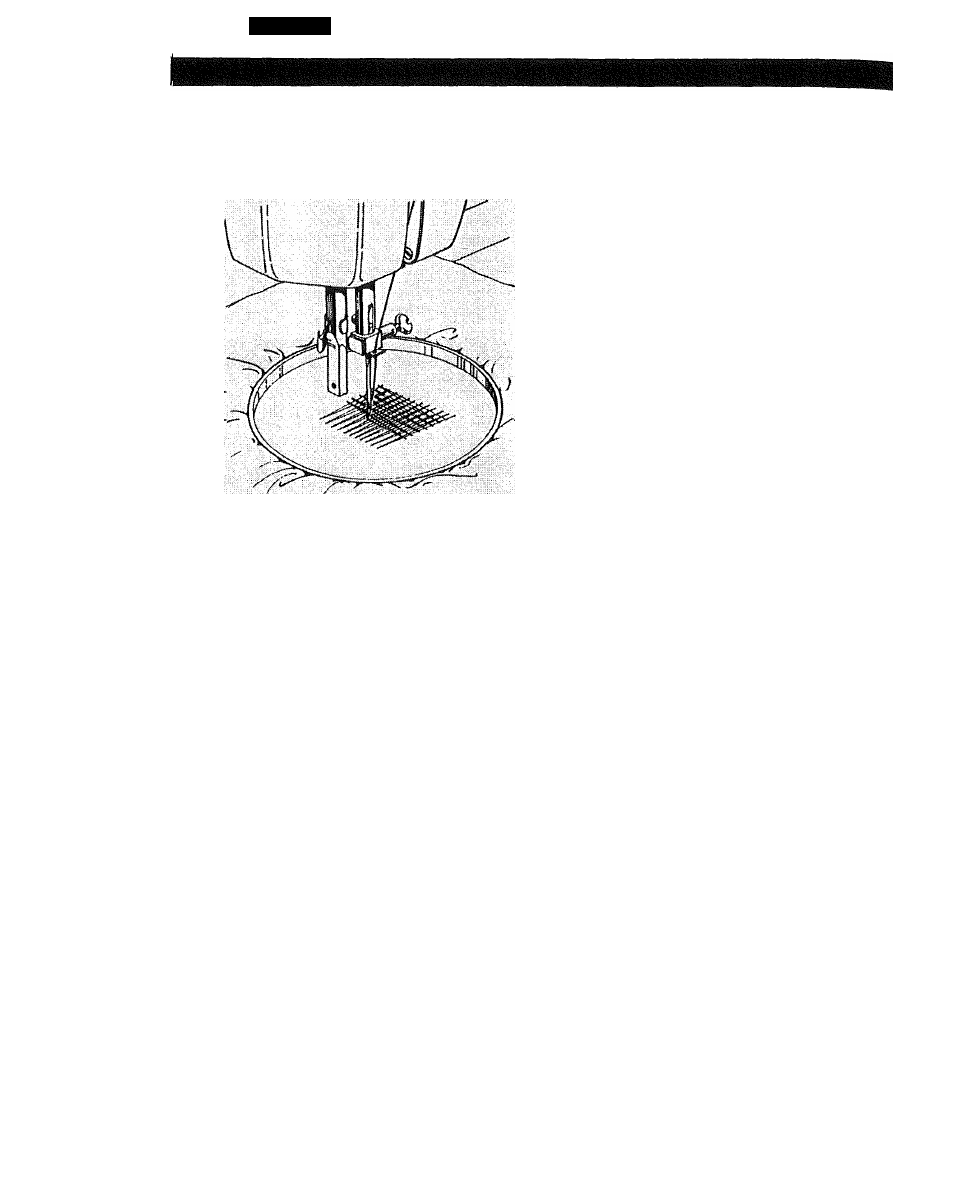
DARNING
SETTINGS:
Special Stitch Dial - (Model 1250 only)
Special Stitch Variegator- Red mark on top
(Model 1250)
Red dot to the
left (Model 1240)
Stitch Width Control - Red Dot
Feed Dog - Down
No Presser Foot
Remove presser foot, stretch fabric be
tween
embroidery
hoops
with
hole
centered. Draw the bobbin thread up
through the fabric by holding the top
thread and taking one stitch at the spot
where
you
wish
to
start
darning.
Lowering the presser bar, start sewing
at a slow to medium speed. Move the
fabric back and forth with a steady
rhythm to cover the darning area. When
it is covered, turn the fabric and sew
another layer of stitching across the first
layer of stitching.
WRITING AND
MONOGRAMMING
SETTINGS:
Free hand
Stitch Width Control - Any setting
Feed Dog - Down
No Presser Foot
Draw initials or words to be sewn on
fabric and fit fabric into embroidefy
hoops. Writing is done with either
zigzag or straight stitching. Remove
presser
foot.
Set
stitch
width
for
straight or zigzag stitches as desired.
Slip hoop and fabric under the needle,
lower presser bar and take one stitch to
raise bobbin thread through fabric.
Using a medium speed, stitch along
marked outline, guiding fabric carefully
by hands.