Buttomholing, Buttonholing , 10 – Kenmore 1250 User Manual
Page 33
Attention! The text in this document has been recognized automatically. To view the original document, you can use the "Original mode".
Page 9
BUTTOMHOLING
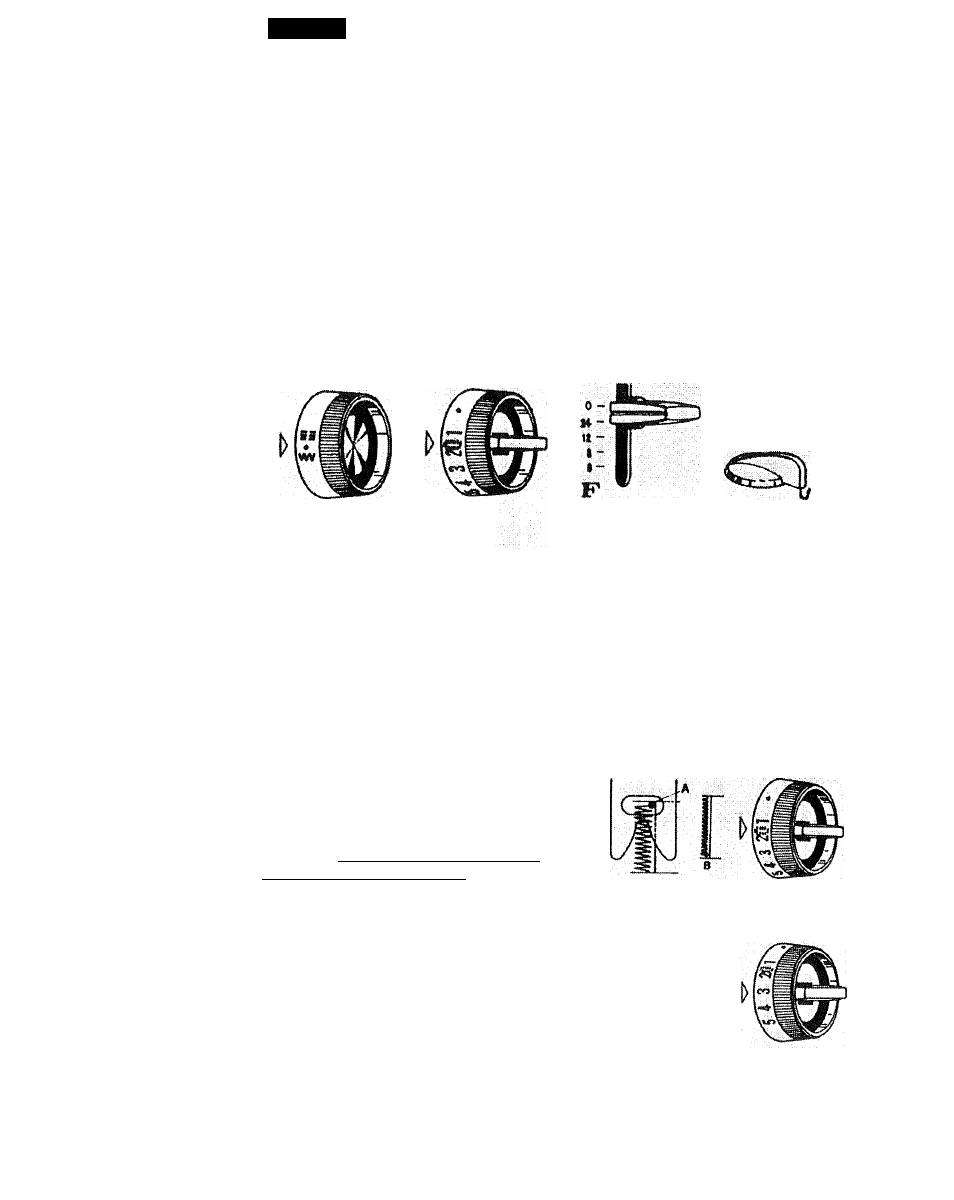
SETTINGS:
.
Special Stitch Dial - (Model 1250 only)
Special Stitch Variegator- Red mark on top
(Model 1250)
Red dot to the
left (Model 1240)
Stitch Width Control - IJ
Stitch Length Control - Between 24 and
white dot
Satin Stitch Foot
Special Stitch
(Model 1250 only)
Stitch
Width
Stitch
Length
Feed Dog
Control
1.
Mark the buttonhole length at both
ends and also the center line.
See Fig. 1
Fig. 1
2.
Position fabric under needle. The
first stroke of the needle should be to
the right and pierce fabric at point.
A. Stitch forward on left side of
buttonhole until desired length is
obtained. Stop with needle in fabric
on right side of stitching. Point BT
See Fig. 2
3.
Raise presser foot and turn material
and set stitch width control to three.
Lower, presser foot and take one
stitch to the left. Point B to C.
See Fig. 3
Fig. 2
C..B
Fig. 3