U ormce spuds fur cunvuifin§ to rafituroe ooss, M w ) k, Lu cohvertihg surface lurners on – GE 49-8338 User Manual
Page 43: Natural, Ri^€@ spuds fur c@ib¥@niiig to if ©gsg l, U ormce spuds fur cunvuifin, Rafituroe ooss
Attention! The text in this document has been recognized automatically. To view the original document, you can use the "Original mode".
¥ AnnriM IMSnrUfTI^TfnMC!
JLL -Slur
M.Jr&M^JSUUrM.M.
1 . Ai. 'lUP J. JL%^JL
(continued)
w
HOW TO CONVERT
THE
RANGE
FOR
USE
WITH LP GAS OR
NATURAL
GAS
(continued)
lU COHVERTIHG SURFACE lURNERS ON
<
1
; mEIIESSSSE U^I7Ea «BAI BRI HIBSHBBe /«««»
Hvn>KFBsrnBBW«p
El BWiB^ «0BBBB G9B
b
««H
í
IBB0 eVVniVBiBMR
lt©p 4 If riiBii® Is ®f|ylpp@ii witii fiuisi burners.)
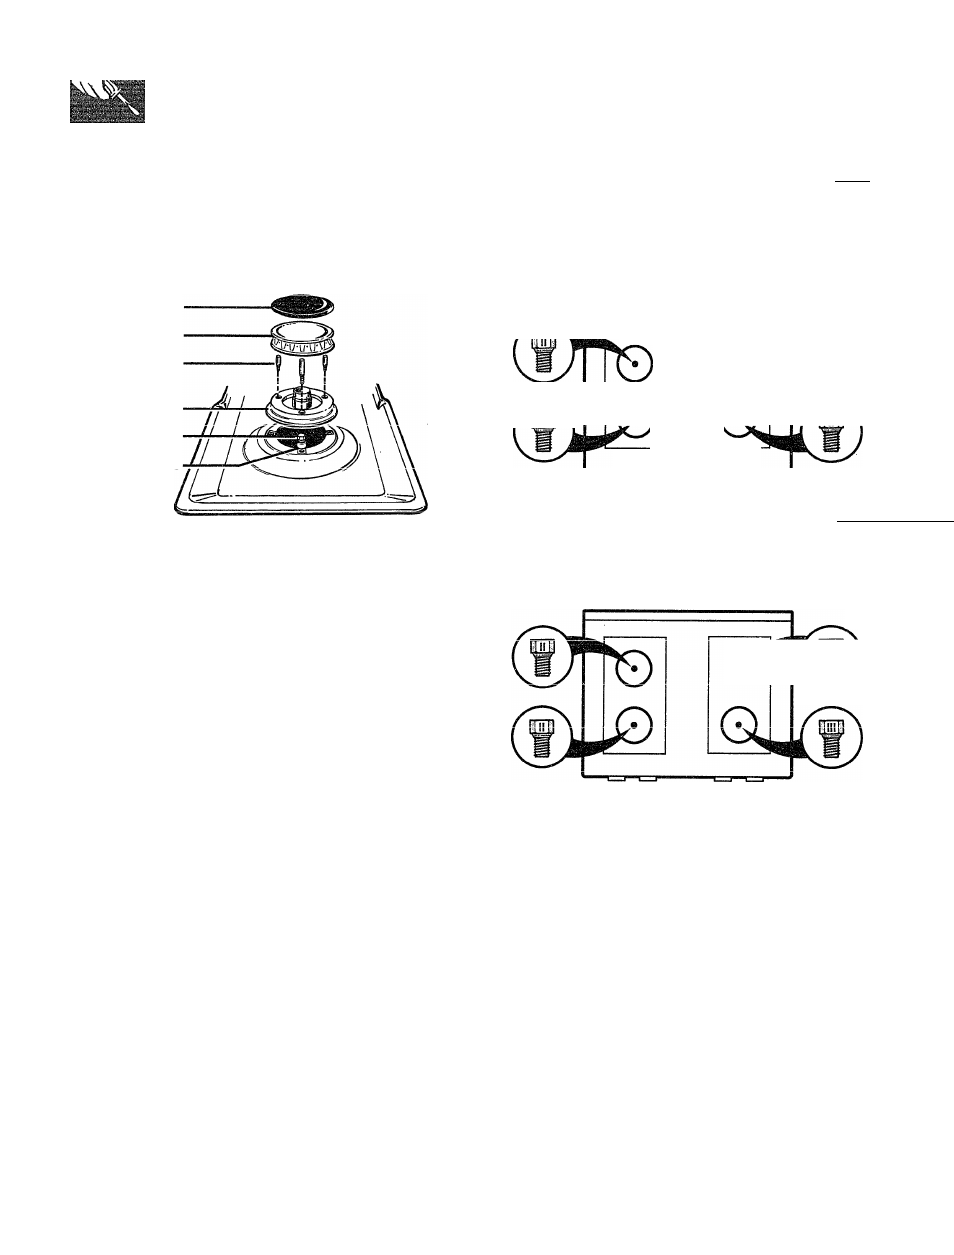
Burner Cap
Burner Head
Screws
Burner Base
Orifice Spud
Gas Inlet Tube
1. Remove grates, burner caps and burner heads.
2. Remove burner bases by unscrewing the 3
small screws in each base. Lift burner
straight out.
DO NOT disconnect the wires from the burner
bases unless the cooktop needs to be raised.
3. Remove the brass orifice spud under each
burner base by unscrewing spud from fitting with
a 7mm or 5/16" wrench (depending on the size of
your spuds). Apply a 3/4" wrench to the hex on
the gas inlet tube as a back-up when removing
spud to prevent the aluminum tube from twisting.
4. Install orifice spuds according- to one of the
following diagrams (see ffl or [£), for LP
gas or natural gas, depending on which you are
converting to.
@ri^€@ Spuds fur C@iB¥@niiig to IF ©gsg L
LP orifice^ spuds are in a small plastic bag packed
with this Use and Care book. LP orifice spuds
have a 2-digit number and the Letter
“L”
on
one side. Each orifice spud will also have 1 or 2
grooves on one side, denoting the location on
the range where it is to be installed.
/
c
:
nnn
E
Front of Range
U OrmCe Spuds fur CUnVUifin§
to
rafituroE ooSs
Natural gas orifice spuds have a 3-digit number
r\T1
orvii/4 TTTill olorv
Í O
'-'XA.
OXVAV.^*
\JX X±L\^\^ OpUVJ. Will CllOW IICIV ^ X,
or 3 grooves on one side, denoting the location
on the range where it is to be installed.
0
m w ) k
Front of Range
42