Tools requsredi, M prepare range for conversion, Щ convert the pressure regulator – GE 49-8338 User Manual
Page 42: The ran£e, Use ^wiîh ip 6£s o
Attention! The text in this document has been recognized automatically. To view the original document, you can use the "Original mode".
'штт Ш ййШЧШ!
THE RAN£E
FOR
USE
^WIÎH IP 6£S O
r
natural
OAS
Щ------------------------ ---------------------------------------------
L
TOOLS REQUSREDi
T-10 Xorxdrivcr (for scaled burners)
1/2"
and 3/4" open-end wrench
T71
o
4*
^om oin
^ 1.C4.U »^1C4.VIV. 0\^1 ^ VVV41 ivtil V^OlllCtliy
Nut drivers or wrenches: 7mm or 5/16''
('denpndinp' nn
thp
sizf*
of thp
m PREPARE RANGE FOR CONVERSION
(1) Turn off gas supply at the w^.
(2)
Turn off the electrical power to the range.
If range has not yet been connected to gas supply,
or if flexible connection was made, range may be
rMtIliZiri /^1 if*
’iTToll f*r\ molr^ r*/\nxTZi»*oi
pU.iJL^\a V^Ut JUUill
VYCiil tv/
V/VIXV^X OlWll ^CIOXC^X*
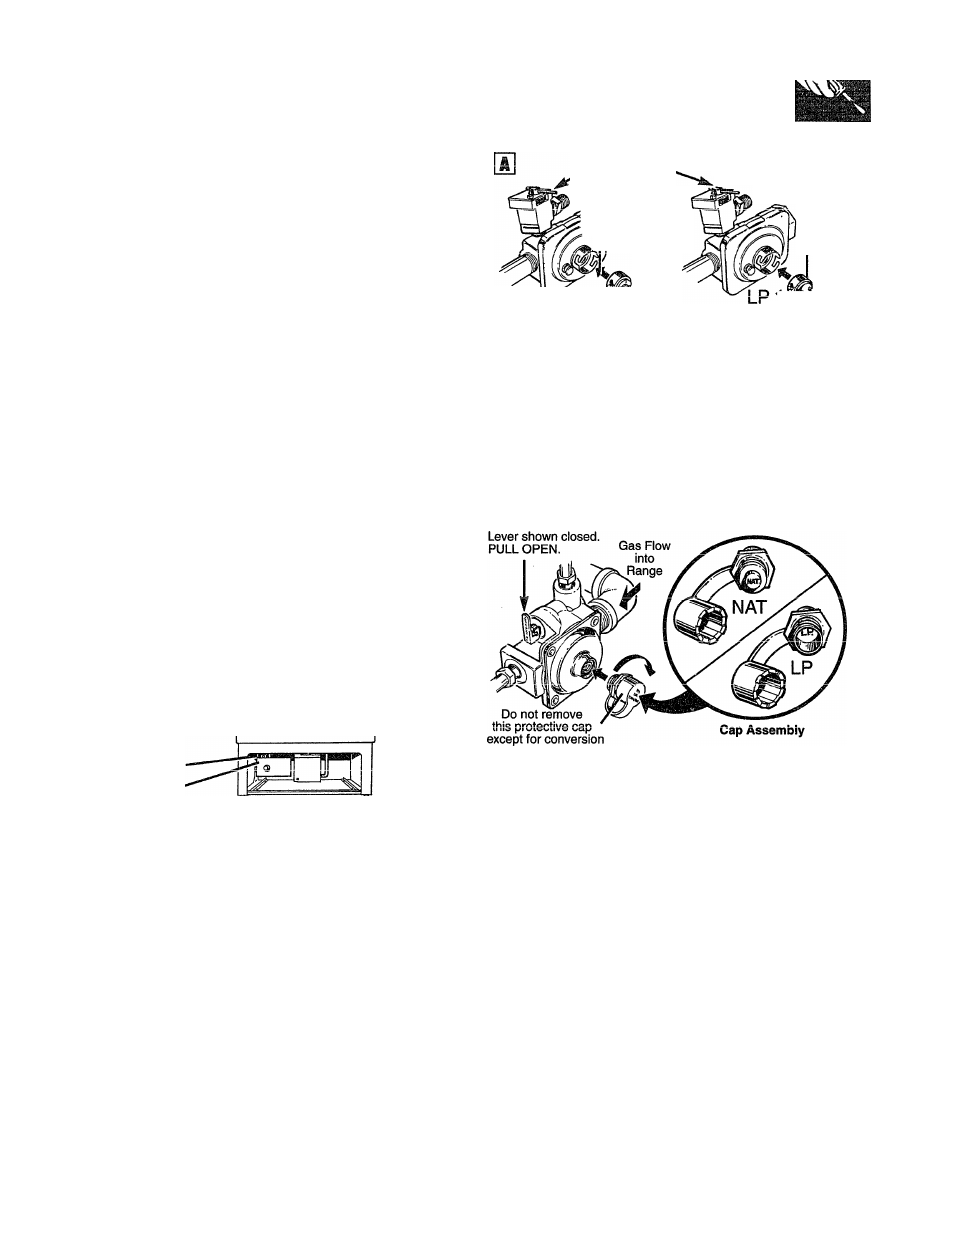
Щ CONVERT THE PRESSURE REGULATOR
•I
WARNING; Do not remove the pressure
■PmrvY i-Vi£\ t^onrr^^
X LlXCit\./X JLXWXXX LX.X\:; xeuxg^:^»
1. For models equipped with sealed burners,
remove the storage drawer, broiler drawer or
kick panel and locate the pressure regulator at
гея r of th e ГЯ n £ге.
Remove Screws
Access Cover
r\^
^ J
"U
4-^
\jii
»umc liiuuci», yuu
iiiixy
iicivc tu icmuvc cui
access cover also.
For models equipped with dual burners, remove
the cooktop and locate the pressure regulator at
right rear of range.
2. Follow the directions in
SI
or
your regulator type.
1. that match
Lever shown closed.
X ROTATE OPEN.
i.Gas Flow
into Range
Cap
^^NAT
Note: On some models the
shut-off valve may be in a
different location.
Cap
Tf it ic tliic rAmilutrvr*
J-L XV XW7 VXXXVT X
1.XXV4.VV/.t •
1. Use a coin to remove the cap from the
pressure regulator,
2. Turn the cap over and hook it into the slots.
The type of gas to be used should now be visible
on the top of the cap.
Note: On some models the shut-off valve
ff it is this regulator:
1. Unscrew the plastic-protected hex-nut cap
from the regulator.
2. Carefully pry the protective plastic cap off
the threaded metal cap. Gently pull the plastic
__
WtlSUCl Ull UlC UUCctUS Ull ULC UUICI SLUG U1 LllC
metal cap.
PncF ttlP> nlnct'ii' r*iin nntn ttlA isnri nf filii
« X MWXX VXXV/ ^XVXWVXV/ V/VGJ^ vrxxw VXXVy> VX4.XVA. V/JL VXXV./ XXXVy'VCXX
cap displaying the type of gas you are converting
to. Press the attached plastic washer onto the
threads on the other side of the metal cap.
4.
Screw the hex-nut cap back into the regulator.
Bo iiOt uVertightcii.
(continued next page)
41