Ligiit §li@ surfsce iureier pilots, Ü¡yst tisy syfffes® iyriisr pii®§$ if ii®s®ss®ry, H seal the 0penih6s – GE 49-8338 User Manual
Page 37: Light the pilots, 6] light the oven pilot
Attention! The text in this document has been recognized automatically. To view the original document, you can use the "Original mode".
_____________
(continued)
[H SEAL THE 0PENIH6S
Seal any openings in title wall behind the range
and in the floor under the range when hookups
are completed.
LIGHT THE PILOTS
(for models equipped with standing pilots)
The range should be installed in its permanent
position before any pilots are lit or adjusted.
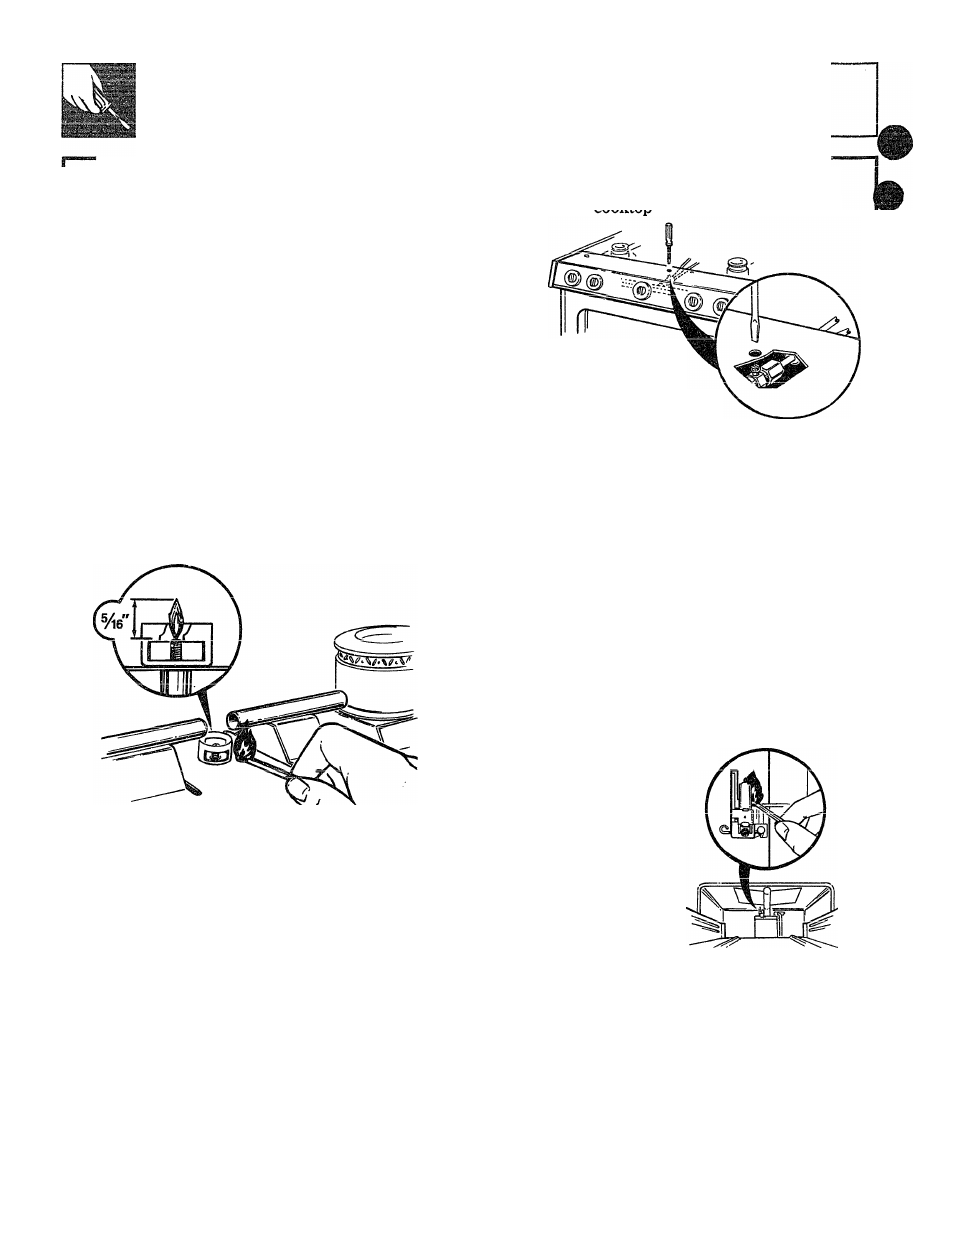
Ligiit §li@ Surfsce iureier Pilots
CAUnON: Make sure the surface burner
control knobs are in the “OFF” positions before
attempting to light the pilots.
1, Raise the cooktop.
2. light both pilots with a match.
Lu
avulu piiut uuut^c, uoc ^^auuuii wiicii
closing cooktop after lighting pilots.
Note: Do not leave standing pilot lit in a newly
constructed or remodeled home or apartment
that will be unoccupied for more than a month.
Each pilot flame was adjusted at the factory
to be approximately 5/16" tall. A tinge of yellow
appearing at the upper tip is normal, if you find
pilot adjustment is necessary, see the following
instructions.
Ü¡yst tisy Syfffes® iyriisr Pii®§$ if ii®s®ss®ry
T?aicí» tVif»
A>**JLVJV# MAW -- ----
2. Locate the pilot
adjustment screw. It can
be accessed through the
small hole near the center
of the manifold Tianel.
3. To adjust, use a blade-type screwdriver with a
shaft diameter of less than 3/16". Turn pilot
adjustment screw until pilot is 5/16" high. Do
not reduce the flame to less than 5/16" or pilot
/Mi+orro »YiOTr
A r\51rkf flomii lf-nirWT llirpTlOf
X JL
JLlCtlJLXV^ MU.X XXXXX^ XXX^XX\.^X
than recommended may generate soot (carbon
black) on the bottom of your cooktop.
[6] LIGHT THE OVEN PILOT
CAUTIUN: Make sure the U VEN CUN'IKUL
knob is in the “OFF” position before attempting
to light the pilot.
1.
Remove the storage drawer, broiler drawer or
kick panel, (depending on your model), by sliding
the drawer all the way out and
then lifting slightly to remove
if* ■ fVrvrtn if
“0
Xi. JJ. \/XXX XLO u cxv^r\.o*
2. Locate the pilot at the
back wall. The pilot is
attached to the left
side of the oven burner.
3. light the pilot with a
match. No adjustments
are required for natural
gas. For LP gas, see How
to Convert the Range for
Use with LP Gas or
i^atuicu vjao.
36