Carl Goldberg GBGA1045 User Manual
Page 16
16
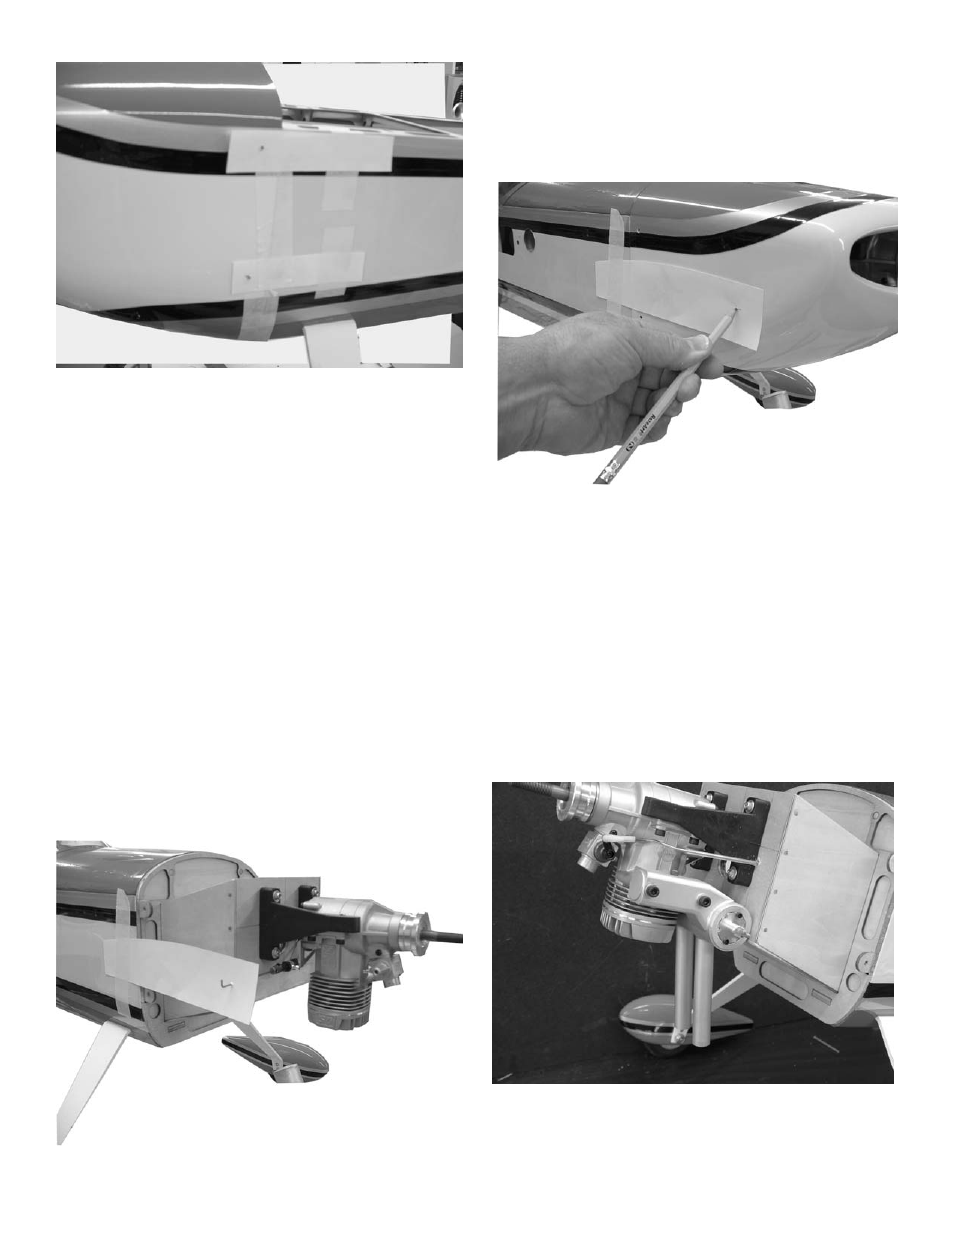
3.
Mount the cowl in position and hold in place
using masking tape.
Note: You will have to make a cut out for the
engine head on the bottom of the cowl.
Slide the cowl on till the engine touches and
reach through the opening in the front of the
cowl and mark the location of the hole.
Start small and make the hole larger as you
continue to check the fit. The cowl should
have about 1/2” clearance on all sides.
4.
When the cowl is aligned properly, stripes on
sides are aligned.
transfer the location of the mounting holes
from the paper to the cowl.
Remove the cowl and drill a 1/8” hole at the
four locations.
5.
To locate the needle valve outlet hole, tape
a piece of paper to the side of the fuselage
with the needle valve extension through the
paper.
6.
Remove the needle valve, reinstall the cowl
using the bolts and transfer the hole location
to the cowl.
Remove the cowl and drill a 1/4” hole at the
location you marked.
After the cowl is install you can insert the nee-
dle valve through the hole.
7.
To locate the muffler exit, install the muffler,
cut a piece of paper to fit around it leaving
about 1/2” clearance and tape to the side of
the fuselage.