6 installing the reflux insert, 7 mounting the support rod (optional accessory), Installing the reflux insert – BUCHI Rotavapo R-215 User Manual
Page 36: Mounting the support rod (optional accessory), 5 .6 installing the reflux insert, 5 .7 mounting the support rod (optional accessory)
5 Putting into operation
36
R-210/215 Operation Manual, Version F
5 .6
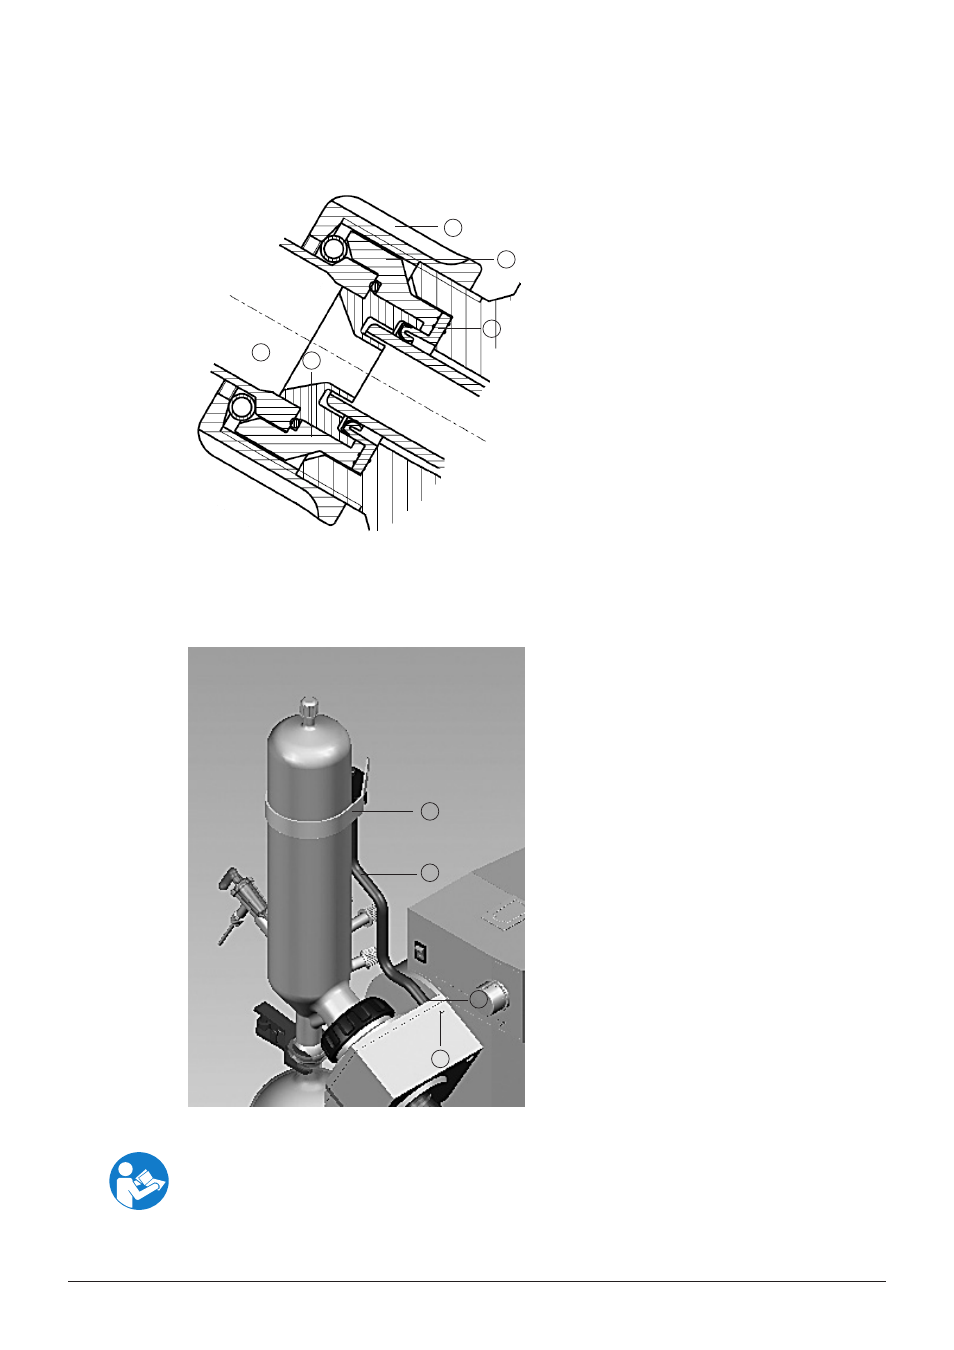
Installing the reflux insert
1
2
3
4
5
Fig. 5.6: Installing the reflux insert
To install the reflux insert, proceed as follows:
• Take the standard flange screwed connection
off the drive unit.
• Fix the gasket WD 26 (seal) (position 3) to the
reflux insert (position 2).
• Mount the reflux insert onto the drive unit.
• Mount the flange srewed connection
(position 1) without tightening it.
• Check whether the O-ring (position 5) is posi-
tioned properly within the reflux insert.
• Mount the condenser of the glass assembly
(position 4) to the drive unit and fix it by
tightening the flange screwed connection.
5 .7
Mounting the support rod (optional accessory)
1
2
3
4
The support rod with bracket and plastic clip is
used with the glass assemblies V, C, S, BY and
CR. It is optional and has the sole purpose of
providing additional stability. We especially
recommend it for the glass assemblies C and
CR.
To attach the support rod to the drive unit, pro-
ceed as follows:
• Insert the support rod b into the hole c on
the drive unit.
• Secure the support rod by means of the
screw d.
• Fasten the clip a at the desired height by
means of the wing nut.
Fig. 5.7: Mounting the support rod
ATTENTION
The support rod is not designed to carry the weight of the glass assembly on its own. Its sole
purpose is to stop the glass assembly tilting forward or backwards when the flanged coupling is
released.