Using the setup menu, E-21 – Casio XJ XJ-360 User Manual
Page 21
Using the Setup Menu
E-21
En
gl
is
h
Using the Setup Menu
Pressing the [MENU] key while an image is being projected displays the setup menu on the
projected image. The setup menu can be used to configure a variety of different projector
settings. Use the cursor keys to select and configure settings, and the [ENTER] key to register
them.
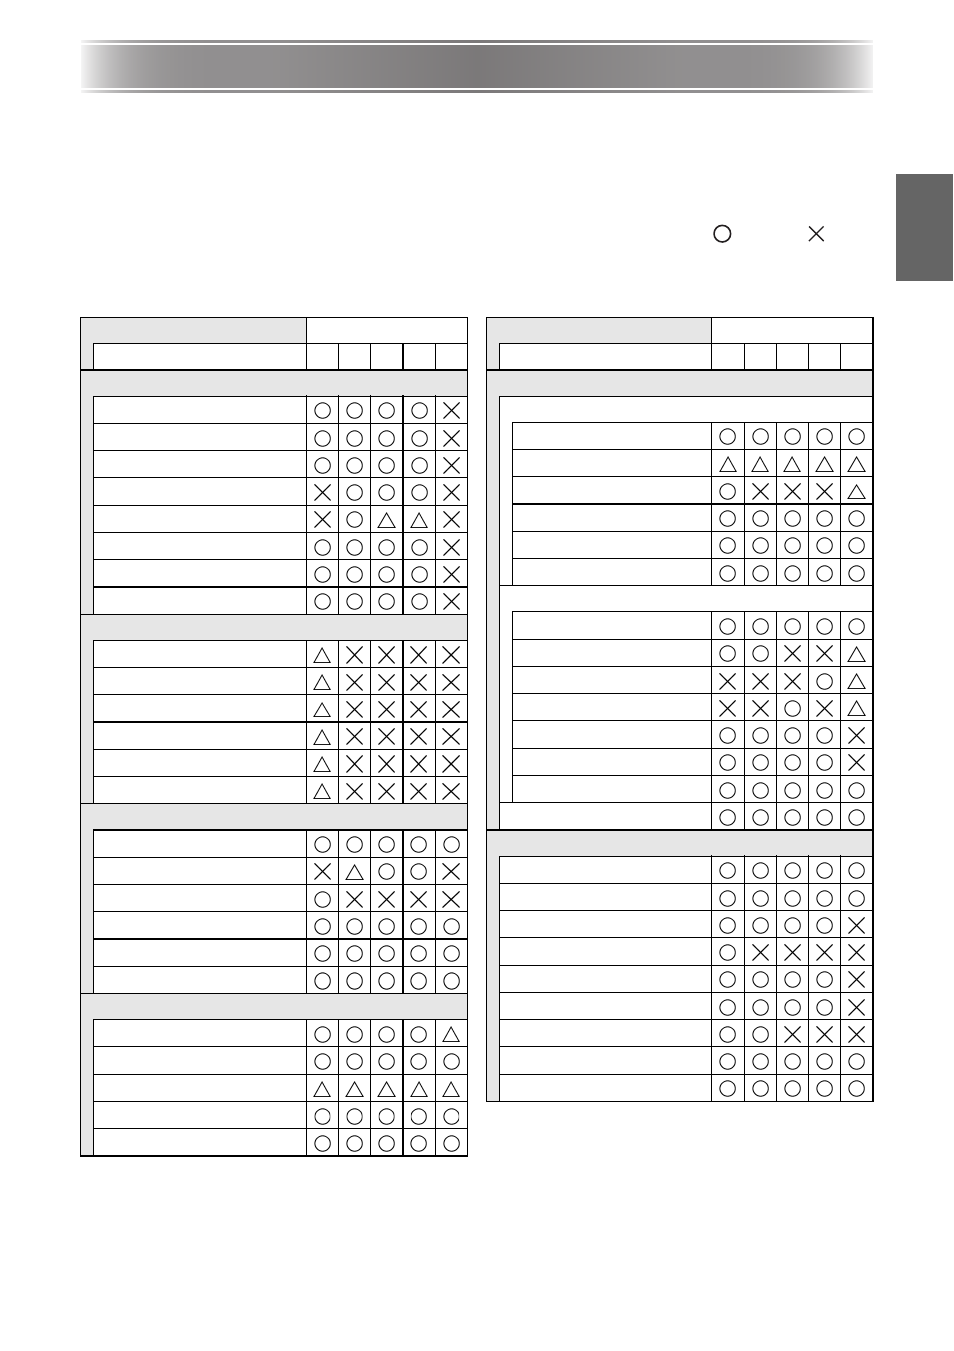
The menu items that can be set (or displayed) depend on the current input source. In the
following table, the “Input Source” columns indicate whether each item appears (
) or not (
)
for each input source (R = RGB, C = Component, S = S-VIDEO, V = Video, – = No input
signal). A triangle (
U
) indicates that the item can be set (or displayed), subject to certain
conditions.
For detailed information about settings and how they are configured, see the User’s Guide
(UsersGuide_English.pdf) on the CD-ROM that comes with the projector.
Main menu
Input Source
Sub-menu
R
C
S
V
–
Image Adjustment
Brightness
Contrast
Sharpness
Saturation
Tint
Color Mode
Color Balance
Restore Menu Defaults
Signal Settings
Vertical Position
Horizontal Position
Frequency
Phase
Noise Filter
Restore Menu Defaults
Screen Settings
Keystone Correction
Aspect Ratio
Resize Image To Fit
Projection Mode
Ceiling Mount
Restore Menu Defaults
Detailed Settings
Volume
Pointer
Low-noise Mode
Power On Password
Change Password
Detailed Settings
Advanced Settings 1
Auto Input Detect
Auto Keystone Correction
Auto Adjust
Show Screen Text
Startup Screen
No Signal Screen
Advanced Settings 2
Auto Power Off
RGB Input
Video Signal
S-Video Signal
Image Enhancement 1
Image Enhancement 2
Language
Restore Menu Defaults
Operational Info
Lamp Time
Input Signal
Signal Name
Resolution
Horizontal Frequency
Vertical Frequency
Scan System
Restore All Defaults
Reset Lamp Time
Main menu
Input Source
Sub-menu
R
C
S
V
–