Power off the unit. remove both power cords – 360 Systems MAXX-6T User Manual
Page 109
____________________________________________________________________________________
MAXX 6T Owner’s Manual
Page 109
APPENDIX A – SETTING THE AUDIO JUMPERS FOR ANALOG/DIGITAL
Analog/Digital Audio Selection
Figure 47 indicates jumper positions to select between analog or digital audio. Note that each
output may be individually selected. As described earlier, when analog audio is selected, only two
channels are available, while selection of AES/EBU digital audio provides two stereo pairs, one on
each XLR connector. Both jumpers for each channel (Left & Right, or Main & Aux) must be set
together, either analog or digital. The MAXX 6T must be power cycled for jumper changes to take
effect.
1. Power off the unit. REMOVE BOTH POWER CORDS
2. Remove the Chassis top by depressing the two blue release buttons, then sliding back and
up.
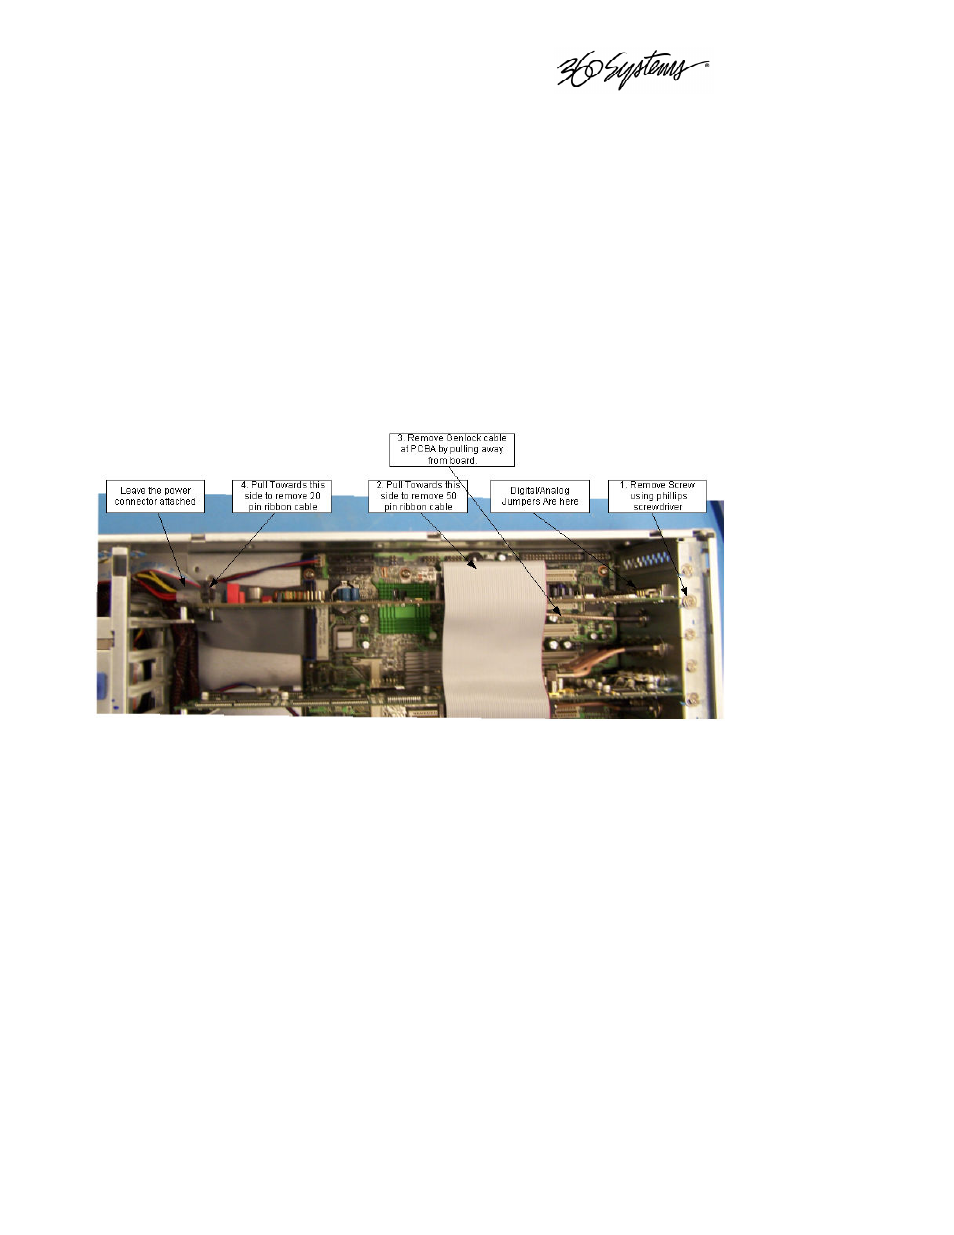
3. The Audio board is the left most PCI card viewed from the front of the unit. Remove the PCI
hold down screw, and remove the three cables as shown. Rock the board up, being careful
not to overextend the cables attached to it.
Figure 46 - Audio PCB Removal Detail
4. Configure the jumpers according to Figure 47
5. Replace the board, the connectors and the lid.