Installation hardware, Overview, A required tools – Panasonic FULL FRONT MP3 CD PLAYER CQ-DFX972U User Manual
Page 52: Dashboard specifications, W^irimiimg
Attention! The text in this document has been recognized automatically. To view the original document, you can use the "Original mode".
шшЫ
W^IRIMIIMG
This installation information is designed for experienced installers and is not in
tended for non-technical individuals. It does not contain warnings or cautions of po
tential dangers involved in attempting to install this product.
Any attempt to install this product in a motor car by anyone other than a qualified
installer could cause damage to the electrical system and could result in serious
personal injury or death.
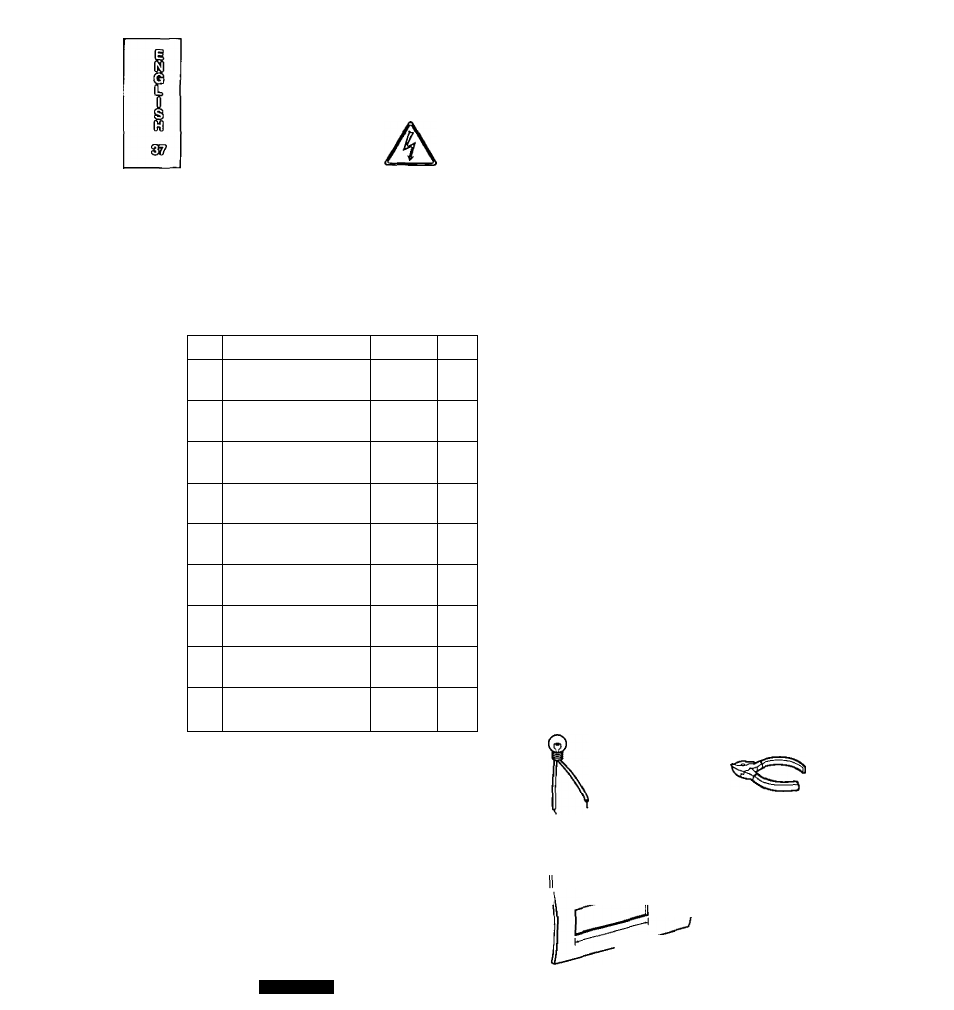
□ Installation Hardware
No.
Item
Diagram
Q’ty
Ф
Mounting collar
1
CD
Hex. nut (5 mm^)
1
(D
Rear support strap.
1
0
Tapping screw
(5 mm0x16 mm)
1
CD
Mounting bolt (5 mm0)
1
0
Power
connector
1
CD
Removable face plate
case
1
0
Trim plate
1
0
Lock cancel plate
2
□ Overview
This product should be installed by a professional.
However, if you plan to install this product yourself,
your first step is to decide where to install it. The
instructions in these pages will guide you through
the remaining steps:
(Please refer to the “WARNING” statement
above.)
о Identify and label the car wires.
о
Connect the car wires to the wires of the power
connector.
52
GQIDRX912jJ
o Install the unit in the dashboard,
o Check the operation of the unit.
If you encounter problems, please consult your
nearest professional installer.
Caution:
oThls unit operates with a 12 V DC negative
ground auto battery system only. Do not at
tempt to use it in any other system. Doing so
could cause serious damage.
Before you begin installation, look for the items
which are packed with your unit.
{
©Warranty Card.
..Fill this out promptly,
o Panasonic Servicenter List for Service Directory
...Keep for future reference in case the product
needs servicing.
o
Installation Hardware..
.Needed for in-dash in
stallation.
a Required Tools
You’ll need a screwdriver, a 1.5 V AA battery, and
the following:
12V DC
Electrical
Side-cut
Test bulb
tape
pliers
□ Dashboard Specifications
Thickness Min. У
16
" (4.75 mm)
Max.
Vsf
(5.56 mm)
^
] 2%2" (53 mm)
75
^
2
" (182 mm)