Installation – Panasonic WVCF20 User Manual
Page 6
Attention! The text in this document has been recognized automatically. To view the original document, you can use the "Original mode".
INSTALLATION
I. Mounting the Camera Fixing Angle
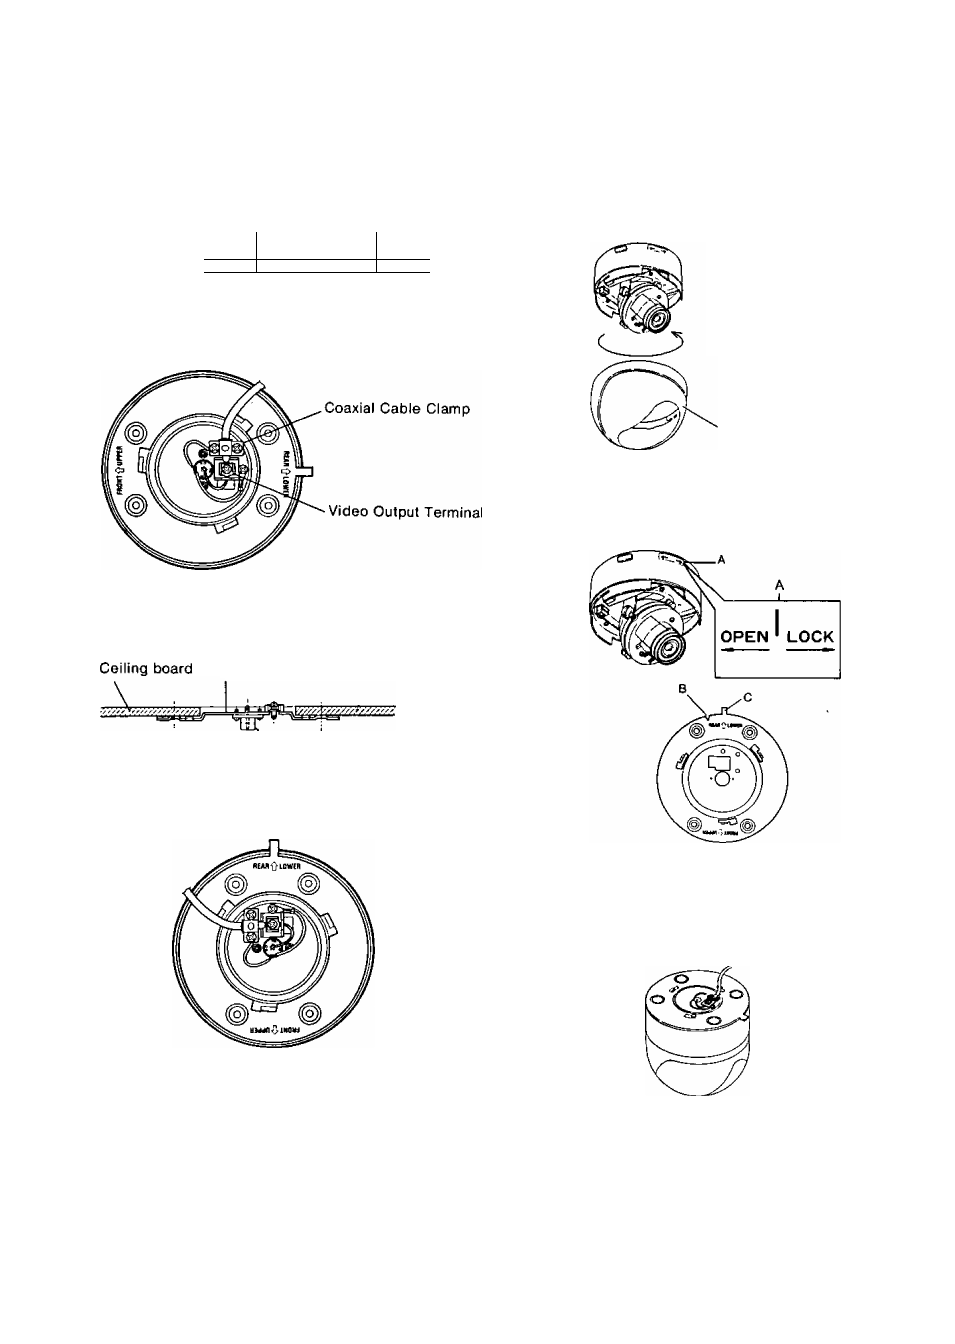
1-1. Make a hole (Dianneter 75mm) in the ceiling
board in the desired location.
'yyy/y/j
2. Mounting the camera onto the Camera Fixing
Angle (provided).
2'1 .Remove the Dome Cover (13) from the camera
by turning it counterclockwise.
Mounting hole
1-2.After completing the cable preparation, fix the
coaxial cable to the Camera Fixing Angle.
Turn to counterclockwise
Dome Cover
2-2.Match “A" on the camera to "B" of the Camera
Fixing Angle and insert the camera into the
Camera Fixing Angle.
1-3.Fix the Camera Fixing Angle onto the ceiling
board by using four Camera Fixing Angle
Mounting Screws,
Camera Fixing Angle
' ^
i Camera Fixing Angle
^
Mounting ScrewX4pcs
Note : 1. Match " 1} ’’ of the REAR LOWER /
FRONT UPPER to the desired position.
2.Use the optional Ceiling Mount Bracket
WV-QIOOA when the ceiling board cannot
support camera.
Important notice :
• The following installation should be made by qual
ified service personnel or system installers and
should conform to all local codes.
• Install to support the load of four times the total
weight.
2-3.Turn the camera toward the LOCK direction so
that “A" is brought to the center of "C".
2-4.Set the Fall Prevention Cap (provided) to pre
vent the camera body from falling as shown
below.
Remarks :
(1) lf the camera body is not installed correctly with
Camera Fixing Angle, the Fall Prevention Cap can
not be set,
(2) The camera body cannot be moved after the Fall
Prevention Cap has been set.
(3) Remove the camera body after the Fall Prevention
Cap has been removed.
-5-