Connections: basic system setup, O dc 12v in jack and cable clip, Caution – Yamaha FX500 User Manual
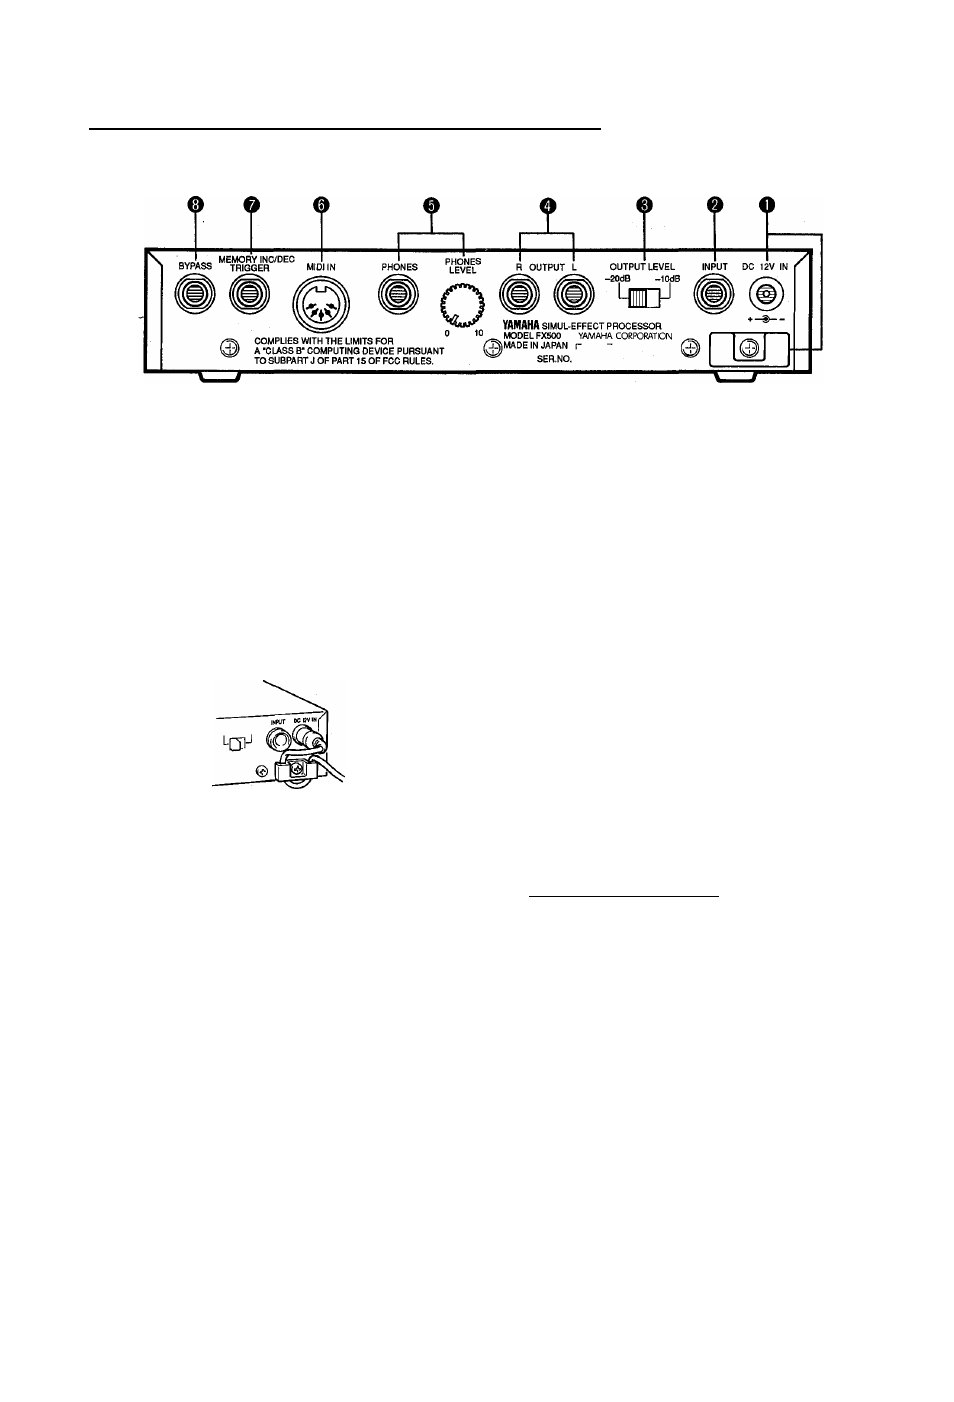
Page 6: O input jack, O output level selector, O output r and output l jacks, O phones level control and phones jack, O midi in connector, O memory inc/dec, trigger (tap tempo delay) jack, O bypass jack
Attention! The text in this document has been recognized automatically. To view the original document, you can use the "Original mode".
3.
Connections: Basic System Setup
O
DC 12V IN Jack and Cable Clip
The DC output cable from the supplied AC Adaptor
should be connected here. When connecting the power
supply, make sure that the FX500 POWER switch is in
the OFF position (extended).
Plug the AC adaptor output cable into the DC 12V IN
jack, and finally the adaptor's AC plug into a convenient
AC wall outlet. The cable clip located immediately
below the DC 12V IN jack helps to prevent accidental
unplugging of the power supply during use. Wrap the
DC cable firmly around the clip a few centimeters from
the plug end.
CAUTION!
Do not attempt to use a different AC adaptor to power
the FX500. The use of an incompatible adaptor may
cause irreparable damage to the FX500, and might
pose a serious shock hazard I
o
INPUT Jack
This jack duplicates the function of the front-panel
INPUT jack described in the following section. It is
important to note, however, that only one of the INPUT
jacks can be used at a time. K plugs are inserted into
both the front and rear-panel inputs, the front-panel
input jack takes priority.
o
OUTPUT LEVEL Selector
This switch is used to match the output level of the
FX500 to the input sensitivity of the amplifier, mixing
console or other device it is feeding. For compatibility
with standard line-level inputs the -10 dB setting
should be appropriate, while the -20 dB setting should
be used when the FX500 is connected to a high-
sensitivity input — the input of a guitar amplifier, for
example.
o
OUTPUT R and OUTPUT L Jacks
These are the main stereo outputs from the FX500. We
recommend using both outputs and connecting them to
the corresponding right and left channels of a stereo
sound system, since the full impact of many of the
FX500 effects can only be appreciated in stereo. If,
however, only a mono sound system is available, use
either the OUTPUT R or OUTPUT L jack.
o PHONES LEVEL Control and PHONES Jack
For private listening or practice when an external
sound system cannot be used, a pair of standard
stereo headphones (with a 1/4" stereo phone plug or
appropriate adaptor plug) can be plugged into the
PHONES jack. The PHONES LEVEL control adjusts
the headphone listening level.
O MIDI IN Connector
The MIDI IN connector accepts MIDI signals from an
external MIDI device such as a MIDI foot controller,
keyboard, etc. The FX500 will accept MIDI PROGRAM
CHANGE messages to directly select effect programs,
or MIDI CONTROL CHANGE messages to control
individual effect parameters.
[See page 19 for further details]
O MEMORY INC/DEC, TRIGGER (TAP TEMPO DELAY)
Jack
An optional Yamaha FC4 or FC5 Footswitch may be
connected here for convenient foot-controlled selection
of effect programs or "tap tempo delay" control which is
used to set delay time for the delay effects. The
function of the footswitch is determined by the UTILITY
mode Foot Switch Function Seiect function (page 22).
The range of effect programs that can be seiected
when the footswitch is assigned to memory selection is
determined by the UTILITY mode Footswitch Memory
Recall Range Edit function (page 23).
o BYPASS Jack
An optional Yamaha FC4 or FC5 Footswitch connected
here performs exactly the same function as the front-
panel BYPASS key. Press the footswitch once to
activate the bypass mode, and again to turn bypass off.