Panasonic S-PG340 User Manual
Page 5
Attention! The text in this document has been recognized automatically. To view the original document, you can use the "Original mode".
Connections
Before making connections, be sure that the power of this unit and
ail other system components is first turned off.
See the operating instructions of the amplifier or the cassette deck
for details.
Note:
The configuration of the AC outlet and AC power supply cord
differs according to area.
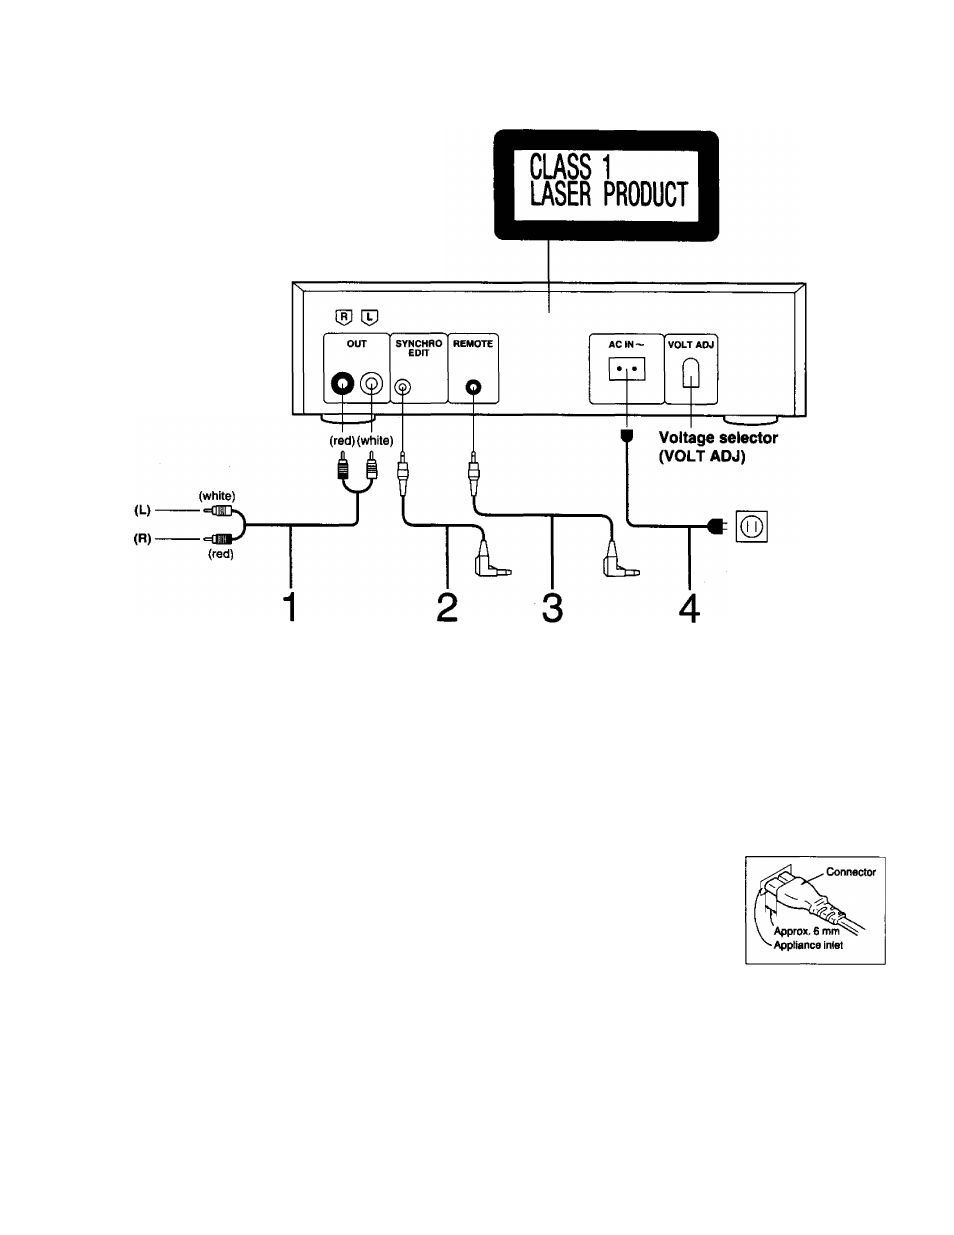
Rear panel
of this unit
Household
AC outlet
1
Connect the stereo connection cable (in
cluded) to the “CD” or “AUX” terminals of the
amplifier.
2
Connect the synchro edit cable (included with
the cassette deck) to the “SYNCHRO EDIT”
terminal of the Technics cassette deck.
3
Connect the remote control cable (included)
to the “REMOTE” terminal of the Technics
receiver or cassette deck.
For areas except Australia and New Zealand
Set the voltage selector (VOLT ADJ) to the volt
age setting for the area in which the unit wili be
used.
•Use a minus (-) screwdriver.
• Note that this unit will be seriously damaged if this setting is not
made correctly.
•If the power supply in your area is 117 V or 120 V, set to the “127
V” position.
Connect the AC power supply cord (included)
to the “AC OUTLET” of the amplifier or the
household AC outlet.
For areas except Australia and New Zealand
If the power plug will not fit your socket, use the power plug
adaptor (Included).
E
e
Insertion of Connector
Even when the connector is per-
fectiy inserted, depending on the
type of inlet used, the front part of
the connector may jut out as
shown in the drawing.
However there is no problem
using the unit.