Panasonic S-PG340 User Manual
Page 21
Attention! The text in this document has been recognized automatically. To view the original document, you can use the "Original mode".
■ Example:
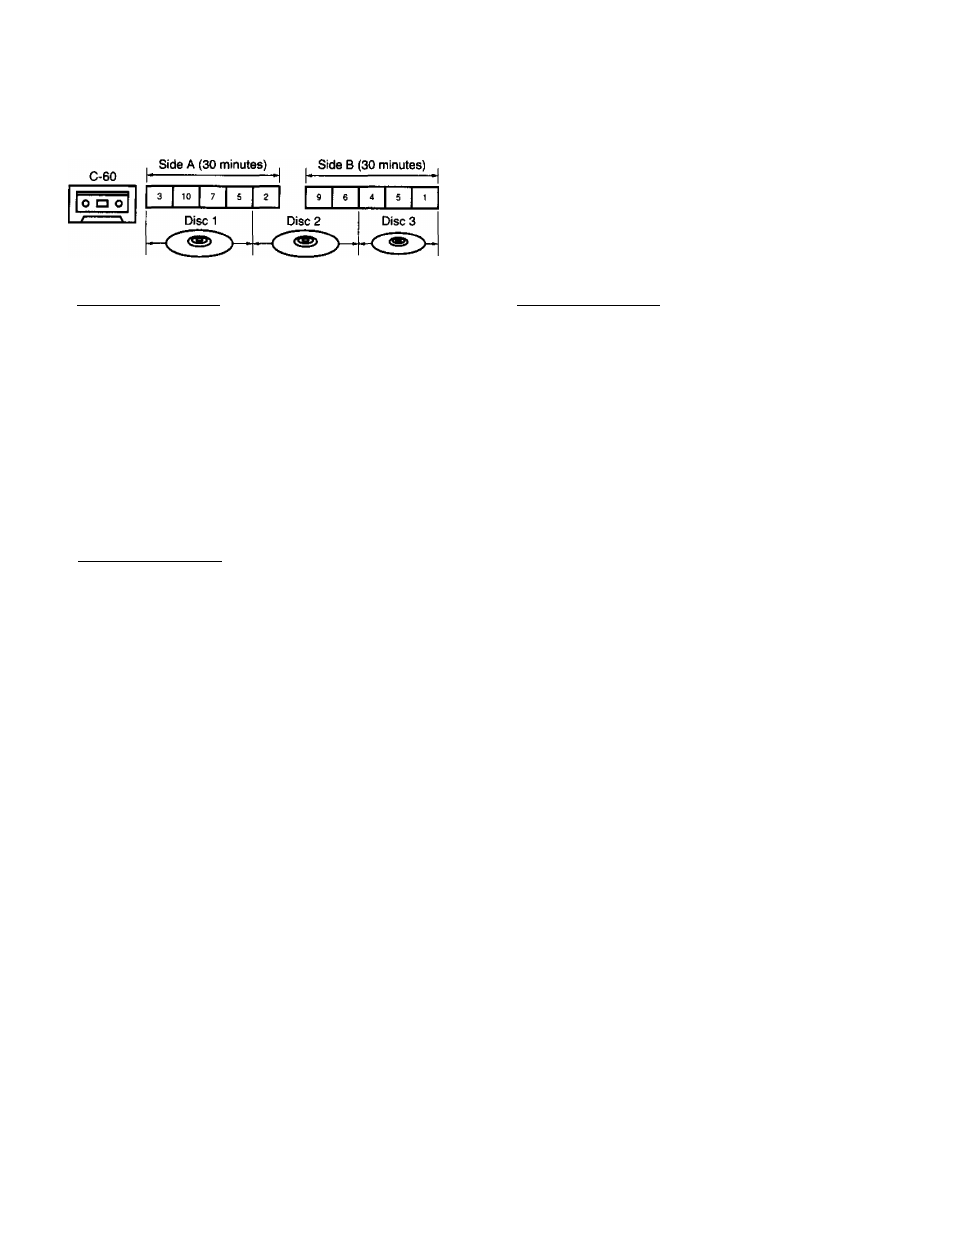
Recording the desired tracks from 3 discs on
60 minute tape
Recording for disc 1
1 Prepare the cassette deck for recording.
2 Enter the desired track number in desired sequence.
In this example;
T racks 3^ 10-» 7—> 5
3 Press TAPE LENGTH twice to seiect “C-60”.
4 Press Disc LiNK.
5 Adjust the recording level on the cassette deck.
6 Press PLAY to start recording.
Recording for disc 3
Recording for disc 2
1
After recording is completed, press ^ OPEN/CLOSE.
2
Replace disc 1 with disc 2.
3
Press A OPEN/CLOSE again.
The unit automatically programs tracks on the remaining
space and the display shows the number ot tracks to be
recorded, in normal sequence.
4 Press CLEAR to cancel the tracks automatically pro
grammed.
Press the button repeatedly until the display shows "0”.
5
Enter the track number for side A.
In this example:
Track 2
6 Press SIDE A/B to switch the display.
7
Press CLEAR to cancel the tracks automatically pro
grammed.
8 Enter the track number for side B.
In this example:
Tracks 9“» 6
9
Adjust the recording level on the cassette deck.
10
Press
>
PLAY to start recording.
1 After recording is completed, press ^ OPEN/CLOSE.
2
Replace disc 2 with disc 3.
3 Press
¿i
OPEN/CLOSE again.
4 Press CLEAR until the display shows “0”.
5
Enter the track number.
In this example:
Tracks 4—^5—»1
6 Adjust the recording level on the cassette deck.
7 Press PLAY to start recording.
Notes:
•The “0” may appear on the track display after you replace the
disc. This means that the first track on that disc is longer than the
remaining space of the tape. In this case, press ■ STOP to
cancel the edit mode.
•If the cassette deck has no synchro edit terminal, the tape will
keep running even after disc play has been completed. Press the
stop button on the cassette deck.
•Do not forget to stop the tape and rewind it to the position where
the recording was completed. If the deck is not equipped with an
auto reverse mode, change the tape over to side B when the
recording on side A is finished.
■ To cancel the link function
Press ■ STOP after recording has finished.
STOP
The edit mode will be also cancelled.
21