Bradford White DB-80R3DS User Manual
Page 33
SERVICE PROCEDURE RE-V
Thermostat Removal and Replacement
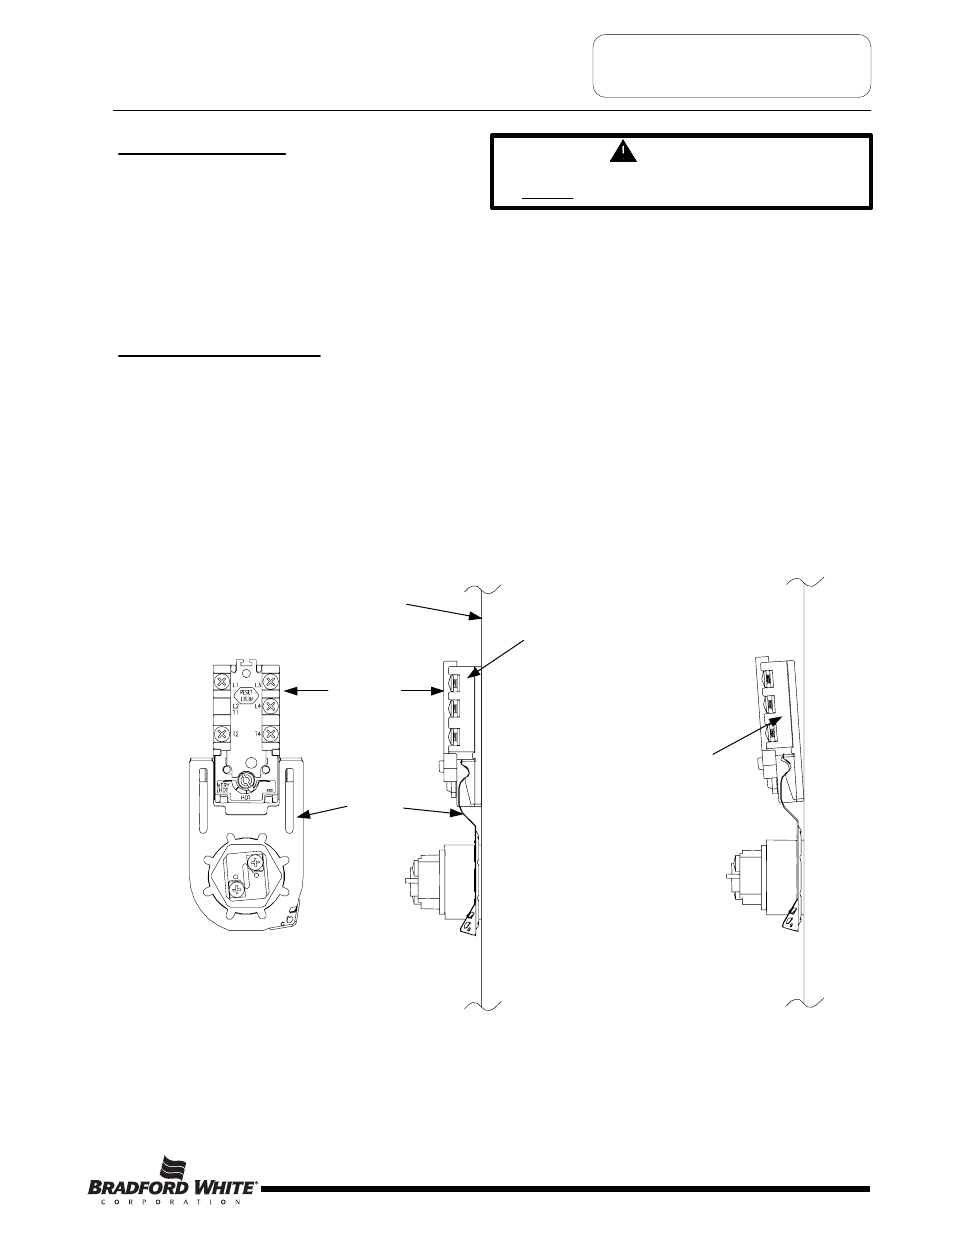
Front View
Thermostat Mounting
Thermostat Removal
1. Turn power “OFF” To water heater.
2. Remove access cover and insulation.
3. Remove plastic thermostat protector from thermostat.
4. Disconnect wires from thermostat terminals. It may be necessary to label wires for proper re-connection to
new thermostat.
5. Note thermostat temperature setting for proper setting of new thermostat.
6. Slide thermostat upwards and out of mounting bracket.
WARNING
High voltage exposure. Be sure power is
“OFF” when performing this procedure.
Thermostat Replacement
1. Use a stiff brush to remove any debris or loose scale from tank surface where new thermostat will be installed.
2. Slide new thermostat down into thermostat bracket until it snaps into place. IMPORTANT! Thermostat must set
completely flat or flush to tank surface. An improperly installed thermostat will cause improper water heater
operation.
3. Refer to the wire diagram located on the inside of the access cover and re-connect wires to the thermostat. Be
sure wire connections are snug and corrosion free. Do not over tighten, doing so may damage thermostat.
4. Set thermostat to the original thermostat setting found on the old thermostat.
5. Re-install plastic thermostat protector.
6. Re-install insulation and access cover.
7. Restore power to water heater and verify proper heater operation.
Thermostat
Thermostat
mounting
bracket
Side View
Proper Thermostat
Mounting
Tank Surface
Side View
Improper Thermostat
Mounting
Proper Thermostat mounting
flush with tank surface
Improper Thermostat mounting.
Thermostat not flush with tank surface
Page 33
33
- LD-WH30L3-1 LD-WH20L3-1 LD-WH12U3-1 LD-WH6U3-1 LD-50L3-3 LD-40L3-3 LD-30L3-3 LD-20L3-3 LD-30U3-1 LD-20U3-1 LD-15U3-1 LD-12UT3-1 LD-10U3-1 LD-6U3-1 LD-120R3-3 LD-80R3-3 LD-65R3-3 LD-50S3-3 LD-40S3-3 LD-30R3-3 M-2-WH30L6SS M-1-WH20L6SS M-1-WH12U6SS M-1-WH6U6SS M-2-30U6SS M-1-20U6SS M-1-15U6SS M-1-12UT6SS M-1-12U6SS