Bracket for cabinet mounting, Fig. 26: bracket for cabinet mounting, Fig. 28: keyhole slot dimensions – Kontron KBox A-101 Users Guide User Manual
Page 29
9. Setting Up the KBox A-101
KBox A-101 – User’s Guide (Version 1.00)
9.2.2.
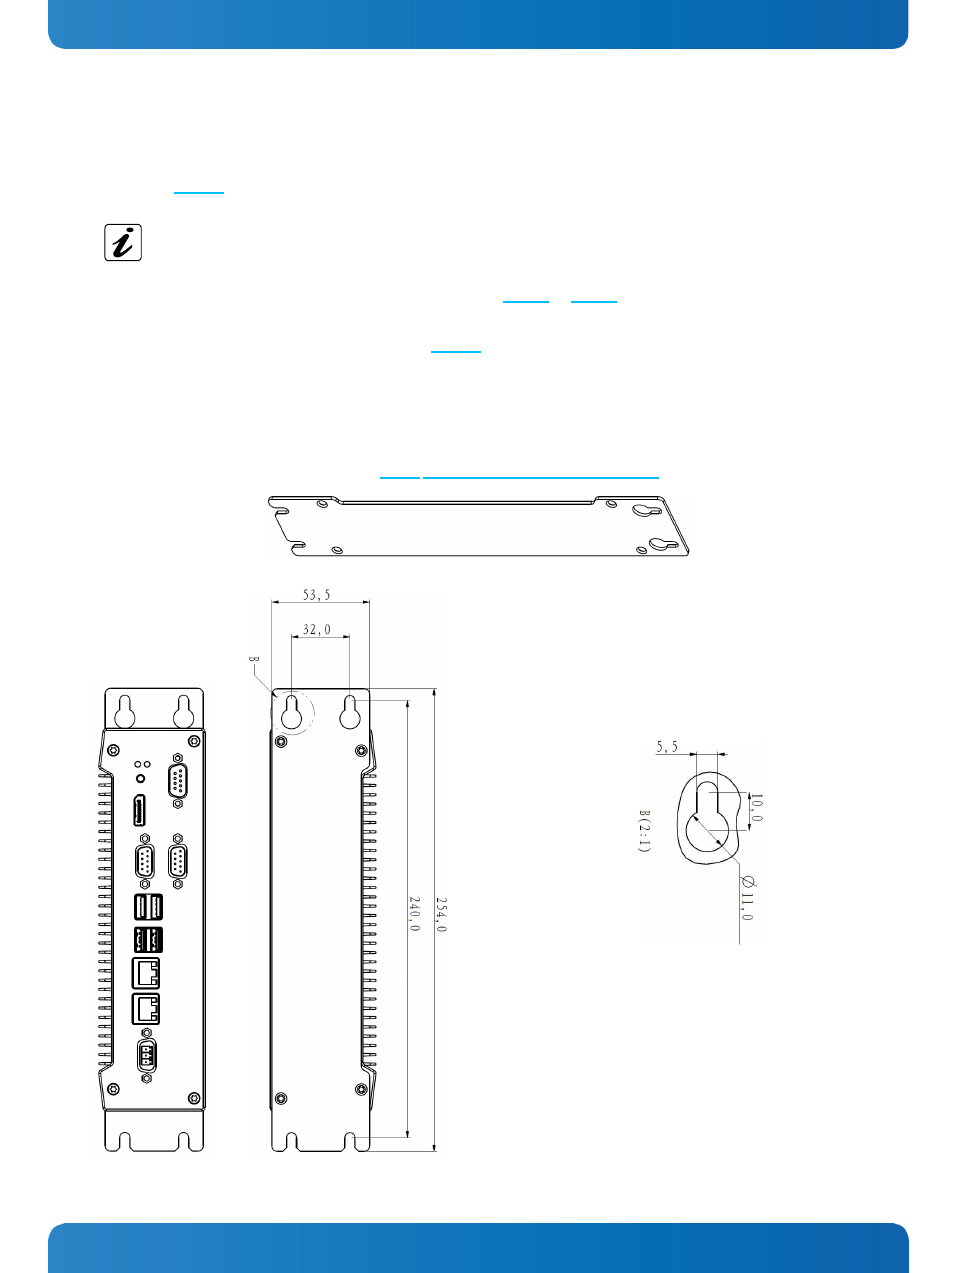
Bracket for Cabinet Mounting
This bracket (Fig. 26) allow you to mount the KBox A-101 in a vertical orientation in a cabinet (e.g. industrial cabinet)
corresponding to the desired orientation.
The mounting of the KBox A-101 into a cabinet is permitted only in a vertical orientation. You may choose
which side should be facing up or down (two operating positions). The bracket must be mounted on the
rear of the KBox A-101, according to the desired operating position, so that the keyhole mounting slots of
the bracket should be located above the unit (see
). Please observe that by using of this
kind of bracket the interfaces (WLAN and GPIO) on the rear side of the KBox A-101 are not available!
Before mounting the cabinet bracket (Fig. 26) to the KBox A-101, you have to disassemble:
the WLAN and GPIO modules and interface connectors if you have ordered the KBox A-101 equipped for
WLAN and GPIO functionality
the cover protection plates of the WLAN and GPIO interface slots, if you have ordered a KBox A-101
without WLAN and GPIO function.
Please refer to the subsection 9.3.1 “Opening and Closing the KBox A-101”.
Fig. 26: Bracket for cabinet mounting
Fig. 27: KBox A-101 with assembled bracket for cabinet mounting
Fig. 28: Keyhole slot dimensions
www.kontron.com
27