Dc power connection (via phoenix connector), Dc power connector – Kontron KBox A-101 Users Guide User Manual
Page 22
7. Product Description
KBox A-101 – User’s Guide (preliminary Version 1.00)
7.5.
DC Power Connection (via Phoenix Connector)
The KBox A-101 can be connected to a DC power source via a DC power cable (only the Phoenix power plug terminal is
included).
7.5.1.
DC Power Connector
The KBox A-101 is delivered with a DC power plug terminal (3-pin Phoenix connector). For DC connection prepare the
connecting wires using the supplied Phoenix plug terminal.
The length of the DC connecting wires may not exceed 10.
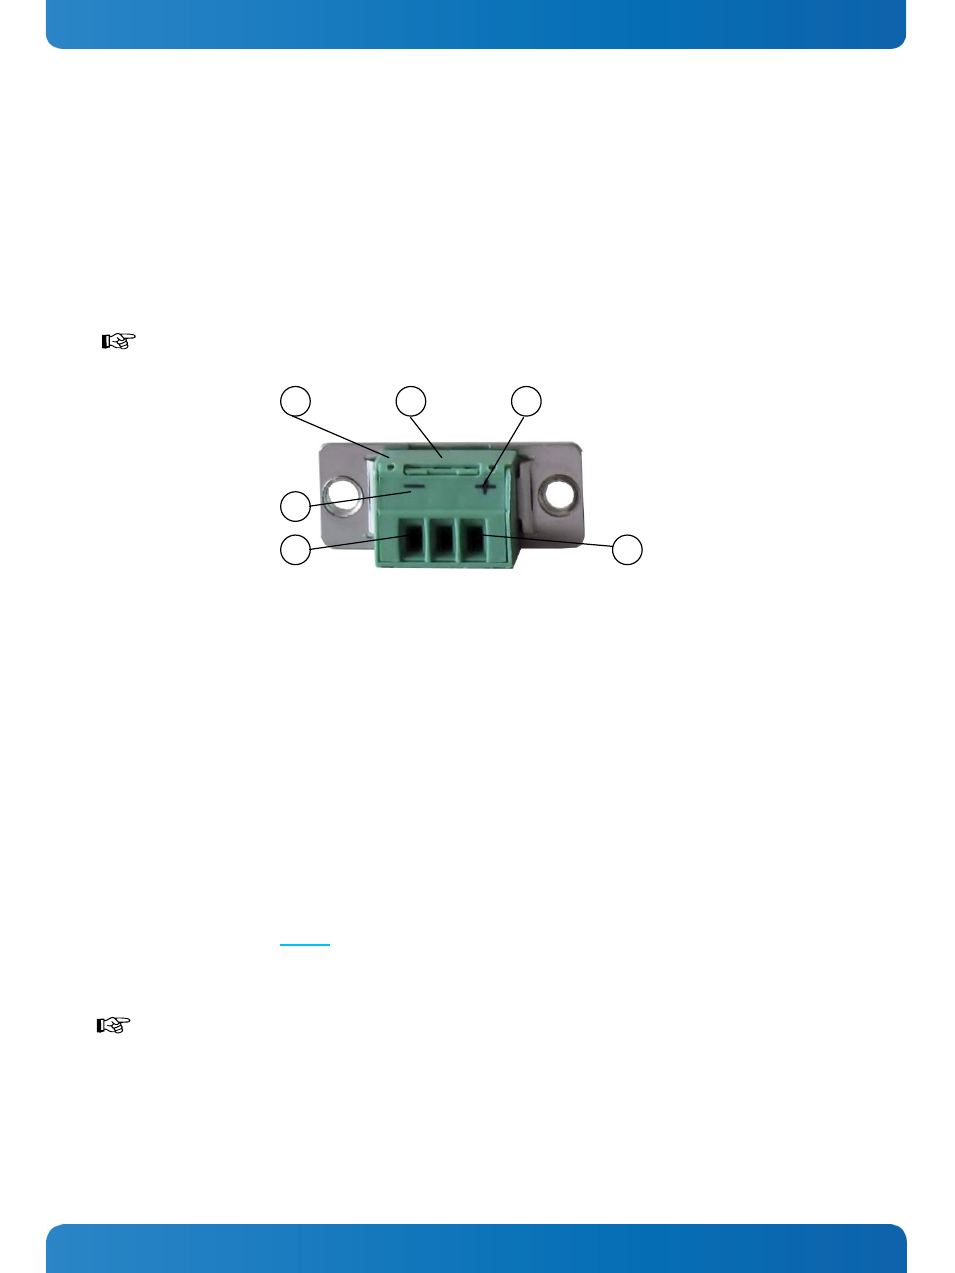
Fig. 20: Phoenix power plug terminal with “plus” and “minus” marking
1
3-pin Phoenix plug terminal
2
Cover over the slotted pan head screws
3
Marking “minus”
4
Marking “plus”
5
Location for inserting the “minus” wire
6
Location for inserting the “plus” wire
1. Cut the required length two isolated wires [AWG18 (∅ up to 1 mm
2
)] and strip each end 5 –7 mm.
2. Twist the striped wire-ends and tin it with solder.
3. Open the cover to have access to the slotted pan head screws.
4. Loosen the two slotted pan head screws (that correspond to the marked location “+” and “-“ of the DC plug terminal)
far enough so that you can insert the end of the prepared wires.
5. Insert the wires into the corresponding clamp of the Phoenix plug terminal. Make sure that you have the right polarity
of the connection (refer to Fig. 20).
6. Fasten the screws to secure the wires into the clamps of the plug terminal.
7. Close the cover.
The second end of each wire will be prepared as required for the connection to the DC power supply.
3
1
2
4
5
6
20
www.kontron.com