Gastroback 42526 Design Multicook Plus User Manual
Page 13
55
5.
Press again the ›Timer / t °C‹-button to adjust the temperature. The temperature indicator
flashes. The LED-display shows the pre-set temperature 100 °C. Use the › + ‹ and › – ‹-buttons to
select the desired temperature.
6.
If necessary, adjust the Auto-Start-Function to start cooking later.
7.
Press and hold for a few seconds the ›Start / Keep Warm on / off‹-button to start the appli-
ance. The ›Start / Keep Warm on / off‹-button lights up and the countdown of the cooking time
is shown in the time indicator.
8.
The Keep-Warm-Function turns on automatically, immediately after the program is over. If
necessary, this function can be switched off by pressing and holding the ›Start / Keep Warm
on / off‹-button at any time.
9.
After completion of the program an acoustic signal will sound. Depending on the settings of
the appliance, the Keep-Warm-Function will launch (the LED-display counts up the time) or the
appliance will return to standby mode.
10.
To cancel the selected program, to interrupt the cooking process or the Keep-Warm-Func-
tion press and hold the ›Cancel / Keep Warm‹-button for a few seconds.
With the program ›Multicook‹, you can prepare many different dishes. Use our recipe book or
the table with the recommended temperatures for cooking various dishes.
program cook
Recommended for the preparing vegetables and legumes. The setting range of the time is 2
minutes to 8 hours in 5-minute steps.
The 24-hour Auto-Start-Function is available for this program.
1.
Prepare the ingredients according to the recipe. Place these evenly in the inner pot and
insert the inner pot into the housing. Please make sure that all ingredients, including liquids,
are below the maximum mark (10 Cup) on the inner surface of the inner pot. Make sure that
the inner pot is firmly in contact with the heating element.
2.
Close the lid until it clicks into place. Connect the appliance to the power outlet.
3.
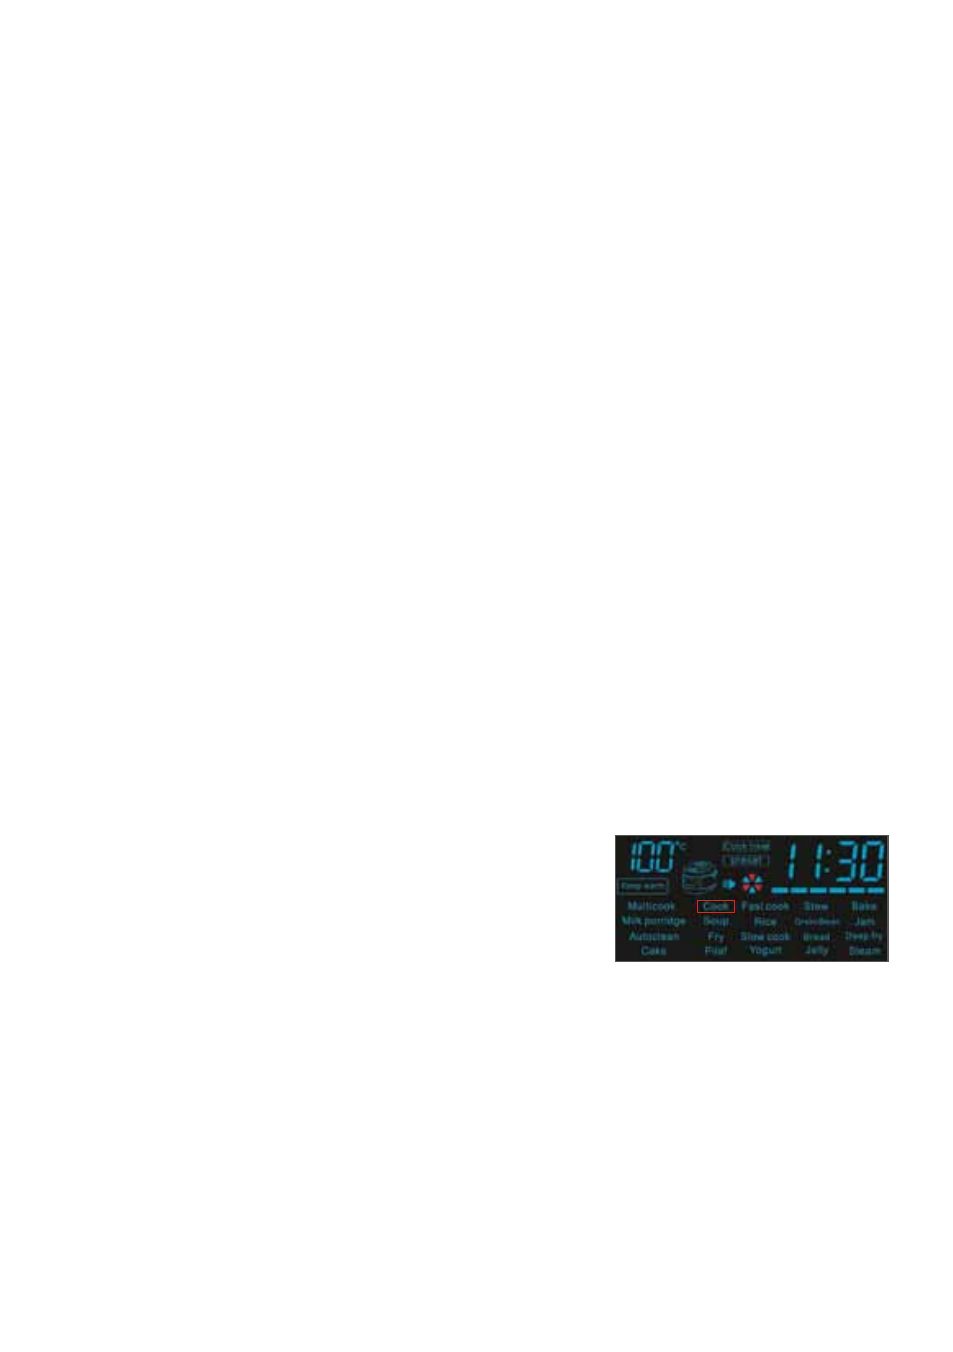
Press the ›Menu‹-button or the › + ‹ and › – ‹-buttons to select
the program ›Cook‹. Once ›Cook‹ flashes on the LED-display
the program is selected. The LED-display shows the default
values for the temperature and cooking time.
4.
Use the ›Timer / t °C‹-button to reach the time selection
mode. The minute indicator flashes. Use the › + ‹ and › – ‹-buttons to adjust the time. With the
›Hour / Min‹-button you can switch between hours and minutes. The LED-display shows the
pre-set cooking time 40 min. You can adjust the cooking time from 2 minutes to 8 hours.
5.
If necessary, adjust the Auto-Start-Function to start cooking later.
6.
Press and hold for a few seconds the ›Start / Keep Warm on / off‹-button to start the appli-
ance. The ›Start / Keep Warm on / off‹-button lights up and the countdown of the cooking time
is shown in the time indicator.
7.
The Keep-Warm-Function turns on automatically, immediately after the program is over. If
necessary, this function can be switched off by pressing and holding the ›Start / Keep Warm
on / off‹-button at any time.