Caution – Elecraft KXV3 Manual User Manual
Page 9
9
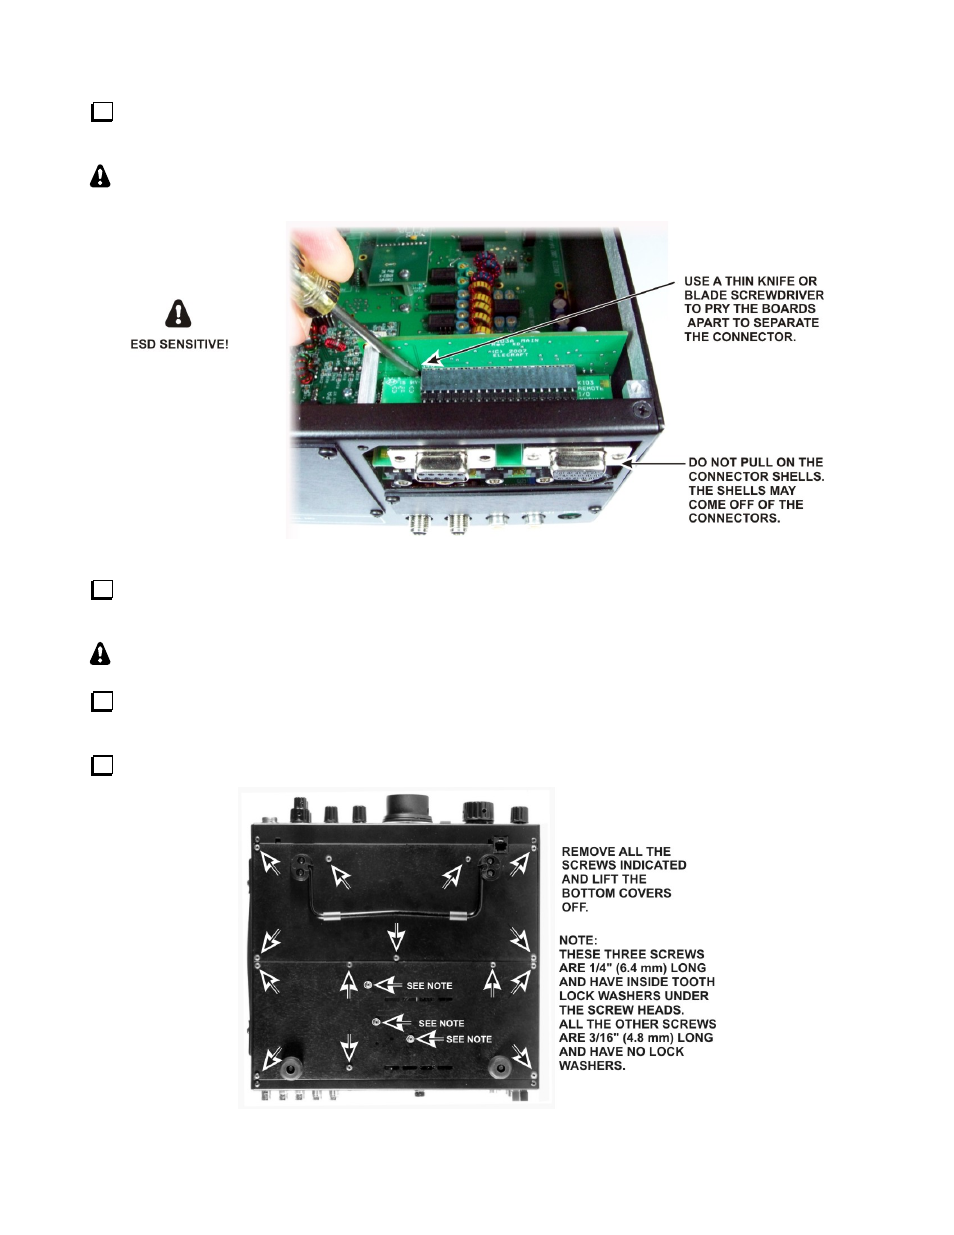
With the back cover of the KIO3 removed, remove the upper Remote I/O daughter board holding the
RS232 and ACC connectors as shown in Figure 5. Only the upper daughter board need to be removed. The
lower Audio I/O interface board may be left in place.
CAUTION:
The Remote I/O daughter board is ESD sensitive. Put it in a safe place until you
reinstall it.
Figure 5. Removing the KIO3 Remote I/O Daughter Board.
Tilt the top of the KIO3 Main board toward the front panel gently so the standoff at the top clears the lip on
the rear panel, then use the standoff at the top to lift up on the board while rocking it from side to side to unplug
the connector.
CAUTION:
The KIO3 Main board is ESD sensitive. Put it in a safe place until you reinstall it.
Remove the blank panel covering the space for the KXV3 module (see Figure 4). This panel will not be
replaced.
Turn the K3 upside down and remove the bottom covers (see Figure 6).
Figure 6. Removing the Bottom Covers.
- KX3 Owner's Manual (58 pages)
- KX3 Assembly Manual (47 pages)
- KX3 Assembly Manual Errata (5 pages)
- KX3-2M (30 pages)
- KX3-PCKT (2 pages)
- KX3 Mobile Installation And Operation Guide (17 pages)
- KX3 Guide for Blind Operators (7 pages)
- KX3 Quick Reference (2 pages)
- K3 Programmers Reference (26 pages)
- KX3 Speaker Grille Instructions (9 pages)
- KXFL3 Filter Option (12 pages)
- KXFL3 Filter Option Errata (2 pages)
- KXAT3 (5 pages)
- KXBC3 (13 pages)
- KXPD3 (4 pages)
- Proset Boom Headset (1 page)
- PX3 Owner's Manual (53 pages)
- PX3 Owners Manual Errata (2 pages)
- KXPA100 Manual (55 pages)
- KXPA100 Assembly Manual (27 pages)
- KXPA100 Assembly Errata (1 page)
- KXPA100 Programmers Reference (24 pages)
- KXAT100 Installation Manual (17 pages)
- KX1 Manual (96 pages)
- KXAT1 (12 pages)
- KXPD1 (7 pages)
- KXB30 (8 pages)
- KXB3080 (20 pages)
- K1 (91 pages)
- K1 1.09 F/W (1 page)
- KNB1 Manual (8 pages)
- KAT1 Manual (15 pages)
- KFL1-2 (2 pages)
- KTS1 (1 page)
- KBT1 Manual (8 pages)
- KBT1 Manual Errata (2 pages)
- K1BKLTKT LCD Mod Kit (6 pages)
- K2 Owner's Manual (171 pages)
- K2 Owner's Manual Errata (1 page)
- K2 PLL (4 pages)
- K2ATOBKIT (15 pages)
- K2ATOBKT (2 pages)
- K2 Keying Modification Instructions (4 pages)
- KPA100 Manual (74 pages)
- KPA100 Shield Upgrade (3 pages)