Installing the kbpf3 in the k3 main receiver – Elecraft KBPF3 User Manual
Page 11
11
If you removed them, place the 7/8” (22 mm) unthreaded sleeves over the long screws so they rest against
the top of the circuit board (see Figure 5).
Place the top shield over the assembly and adjust its position so the edge of the top fits inside the bottom
and rests against the KRX3 main board on all sides. The long screws will pass through holes in the top cover.
Secure the top with the knurled nuts, tightened only enough to hold the cover in place so it isn’t loose.
If you are installing another KBPF3 in the main K3 receiver, go to Installing the KBPF3 in the K3 Main
Receiver below. Otherwise, go to Reassembly on page 14 to finish the installation.
Installing the KBPF3 in the K3 Main Receiver
Installing the Standoffs on the K3 RF Board
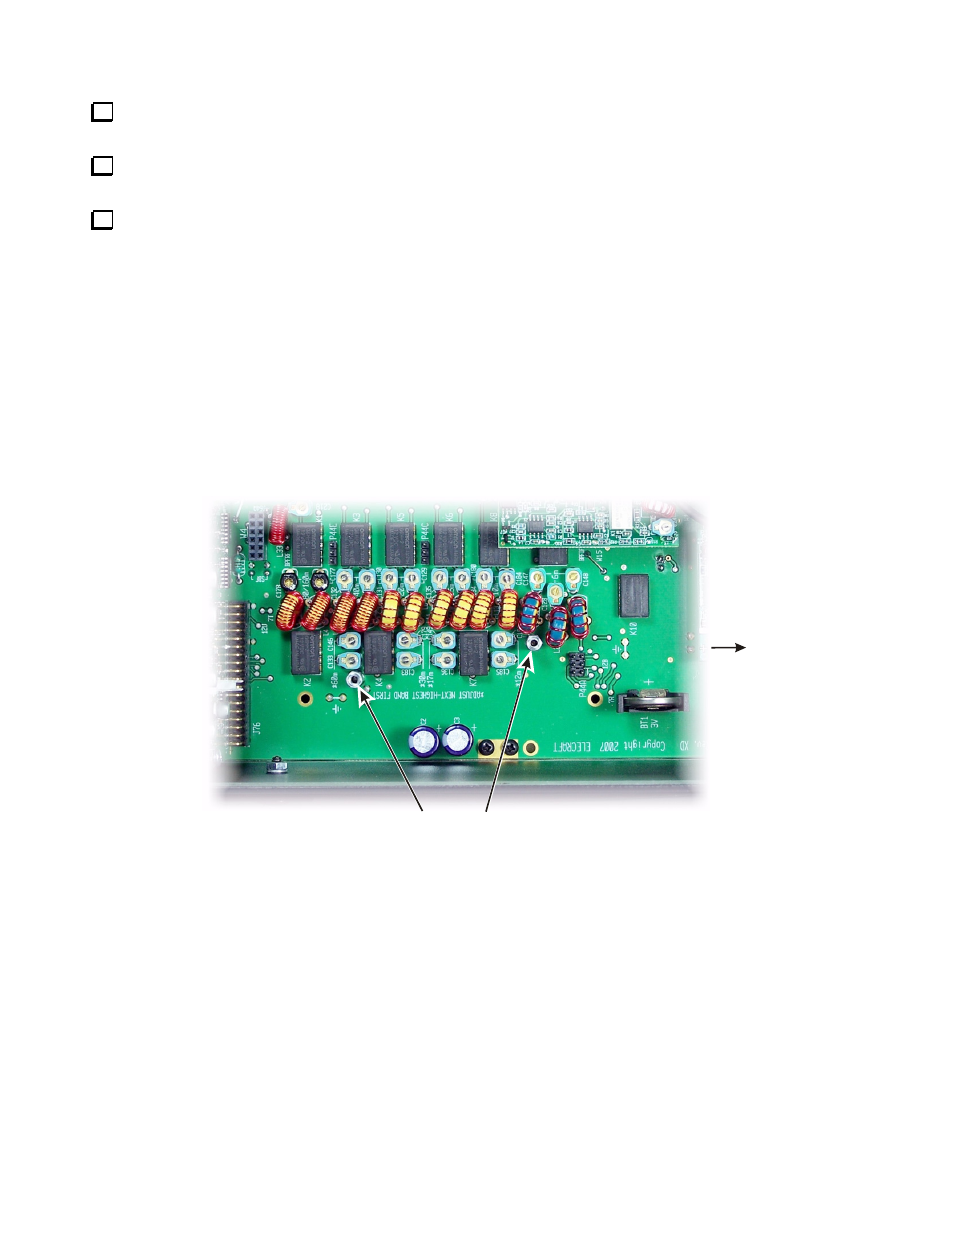
Check the RF board that covers the bottom of the chassis area to see if the standoffs shown in Figure 9 are
installed. (Note that the stiffening bar across the top of the K3 chassis has been removed to show the standoffs
more clearly.) Do the following steps only if the standoffs are not already installed as shown. If the standoffs
are already in place, go directly to Installing the KBPF3 on page 13.
FRONT
OF K3
KBPF 3 STANDOFFS
Figure 9. KBPF3 Standoff Locations.