Elecraft KAF2 User Manual
Page 10
10
3-Volt Battery Installation
Turn the K2 off. Remove the top cover or left side panel to gain access to the KAF2.
The (+) side of the 3-volt battery must be oriented toward the "+" symbol on the KAF2 board. The (-)
side must face the left side panel of the K2. Insert the battery in its socket, under the spring clip. DO NOT
use long-nose pliers to hold the battery--this will short the + and - sides of the battery together.
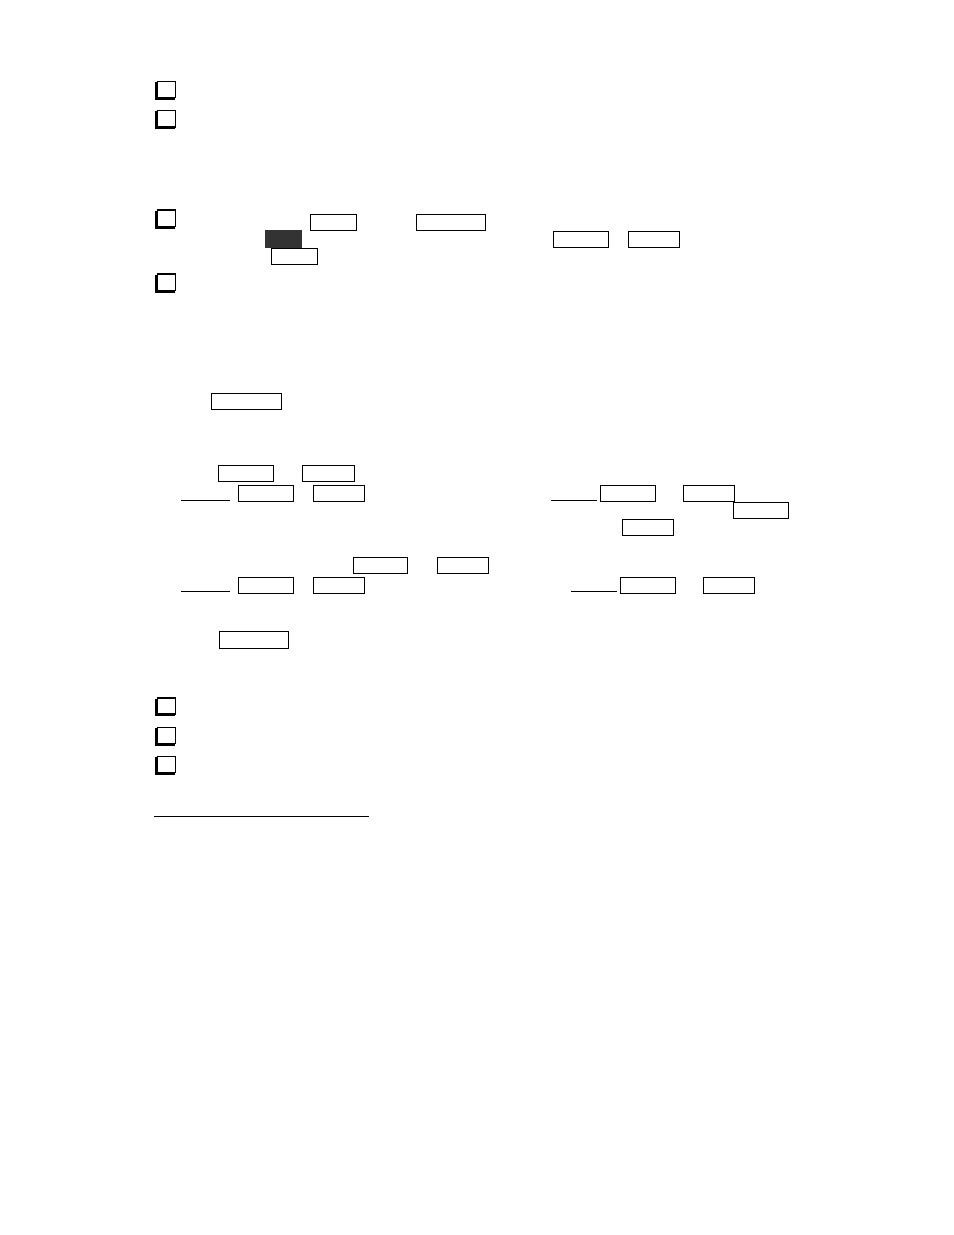
Setting the Date and Time
Turn the K2 on. Tap
M E N U
, then tap
D I S P L A Y
to switch to the secondary menu, and locate the
R T C
menu entry.
E D I T
the parameter and change it to
O N
using
B A N D +
or
B A N D -
. (This enables the
clock feature.) Tap
M E N U
twice to return to the frequency display.
To set the real-time clock you must set the date first, then the time, as described below. (The KAF2
firmware enforces this sequence to help prevent accidental time changes. If you attempt to set the time first,
or if you switch between time and date display more than once, any changes will be disabled.)
1.
Turn the K2 off, wait a few seconds, then turn it back on. If you plan to use WWV or some other on-
air time announcement, tune it in now. If you're setting the clock to UTC, don't forget to use the UTC
date if it's different from the local date.
2.
Tap
D I S P L A Y
. After about 1 second, you should see a time display (
H H . M M . S S
). The time may
not be changing at this point, and may be set to
0 1 . 0 1 . 0 1
or to a random time. Note: The receiver is
not muted when time is displayed, so you may hear microcontroller-generated noise. If the noise is
objectionable, turn down the AF gain when leaving the clock displayed for long periods of time.
3.
Hold
B A N D +
and
B A N D -
together to switch to date display (
M M - D D - Y Y
or
D D - M M - Y Y
3
).
4.
Tapping
B A N D +
or
B A N D -
will now change the day, and holding
B A N D +
or
B A N D -
will
change the month. To change the year: If the month is set to
1 2
, each subsequent hold of
B A N D +
will increment the year. If the month is set to
1
, each subsequent hold of
B A N D -
will decrement the
year. Once the desired year is selected, you can set the month by moving it back in the other direction.
5.
With the date now set, hold
B A N D +
and
B A N D -
together to switch back to time display.
6.
Tapping
B A N D +
or
B A N D -
will now change the minute, and holding
B A N D +
or
B A N D -
will
change the hour. Every change resets seconds to
0 0
, so you can sync to a time reference if desired.
7.
To disable further changes, switch to date display, then back to time display. Then move the VFO knob
or tap
D I S P L A Y
twice to return to the normal frequency display.
Final Assembly
Turn off the K2. Re-connect the speaker cable and any option cables.
Replace the K2 top cover and secure it with six screws.
Set the internal battery switch to ON if applicable.
3
Jumper W2 must be installed to select
D D - M M - Y Y
date format; see page 6.