Elecraft KXPD1 User Manual
Page 7
7
Test the paddles, pressing them at approximately the points indicated by the arrows in Figure 8.
After you have confirmed that both paddles work properly, remove the backing from the adhesive hole
cover and position it to cover the exposed terminals as shown in Figure 9. Be careful not to cover either
thumb screw hole.
Thumbscrew with washer
Place hole cover label here
Figure 9
Contact Spacing Adjustment (Optional)
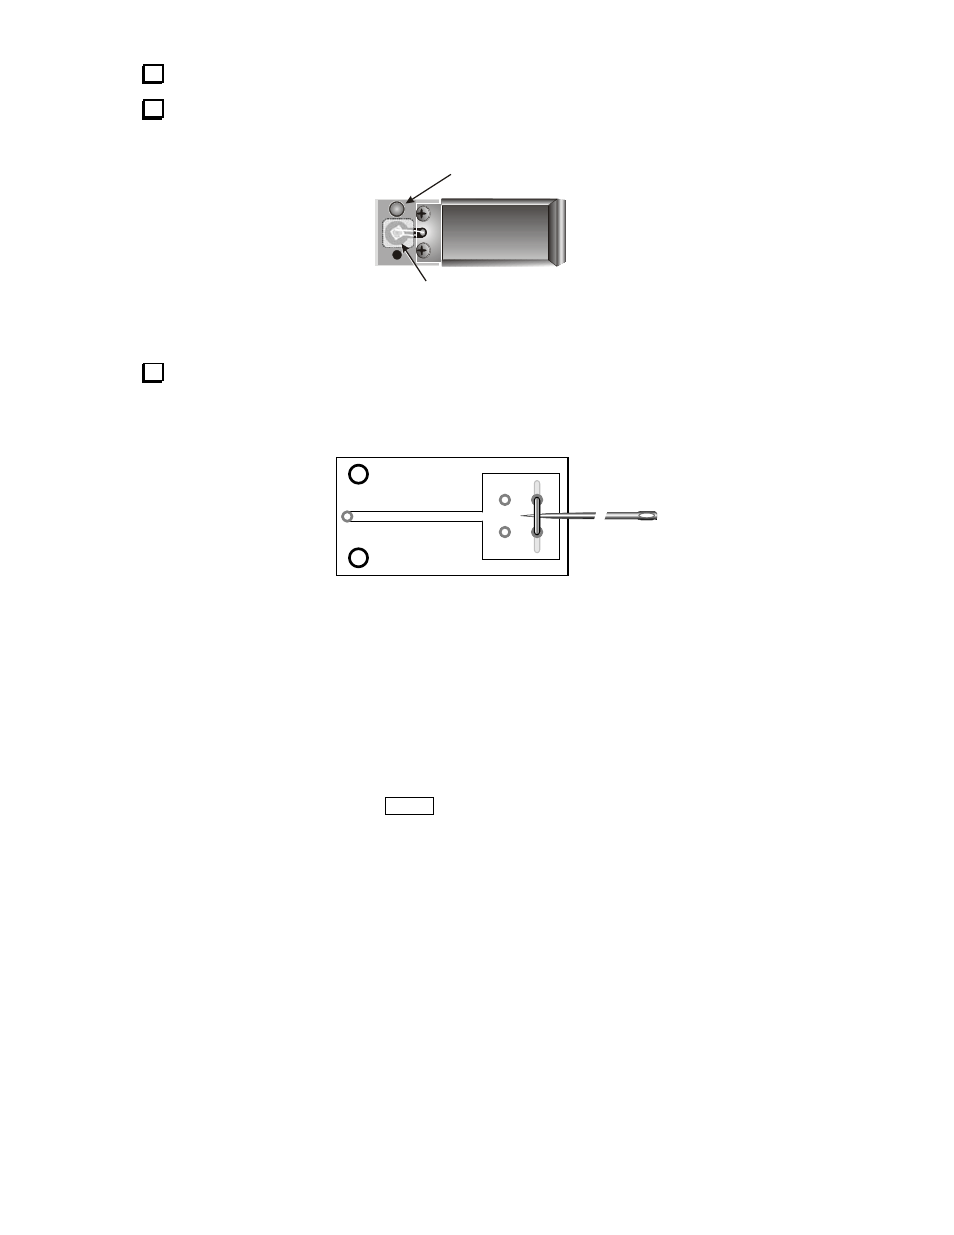
You can decrease the spacing between the lever and the silver contact wire, if desired, by lifting the
center of the wire slightly using the tip of a very thin sewing needle (Figure 10). This will move the center
of the wire upward by about 1/100" (0.25 mm). The ideal spacing must be determined experimentally. If
the spacing is found to be too close, the wire can be squeezed back down slightly using long-nose pliers.
Figure 10
Using the KXPD1
DOT/DASH Reversal: In addition to being physical reversible, the paddle can be electrically reversed
(dot/dash lines swapped) by setting the KX1's I N P menu parameter to P D n or P D r (normal or reverse)
as desired.
Storage and Transport: The paddle should be unplugged and stored in a padded pocket or bag for
transport. However, the captive thumb screw should be left threaded into the bracket so it will not become
lost.
Switch CW Mode: If the KXPD1 is ever lost or damaged during field use, you can use the KX1's Switch
CW mode as a backup. Press and hold
M E N U
and the VFO knob together to toggle between b t n
(button, or Switch CW mode) and p d l (paddles).