Step 9) sealing the ends of the subsill – EFCO 526 Series User Manual
Page 28
EFCO 6/2012
Page 28
Series 526 Impact Installation Instructions
SECTION VI: Subsill Fabrication and Installation
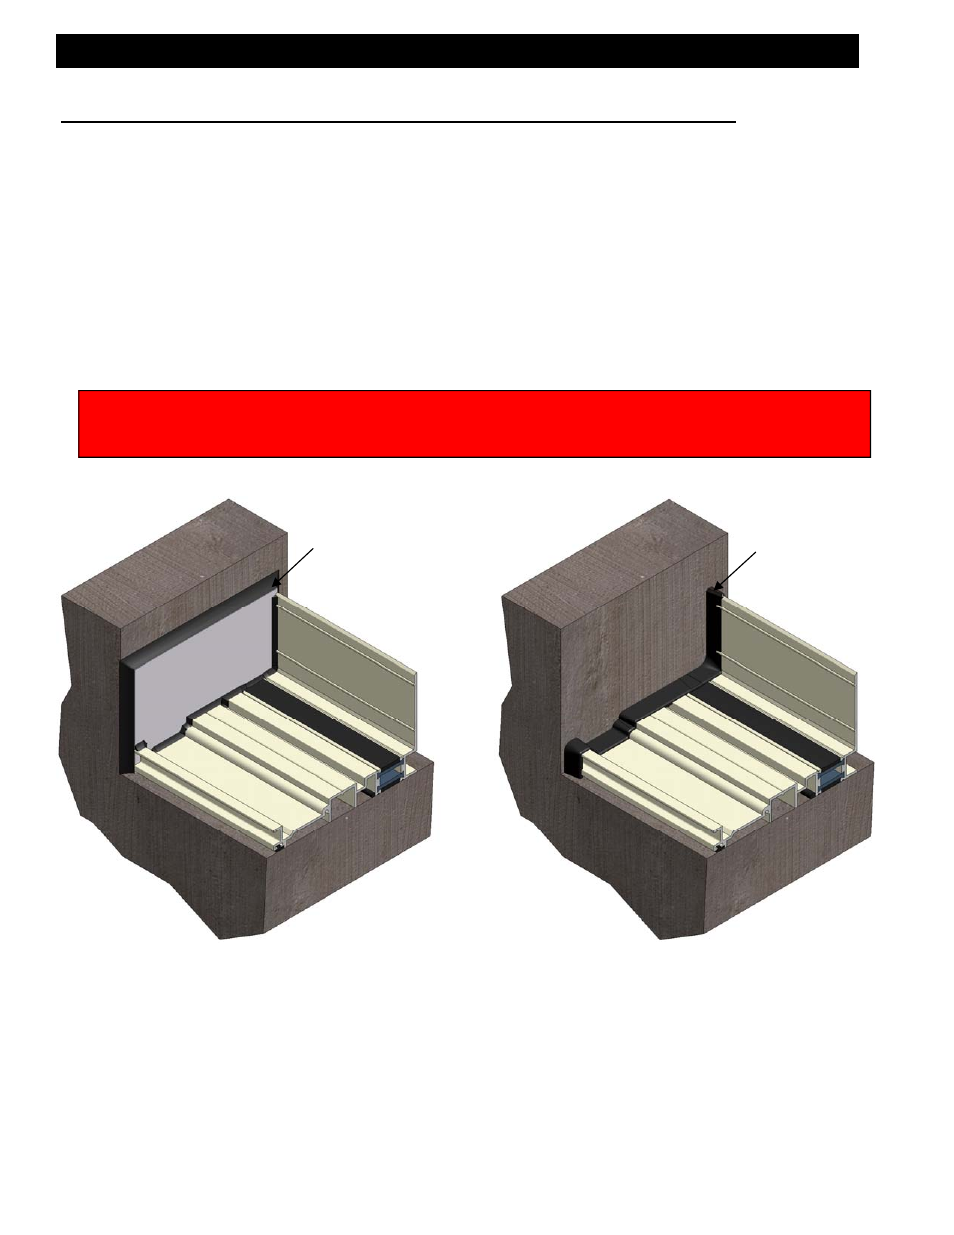
Step 9) Sealing the Ends of the Subsill
After the subsill has been installed and anchored, it must be sealed to the condition at
each end with silicone type sealant. If the subsill has an end dam, there should be a
continuous bead of silicone type sealant placed up both the interior and exterior and
across the top edges of the end dam, where it meets the condition. The sealant should
be tooled to make a watertight seal between the end dam and the condition. If the subsill
does not have an end dam, a continuous bead of silicone type sealant must be applied
to the end of the subsill, where it meets the condition. The sealant should be tooled to
make a watertight seal between the subsill and the condition. See figures 16 and 17
below for sealant application.
Tool sealant from
subsill end dam to
condition for a
watertight seal.
Tool sealant from
subsill to condition
for a watertight
seal.
[Fig. 16]
[Fig. 17]
Prior to applying sealant to the required areas, clean the area with Isopropyl Alcohol and a clean towel
that will not leave towel materials behind. Wipe off material with a sufficiently dampened towel to remove
all dust, oil, and cutting fluids from the required areas. Allow to air dry before applying any sealant.