EFCO 526 Series User Manual
Page 26
EFCO 6/2012
Page 26
Series 526 Impact Installation Instructions
Before installing the subsill, the exterior face location of the frame should be found using
benchmark information from the shop drawings or architectural drawings. The subsill
protrudes 1/32" to the exterior of the exterior face of the frame. Locate this line based on
the benchmark information, and snap a chalk line to follow when installing the subsill.
The subsill exterior angled leg should follow the chalk line for correct installation.
SECTION VI: Subsill Fabrication and Installation
Step 6) Benchmarks for Subsill Location
Step 7) Preparing and Sealing the Subsill for Installation
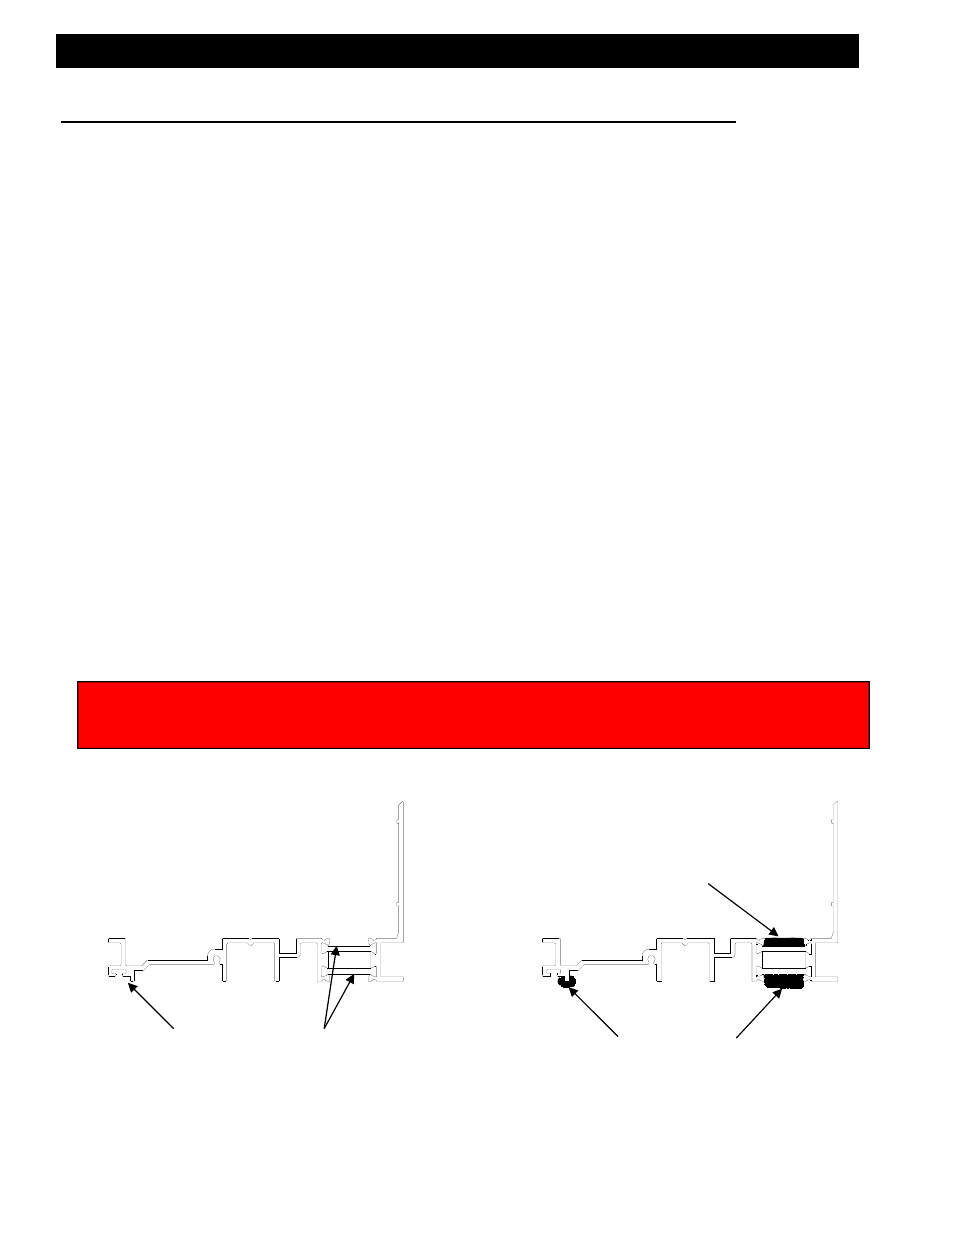
Regardless of whether an end dam is used or not, the subsill must be sealed to the
condition to create a watertight condition when it is installed. It is also necessary to run a
continuous bead of silicone on the top of the strut. See figure 11 below. Begin the
process by cleaning the bottom and top strut of the subsill with a degreasing solution, and
wipe it dry after all foreign material has been removed. See figure 10 below. When the
subsill is clean and dry, run a bead of silicone type sealant across the top of the strut, and
tool smooth. Then turn the subsill over, and apply a generous amount of silicone type
sealant to the areas shown in figure 11. This should be done just prior to the
installation of the subsill.
Silicone Sealant
[Fig. 10]
[Fig. 11]
Prior to applying sealant to the required areas, clean the area with Isopropyl Alcohol and a clean towel
that will not leave towel materials behind. Wipe off material with a sufficiently dampened towel to remove
all dust, oil, and cutting fluids from the required areas. Allow to air dry before applying any sealant.
Clean and Degrease
Thoroughly
Silicone sealant
tooled smooth across
top of the strut.