Subsill end dam, Glazing, Step 1) subsill end dam requirements – EFCO 525 Series User Manual
Page 22: Step 2) subsill end dam installation
[FIG. 22]
[FIG. 23]
& INSTALLATION
SECTION VII - SUBSILL FABRICATION
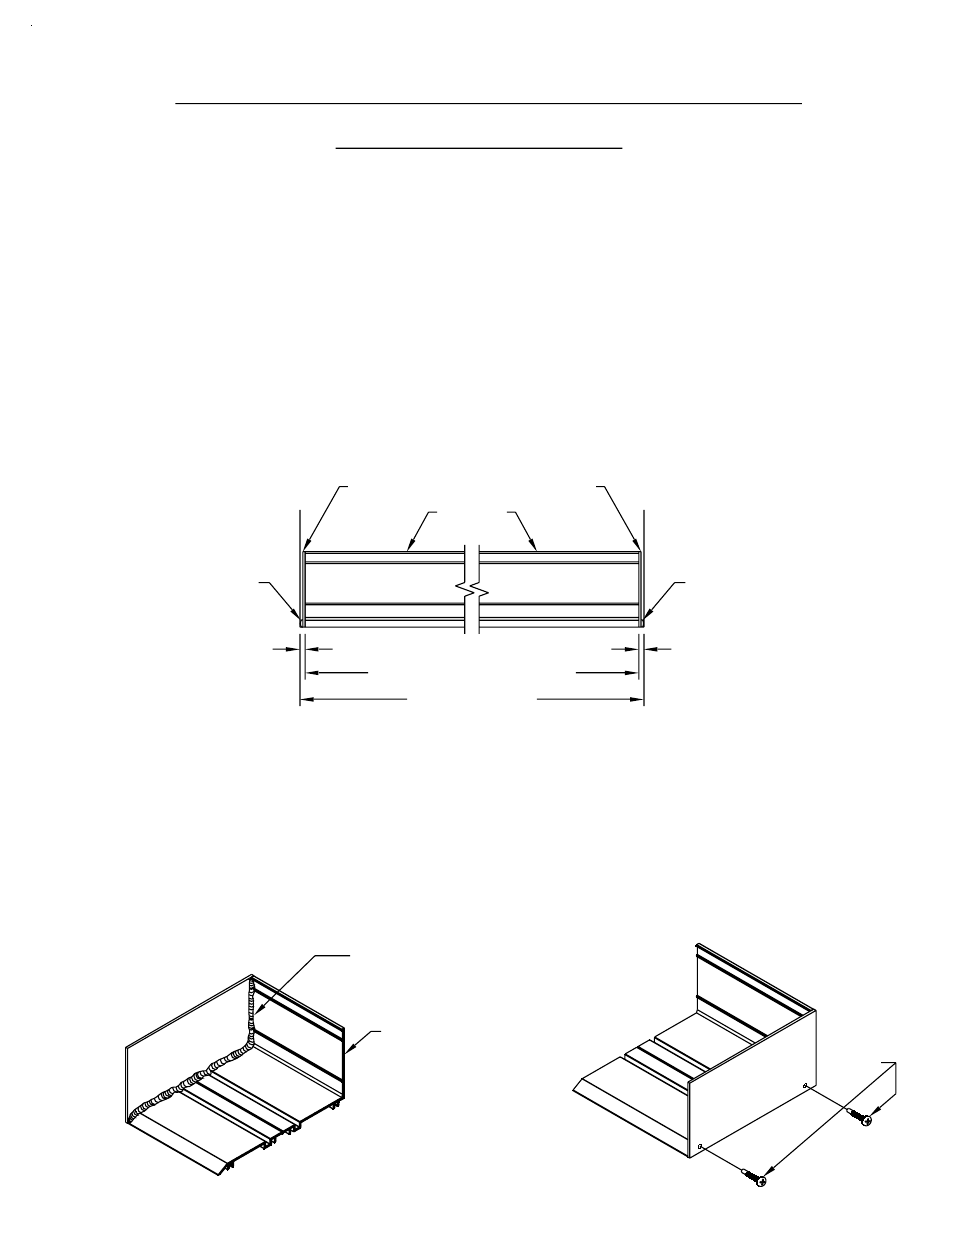
[FIG. 21]
STC7 FASTENER
SUBSILL
KN66 END DAM
PAGE 20
STC7 FASTENER
STEP 1) SUBSILL END DAM REQUIREMENTS
Before installing the subsill into the rough opening, you must
determine whether an end dam is required or not. If the surrounding
condition does not have an open area or can be used as a water dam,
move to Step 3 on page 21.
The first step to installation of the end dams is to measure the rough
opening width. The subsill length should be, ROUGH OPENING
WIDTH - 3/8". This formula will give enough room for the end dam
and attachment screws to fit on both ends of the subsill without
interference with the rough opening. (See figure 21 below.)
KN66 END DAM
STC7
BUTTER THE ENDS
OF THE SUBSILL
WITH SILICONE
TYPE SEALANT
PRIOR TO
INSTALLATION OF
THE END DAM
TOOL SEALANT
Prior to installing the end dam, apply a generous amount of silicone
type sealant to the end of the subsill. Insert the
STC7
fasteners into
the end dam and attach it to the end of the subsill. After the end dam
is attached, the excess sealant should be tooled at the interior of the
subsill/end dam joint to provide a watertight seal. Apply more sealant
if required for a watertight seal. (See figures 22 and 23 below below.)
STEP 2) SUBSILL END DAM INSTALLATION
3/16"
ROUGH OPENING
SUBSILL LENGTH = R.O. - 3/8"
3/16"
525 IMPACT
DPS 3/2004