Interior gasket installation, B. shear block, Door frame installation – EFCO 525 Series User Manual
Page 14: Step 1) interior gasket installation
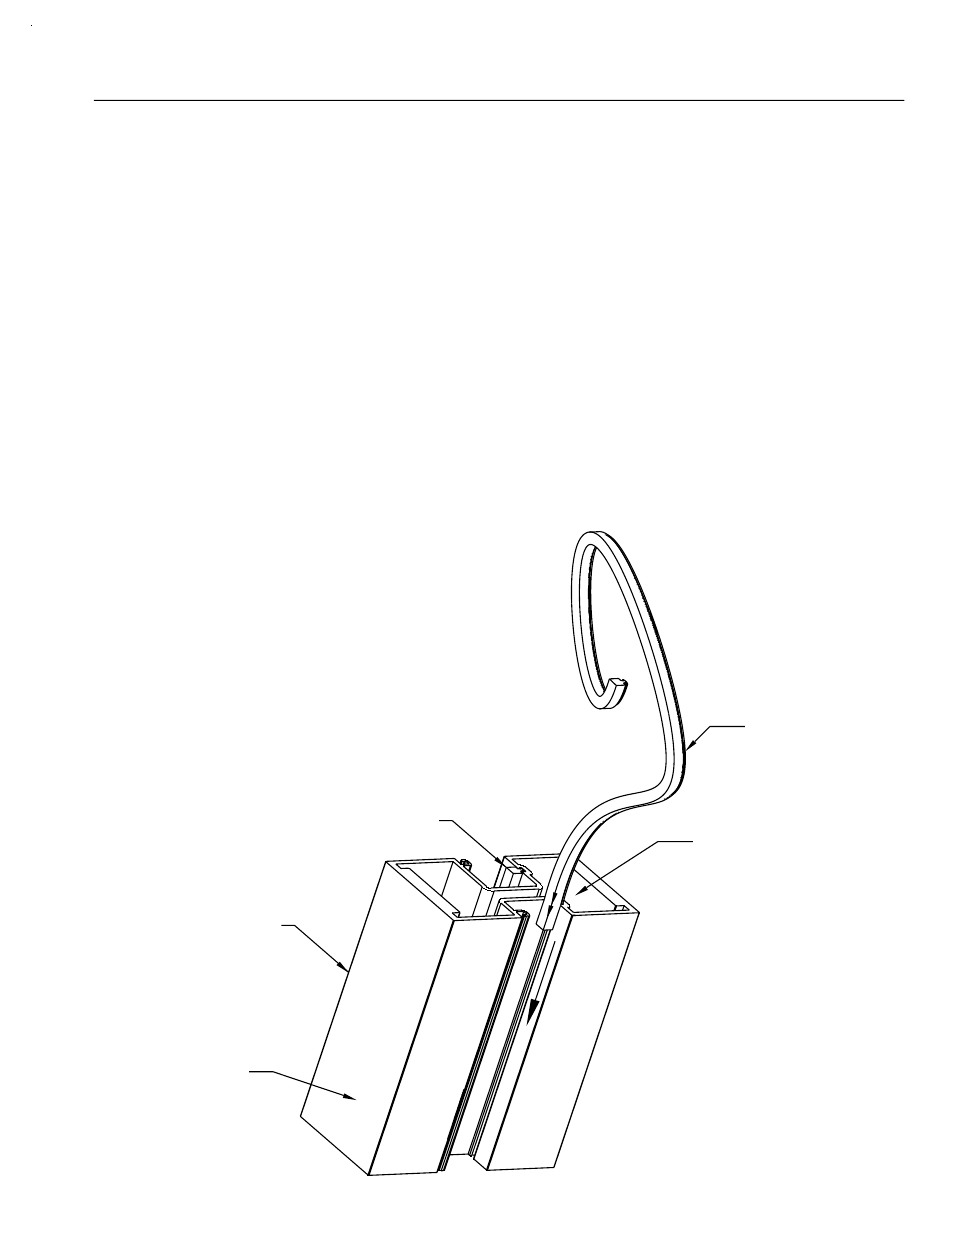
SECTION IV - INTERIOR GASKET INSTALLATION
[FIG. 9]
PAGE 12
WEQ1
INTERIOR
GASKET
SLIDE WEQ1 INTO
GASKET RACE
WEQ1
(INSTALLED)
EXTERIOR FACE
4477 SHOWN
OTHERS SIMILAR
After all material is cut to the appropriate length, the WEQ1 interior
gasket/sealant backer should be installed. Begin the installation of the WEQ1
by first ensuring that the gasket race is clean and free of debris. The WEQ1
should be cut to the same length as the frame member it is being installed into.
Begin the installation on one end of the frame member and slide the WEQ1
into the raceway. It may be advantageous to use a light mixture of soapy
water to help the gasket slide into the race. After installation, ensure that the
WEQ1 is not stretched an excessive amount.
It is "possible" to install the WEQ1 after the frame members are assembled,
but it has to be pressed into the gasket race instead of sliding in. This is "far
more difficult and time consuming" and should be avoided unless absolutely
necessary. If the WEQ1 must be installed after the frame material is
assembled, a tool with a hooked tip of some type will ease the installation of
the gasket, as will a light mixture of soapy water. Refer to figure 9 below for
WEQ1 installation.
STEP 1) INTERIOR GASKET INSTALLATION
525 IMPACT
DPS 1/2004