EFCO S5600 Outside Glazed User Manual
Page 20
EFCO CORPORATION 7/2012 PART NO. Y302
Page 20 of 26
Series 5600 Outside Glazed Installation Instructions
Section VII: Glazing Installation
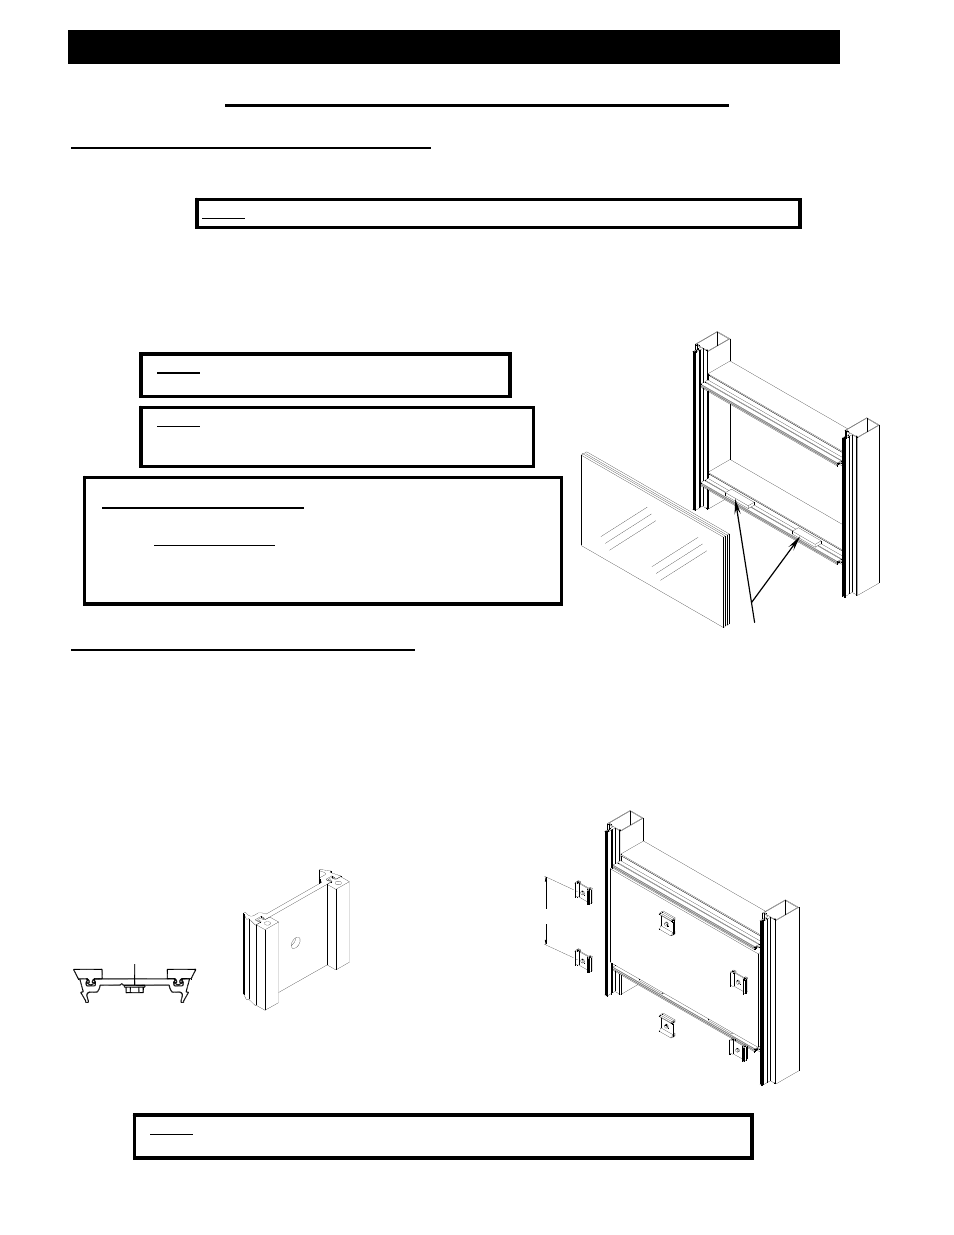
Step #3 Install Infill Glazing Materials
A.)
Install proper infill into the opening using suction cups to gently lower the infill
material onto the setting blocks.
B.)
Position the infill in the center of the opening maintaining a ½” glass bite around
the entire perimeter.
C.)
Lift the infill slightly off the setting blocks and press the infill firmly against the
interior glazing gaskets at the sill horizontal.
Step #4 Install Temporary Retainers
A.)
Depending on your specific installation sequence, it may be desirable to install
temporary glazing retainers to hold the infill glazing in the opening. Apply the
retainers as needed; however, it is suggested that they be spaced no more than 30”
apart. They are intended for short term temporary applications only and are not to
be left unattended, or overnight. [TEMPORARY RETAINERS DO NOT MEET
STRUCTURAL REQUIREMENTS AND CAN FAIL UNDER STRUCTURAL
LOADS.]
30" Max.
Note: The typical glass bite is ½”. Glass
sizes are based on D.L.O. plus 1”.
Note: Impact glazing glass bite is ¾” minimum.
Glass sizes are based on D.L.O. plus 1 ½”.
[See Final Shop Drawings]
Note: Temporary retainers are available from EFCO by request only and are
NOT INCLUDED in the estimated cost of the materials for the job.
2”
Typical Pressure Plate Dutchman
Typical temporary infill glazing retainer clips
[Dutchman] 2” long minimum
Note: Do Not Seal the Setting Blocks to the Tongue of Horizontal Mullion.
Setting Blocks
¼ Points Typical
1” Infill
Customer / Installer Note: EFCO setting blocks are
typically 4" in length with different depths. If the glazing
infill is "NOT BY EFCO" and glazing sizes are larger than
40 square feet, then the glazing details must be reviewed
by the glazing manufacturer for proper setting block size.