EFCO S5600 Outside Glazed User Manual
Page 19
EFCO CORPORATION 7/2012 PART NO. Y302
Page 19 of 26
Series 5600 Outside Glazed Installation Instructions
Section VII: Glazing Installation
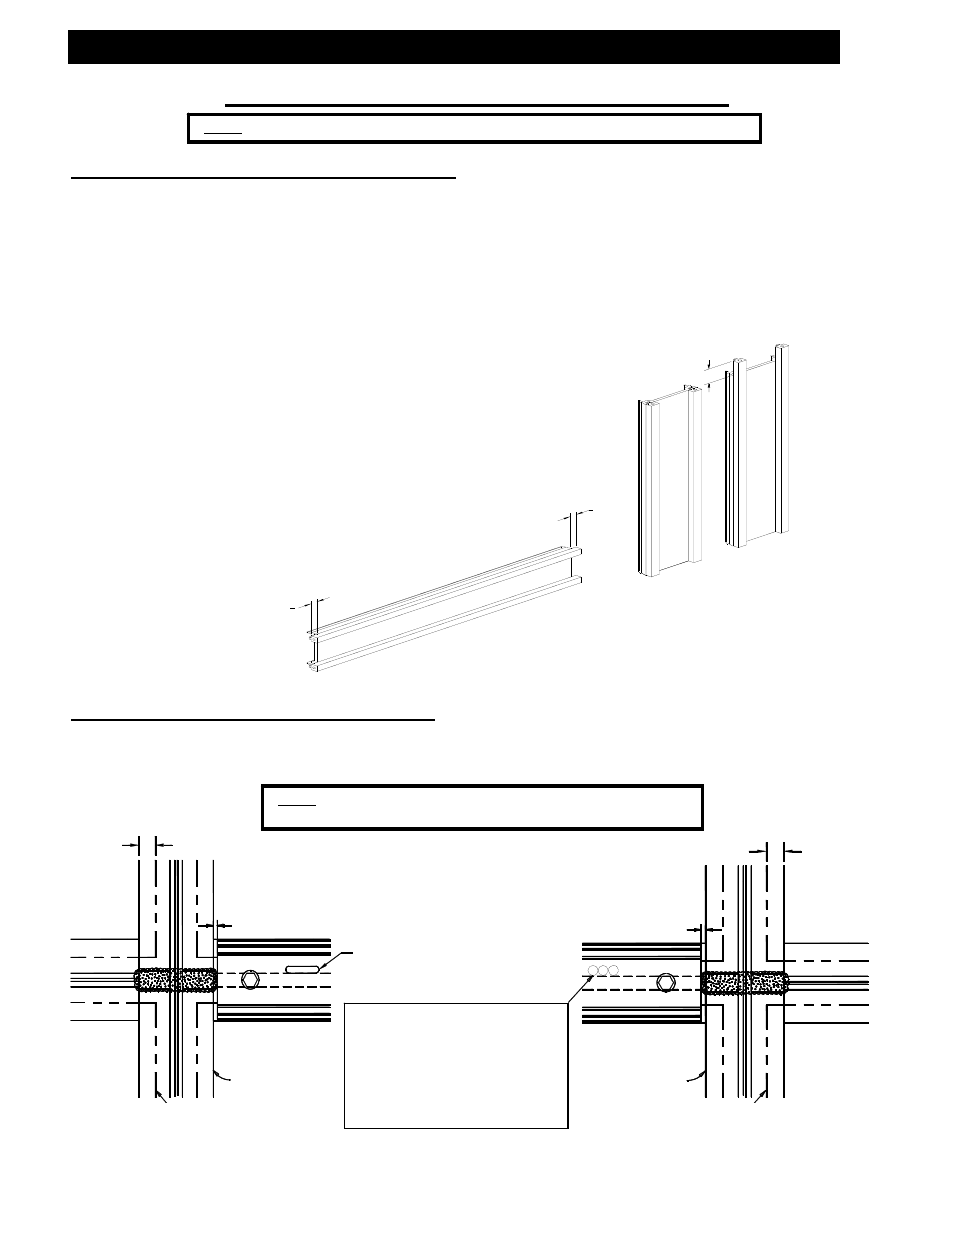
Step #1 Prepare Exterior Pressure Plates
A.)
Remove exterior gasket material from the reel and allow to relax and shrink.
B.)
Apply glazing gaskets to the pressure plates. Gaskets must be cut flush at both
ends of the vertical pressure plate except in multi-story applications, where gaskets
are to extend 1” beyond the top end to cross the expansion joint. The pressure
plate should extend 3” past the splice. [See Section IX: Vertical Splice Joints]
C.)
Cut the horizontal gaskets ½” longer than the pressure plate length and apply so
that ¼” extends beyond each end.
Step #2 Apply Exterior Pressure Plates
A.)
Apply sealant to the face of the joint plugs prior to installation of the vertical and
horizontal pressure plates.
Note: All anchors must be “FIXED” before glazing installation begins.
Edge of Glass
Line of Mullion
3/16” X 1” weep slot
centered 4” off each
end of the pressure
plate.
½” Glass Bite
(typical)
Note: Horizontal pressure plates are cut D.L.O. -1/4”.
The erector must split the difference on both ends.
1"
1
4
"
1
4
"
Typical horizontal
gasket extended ¼”
each end.
Typical vertical
gasket cut flush
top and bottom.
Vertical at multi-
story, gasket
extended 1” at top.
Horizontal Pressure Plate
Vertical Pressure Plate
OPTIONAL WEEP HOLES
5/16” dia. weep holes
Drill 3 side by side centered
4” off each end of pressure
plate. Locate C/L of holes
5/32” above top of tongue.
Line of Mullion
Edge of Glass
½” Glass Bite
(typical)
1/8”
1/8”