4wd dyno movement test – Dynojet 224/4WD: Installation Guide User Manual
Page 42
In Ground Model 224 4WD Automotive Dynamometer Installation Guide
C H A P T E R 2
4WD Dyno Movement Test
2-22
. . . . . . . . . . . . . . . . . . . . . . . . . . . . . . . . . . .
4WD DYNO MOVEMENT TEST
Verify the movement of the 4WD dyno before installing the grates.
1
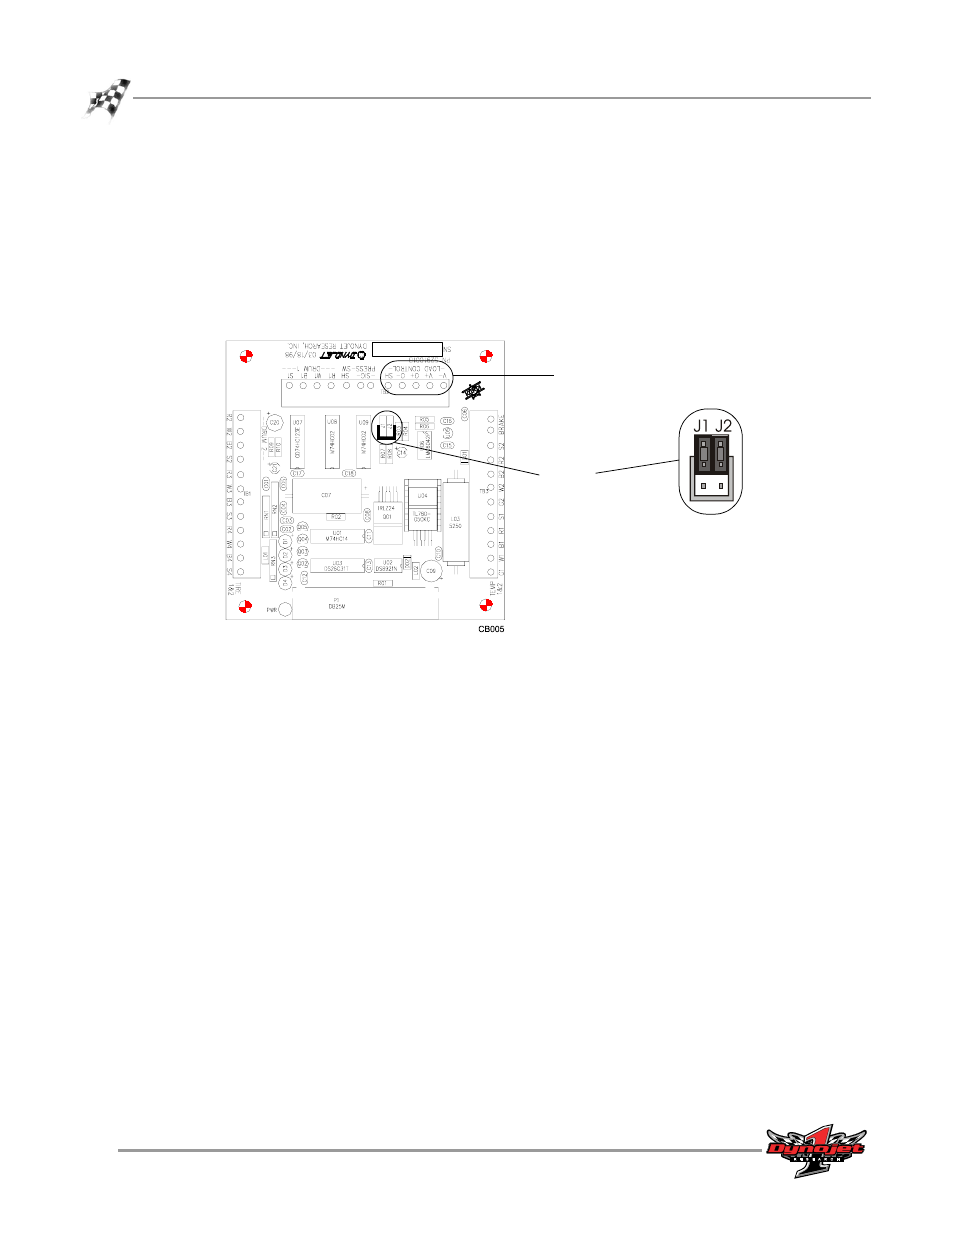
The Breakout board jumper settings are preset, however, verify jumpers J1 and J2
are set for the 4WD proportional air brake as shown in Figure 2-19.
Note: The Breakout board is inside the 4WD control box. Refer to Figure 1-2 for
more information on locating the 4WD control box.
Figure 2-19: Verify the Jumper Settings
2
Verify the air motor lubricator bowl is full with oil. Refer to page 4-12 for
information on how to check the air motor lubricator.
Note: The air motor lubricator bowl is inside the 4WD control box. Refer to
Figure 1-2 for more information on locating the 4WD control box.
3
Turn the dyno electronics on.
4
Turn the air on.
5
Press the red button on the dyno pendant. The button should light up indicating
the brakes are activated. The red button will control the brakes on both dynos.
6
Verify the brakes are working properly by pressing the red button a few times to
cycle the brakes.
7
With the brakes on, press and hold the "in" button on the dyno movement
pendant. You should hear air venting, and the rail clamps releasing.
Note: The dyno brakes MUST be on or the 4WD dyno will not move.
8
Keep holding the "in" button down until you see the motor shaft begin to turn.
9
Repeat this procedure holding the "out" button.
load control
jumpers
J1 and J2
four wheel drive
prop air brake
jumper settings