Installation, Installing the blower arm assemblies, Installing the blower arm assemblies -4 – Dynojet 200: High Pressure Blower User Manual
Page 8
High Pressure Blower Installation Guide
H I G H P R E S S U R E B L O W E R
Installation
4
. . . . . . . . . . . . . . . . . . . . . . . . . . . . . . . . . . .
INSTALLATION
If you have a monitor tray, the support arm must be installed before the blower arm
assemblies. Refer to the Model 200i/250i Motorcycle Dynamometer Installation Guide
for more information.
I
NSTALLING
THE
B
LOWER
A
RM
A
SSEMBLIES
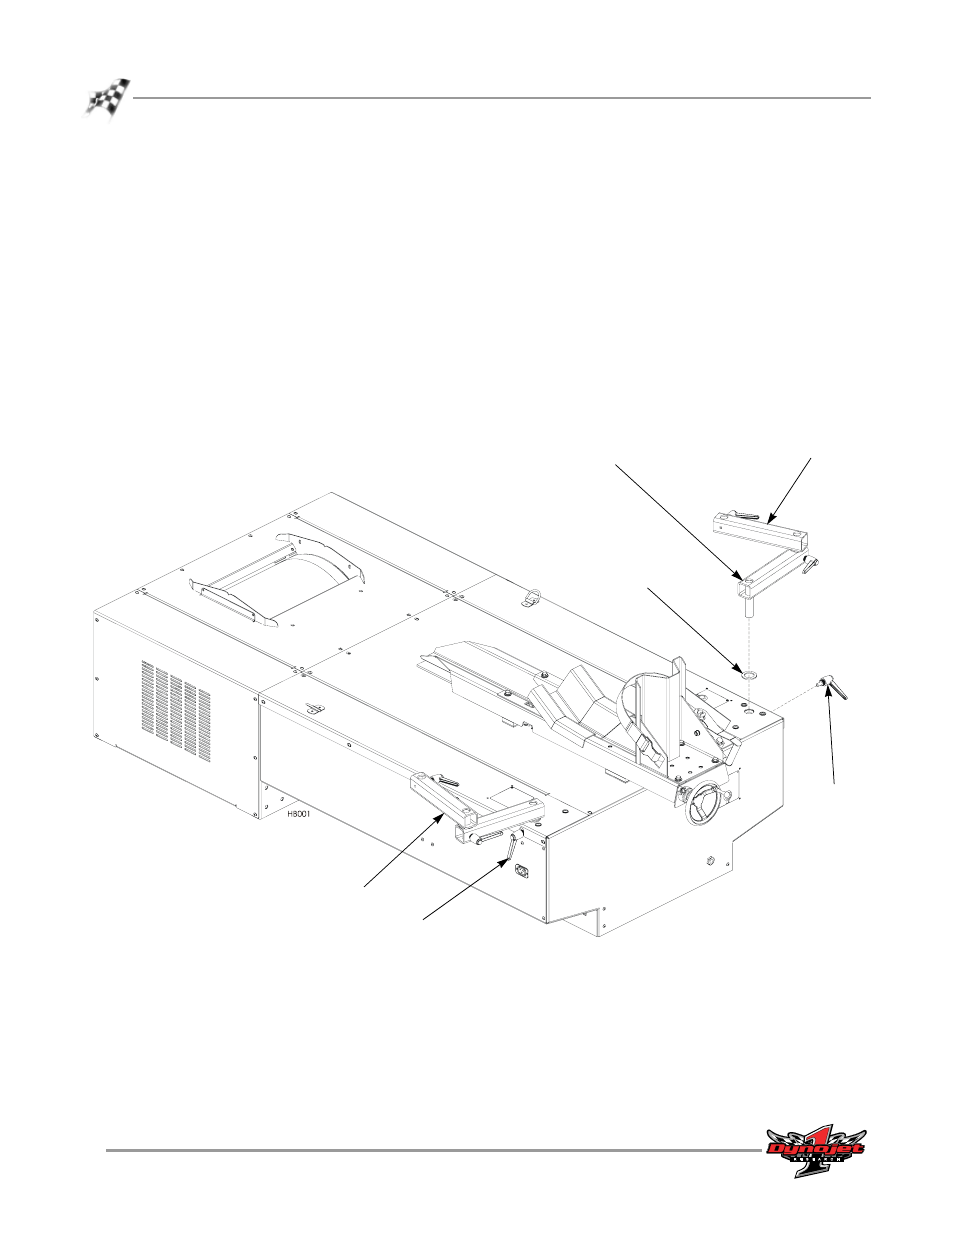
Repeat the following steps for each blower arm assembly.
1
Place a 1/4-inch thick poly washer around the pin on the blower arm assembly.
2
Insert the pin on the blower arm assembly into the dyno.
3
Secure the clamp lever to the dyno.
Figure 2: Install the Blower Arm Assemblies
clamp lever
1/4-inch thick
poly washer
blower arm
assembly
blower arm
assembly
clamp lever
lower arm has longer
arm and pin