Installation, Modifying the tire stop – Dynojet 200: High Pressure Blower User Manual
Page 14
High Pressure Blower Installation Guide
A P P E N D I X A
Installation
A-2
. . . . . . . . . . . . . . . . . . . . . . . . . . . . . . . . . . .
INSTALLATION
The high pressure blower supplies air to cool the bike’s engine.
The blower extension arm assembly comes ready to mount to the tire carriage on the
dyno. However, if you have a power carriage installed on your dyno, you will need to
make adjustments to the extension arm assembly before mounting the assembly to
the dyno. Refer to “Modifying the Extension Arm Assembly (For Power Carriage
Only)” on page A-6.
To prevent possible injury, disconnect the battery before performing any dyno
maintenance or installing any optional accessory.
M
ODIFYING
THE
T
IRE
S
TOP
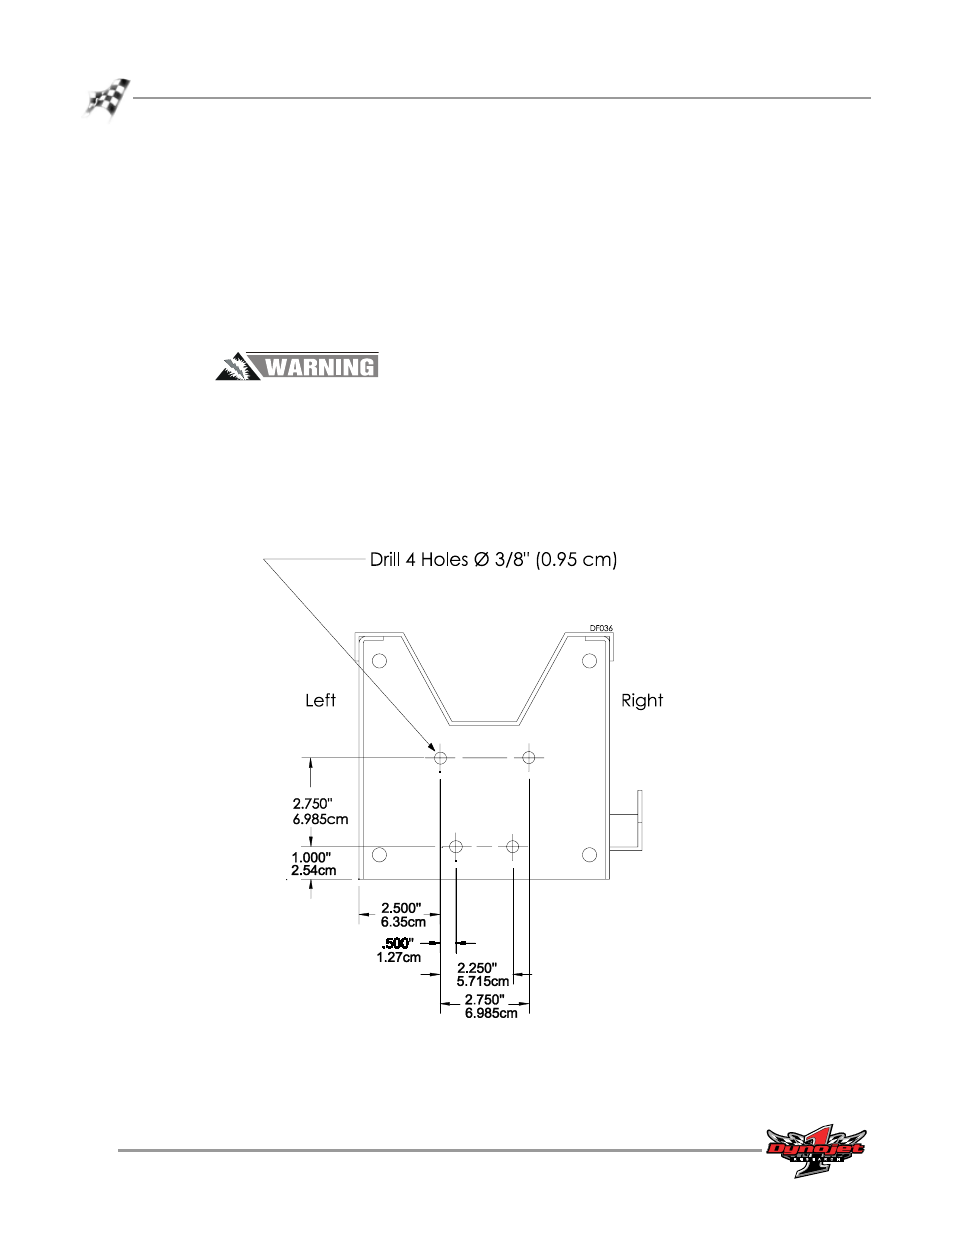
Older dynos may not have the four holes on the tire stop needed to mount the
extension arm assembly; you will need to modify the tire stop before continuing with
the blower installation instructions. Refer to Figure A-1 for hole size and placement.
Figure A-1: Modify the Tire Stop