B&M 10228 TRANSPAK User Manual
Page 4
4
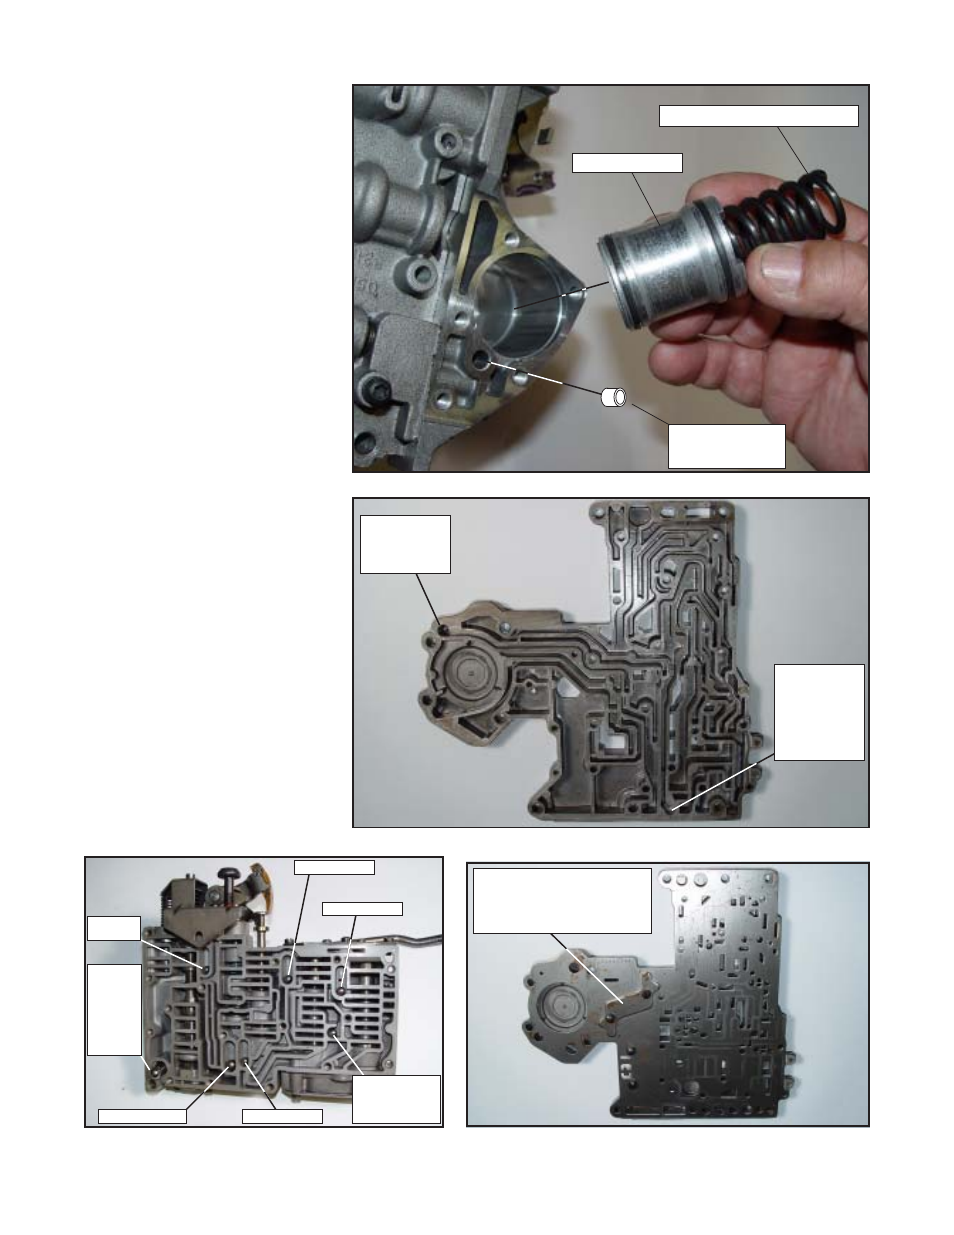
Figure 6
Figure 7
STEP 10. 4 Speeds ONLY: In-
stall the piston as removed (See
Figure 6) with the non-hollow end
into the bore, replacing the orig-
inal spring with the supplied B&M
3-4 accumulator spring. Install
the B&M aluminum cup orifice
plug in the location shown in fig-
ure 6 below the deck surface.
STEP 11. Remove check balls
from the check ball location #1
and check ball location #2 from
the transfer plate (See Figure 7).
EXCEPTION FOR JEEPS: DO
NOT remove check ball from
check ball location #2.
STEP 12. Refering to figure 8,
make sure all indicated check
balls are of the proper size and
location as indicated.
STEP 13. Reassemble the sep-
erator plate onto the transfer
plate as shown in figure 9. NOTE:
Figure 9 shows the 1970 and lat-
er model stiffener plate, other
year model stiffener plates may
vary in appearance.
STEP 14. Use a 3/16” allen
wrench and turn the adjustment
screw (See Figure 10) clockwise
until the pressure regulator spring
seat is sitting flush against the
inside edge of the spring retain-
er. Then turn the adjustment
screw five (5) full turns counter-
clockwise for heavy duty applica-
tions or seven (7) full turns for
street level and 3-speed off-road
racing applications.
B&M aluminum
cup orifice plug
B&M 3-4 accumulator spring
original piston
Figure 8
Figure 9
check ball
location #1
(remove ball)
check ball
location #2
(remove ball
except for
Jeeps)
check ball #3
(1/4”)
check ball #4 (1/4”)
check ball #5 (1/4”)
If there is a
check valve &
spring or a
check ball &
spring in this
location -
then reinstall
it.
check ball #1 (11/32”)
check ball #2 (1/4”)
check ball #6 (remove
for Heavy Duty & Off-
Road Racing
applications)
stiffner plate must be installed
as shown (stiffner plates
vary in appearance(1970 and
later shown))