Step 3 frame a picture, 1 ready the camera, Z frame the picture – Nikon COOLPIX AW100 User Manual
Page 52: C notes on (easy auto) mode
Attention! The text in this document has been recognized automatically. To view the original document, you can use the "Original mode".
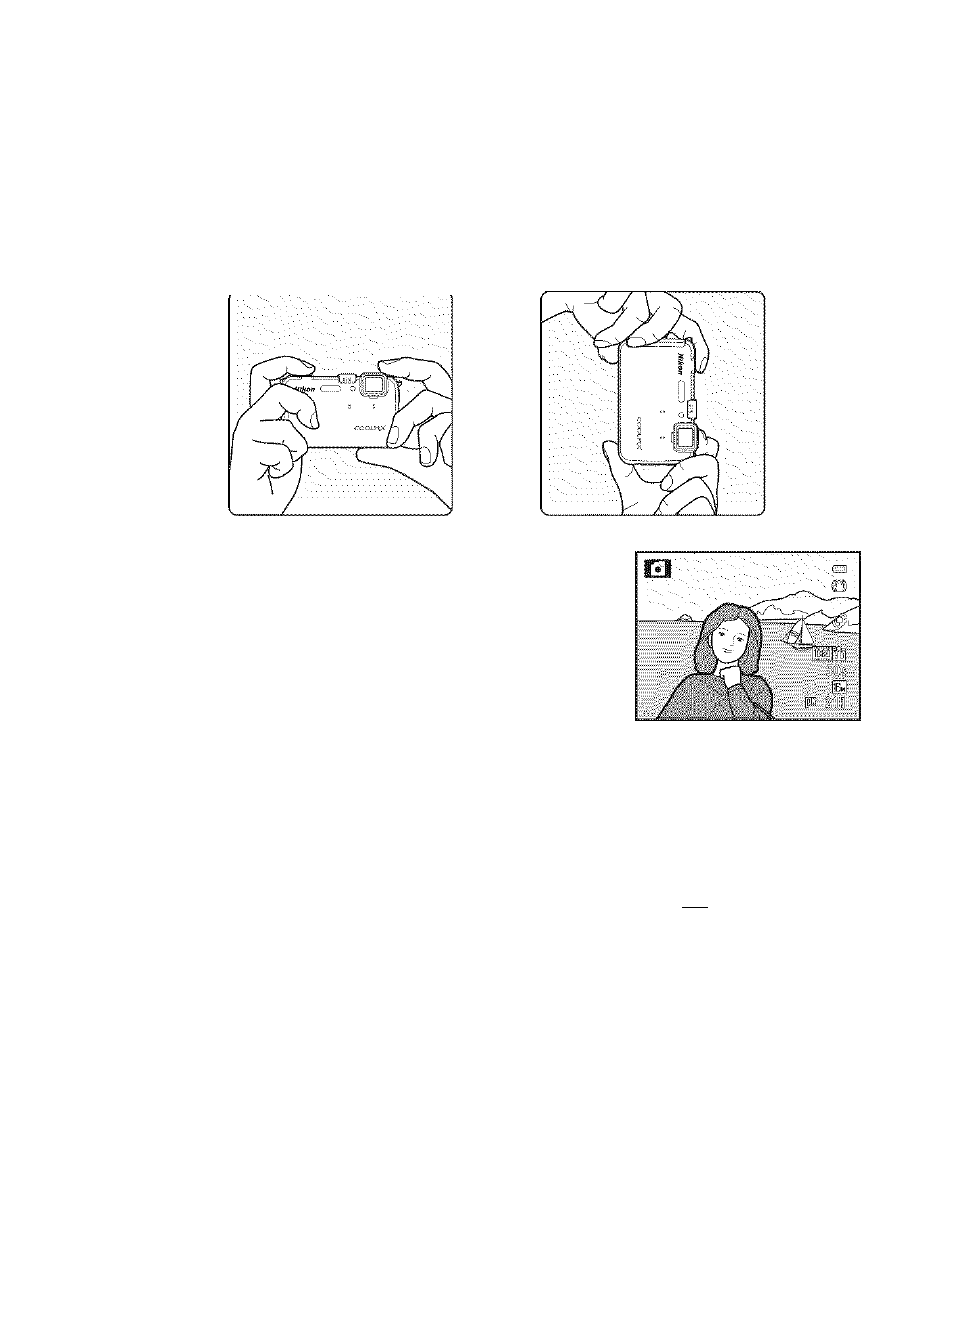
Step 3 Frame a Picture
1
Ready the camera.
• Keep your fingers, hair, camera strap and other objects away from the lens, flash, AF-
assist illuminator and microphone.
• To shoot in the "tall” orientation, hold the camera so that the flash is above the lens.
28
Z
Frame the picture.
• When the camera determines a scene mode, the
shooting mode icon changes (dl26).
• When the camera detects a face, a yellow double
border (focus area) is displayed.
See "Using Face Detection” (CÜZI6.5) for more
information.
• When non-human subjects are photographed, or a subject with which no face can be
detected is framed, the focus area is not displayed. Position the main subject near the
center of the monitor.
C Notes on (Easy Auto) Mode
• When the digital zoom is in effect, the shooting mode is set to
WiM.
• Depending upon shooting conditions, the camera may not select the desired scene mode. In this
case, select another shooting mode.
B ISO Sensitivity
Q@û] (ISO sensitivity, [lul7) may be displayed on the shooting screen. When [®î) is displayed, the ISO
sensitivity is automatically raised.
B Using a Tripod
• In the following situations, use of a tripod is recommended to stabilize the camera during
shooting and toavoid the effects of camera shake.
- When shooting in dark surroundings or when flash mode (Dul54) is set to ® (off)
- When shooting at the telephoto zoom position
• To take a picture with the camera attached to a tripod, set
Vibration reduction
in the setup
menu (C394) to
Off,