Recording images in macro, Using the self-timer – Sony DSC-F1 User Manual
Page 11
Attention! The text in this document has been recognized automatically. To view the original document, you can use the "Original mode".
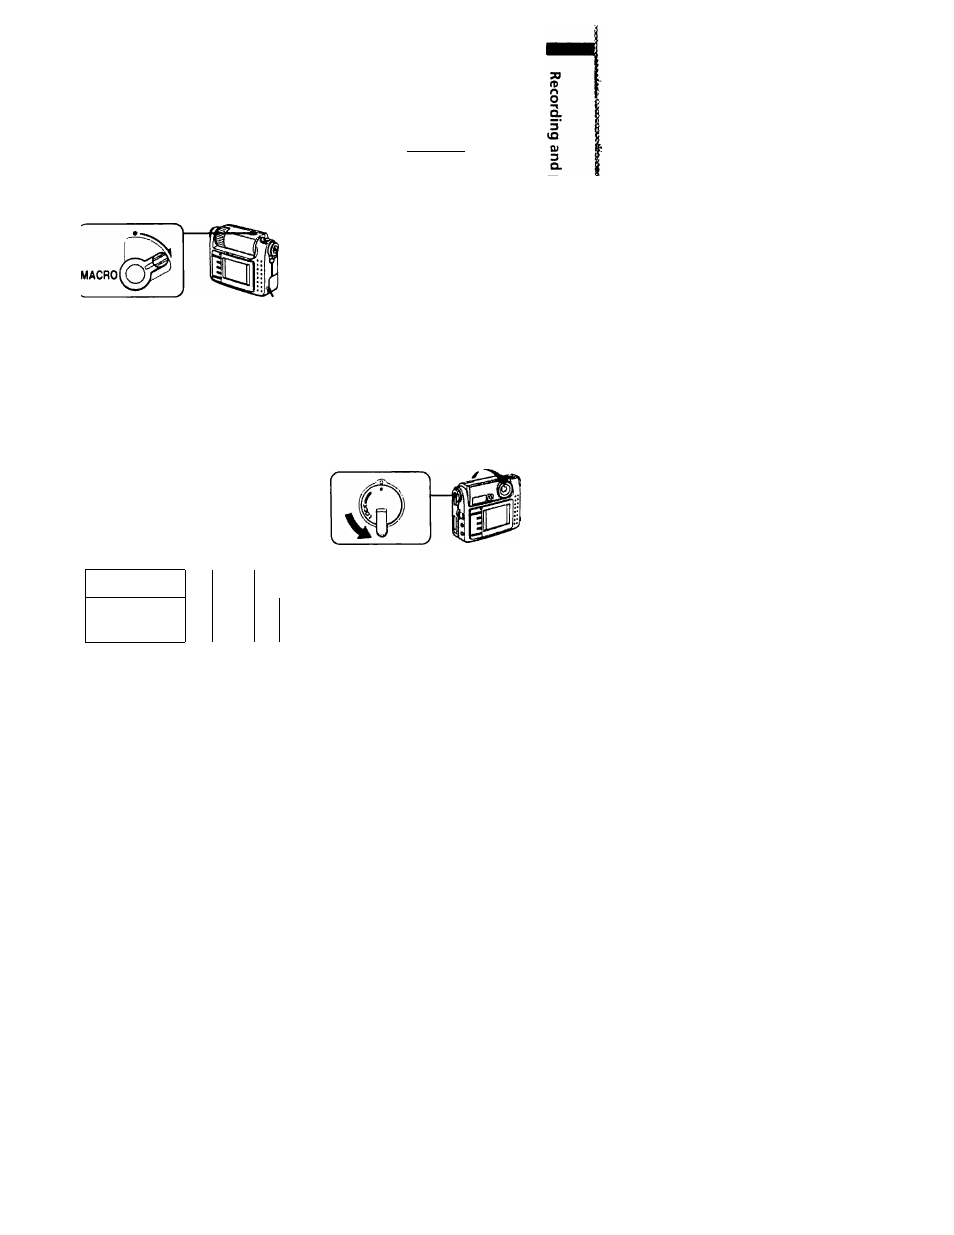
Recording images in macro
Turn the MAQIO lever in the
direction of the arrow. The macro
indicator ( A) appears on the LCD
screen. You can shoot a subject that is
about 3 inches (8 cm) to 9 inches (25
cm) away from the lens surface in
macro mode. If you turn the MACRO
lever in the opposite direction of the
arrow until it clicks, maao mode is
released and you can record images in
normal mode.
Adjust the focus on the LCD screen
using the MACRO lever.
OTo adjust the focus precisely
Connect the VIDEO OLTT jack of the
camera
to the video-in jack of the TV, and
then check if the subject is in focus on the
TV screen, (page 43)
Using the self-timer
With the self-timer about 10 seconds
after you press the shutter button, the
subject is recorded.
1 Press SELF TIMER.
The self-timer indicator (0) Ls
liisplayed on the LCD screen.
/-------------------------------
SELF TIMER
3 Press the shutter button fully.
The shutter is released in about 10
seconds and the image is recorded.
During the
10-second
countdown,
the indicator -|^□ □ □ □ □ | O
disappears
from the
screen one by
one.
Changing the lens orientation
— Face to face shooting
You can shoot yourself by placing
yourself and the LCD screen face to
face. Turn the LCXK lever in the
direction of the arrow until the marks
(•) are aligned so that you can release
the lever, and rotate the lens at about
180°. You can lock the lens angle by
turning the LOCK lever in the opposite
direction of the arrow.
The images displayed on the LCD
screen are mirror images. But they are
stored in memory in the same way as
you see through the lens.
2 Press the shutter button halfway
down.
The AE lock indicator (•) appears
on the LCD screen.
7^75!—n*SSjr:r: