Ktm dc conversion harness, Installation installation continued – Trail Tech KTM DC WIRE HARNESS KIT S-8300-WK User Manual
Page 3
KTM DC CONVERSION HARNESS
INSTALLATION
INSTALLATION CONTINUED:
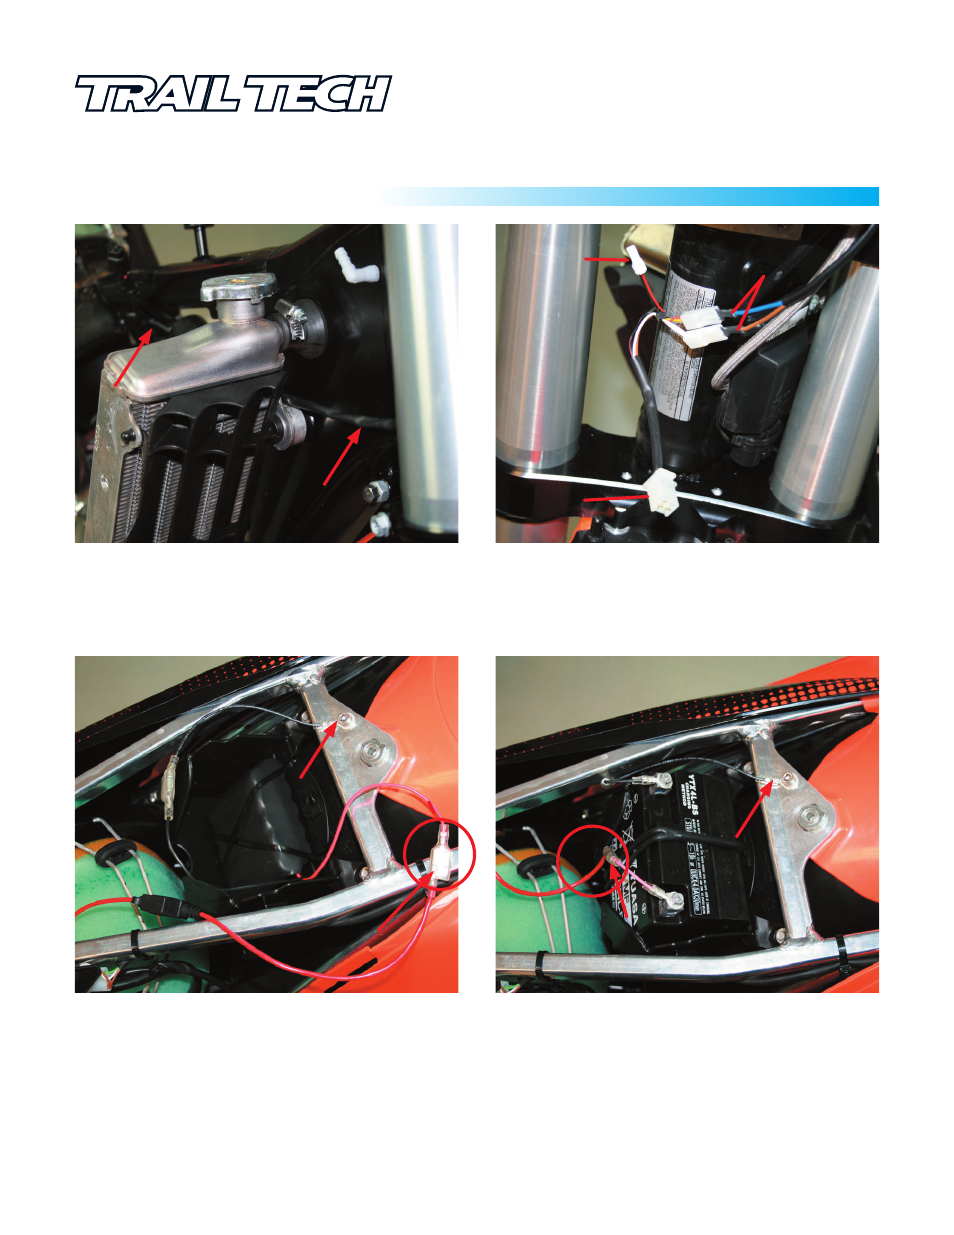
STEP 7: Route the head light, computer, and switch
connectors to the right side of the frame, and forward along
the frame to the steering stem area.
010-ELV-43
KTM DC HARNESS
Tech Support: 360-687-4530
Continued on other side >>
STEP 8: Install the handlebar mounted switch in the location
of your choice. Connect the two spades to the headlight
switch connectors of the wiring harness. The computer and
headlight can also be connected at this time. If using the
stock push/pull switch, connect directly to the two spaes.
STEP 9 (040-BATT3.7): Install the ground wire as shown.
Screw to frame rail using provided M5 bolt and lock washer.
Connect the strap to the black wire of the battery. If the frame
is not drilled for the ground strap, drill with a 1/8” drill bit and
attach with the included self-tapping screw and washer.
STEP 9 (Yuasa YTX4L-BS): Install the ground wire as
shown. Screw to frame rail using provided bolt and lock
washer. Install the provided ring terminal adapters onto the
battery + wire, and the ground strap. Connect the strap to the
negative terminal of the battery.
DO NOT
CONNECT
DO NOT
CONNECT
Handle Bar
Switch Wires
Head Light
Connector
Computer
Connector
LEAVE THE BATTERY POSITIVE (+) WIRE DISCONNECTED UNTILL ALL
ELECTRICAL WORK, INCLUDING STATOR INSTALL, IS COMPLETE.