Ktm dc conversion harness, Installation installation continued – Trail Tech KTM DC WIRE HARNESS KIT S-8300-WK User Manual
Page 2
KTM DC CONVERSION HARNESS
INSTALLATION
INSTALLATION CONTINUED:
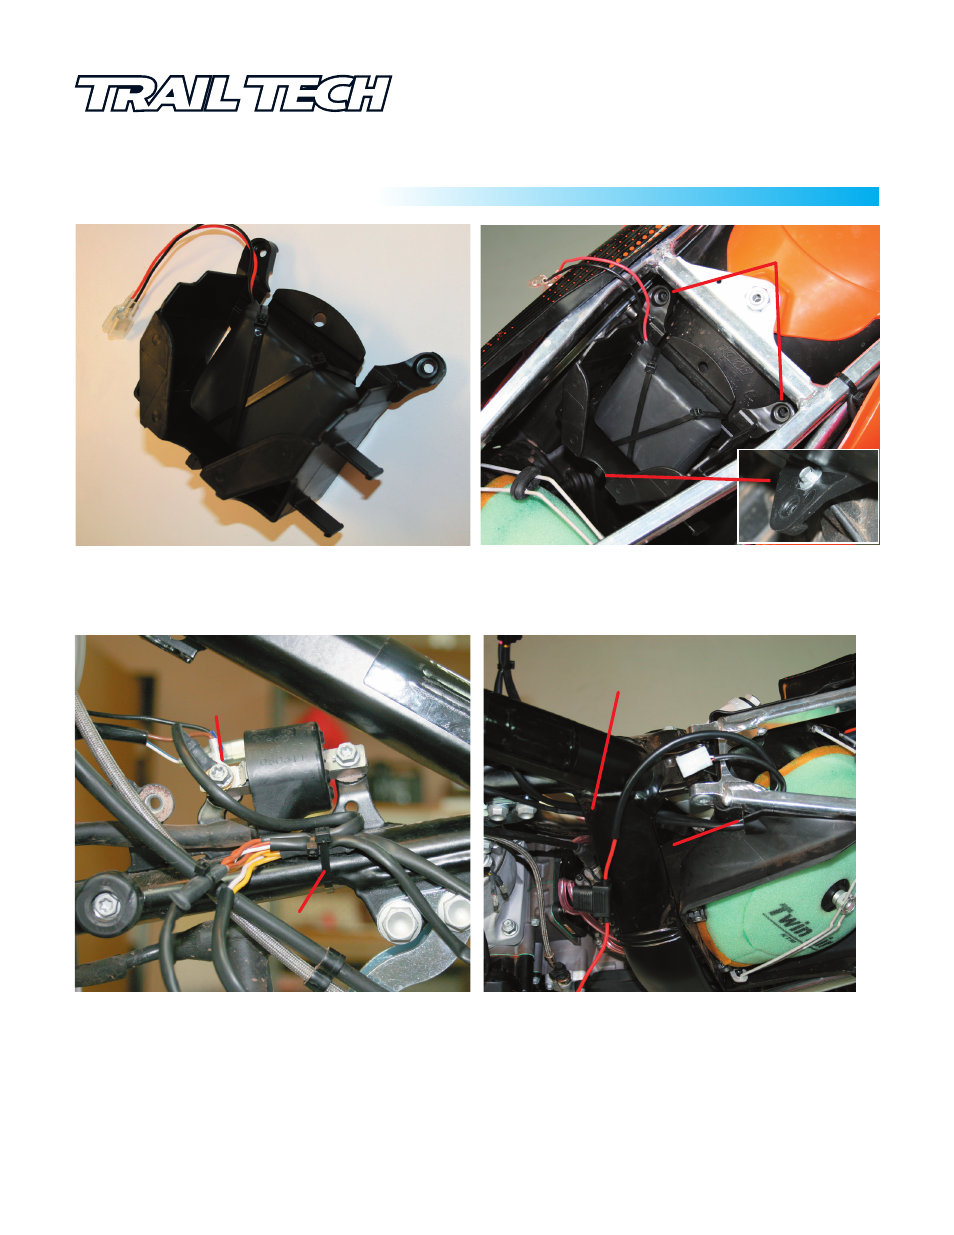
STEP 3: Install the battery in the battery box. If using the Trail
Tech 040-BATT3.7, use the two included 8” zip ties as shown.
If using the Yuasa YTX4l-BS, use a KTM battery strap, part
number 50303018000 (sold separately)
010-ELV-43
KTM DC HARNESS
Tech Support: 360-687-4530
Continued on next page >>
STEP 4: Screw the battery box into place on the rear fender.
Use the 3 provided screws. The bottom screw hole may not
line up on some older models. If so, use alternate opening as
shown.
STEP 5: Begin installing the wiring harness at the Ground Ring
Terminal. Remove the forward coil Bolt (on older models, use
the regulator mount), and re-install with ring terminal. Rotate all
connectors towards the rear of bike before tightening bolt. Zip-
tie the wire harness to the lower frame rail, routing the zip tie
through the available slot in the coil mount (as shown).
STEP 6: Route the positive(+) battery and tail light connectors
under the frame rails, then through the wiring notch in the air-
box plastic. If installing a tail light, connect it now.
Start these two
screws first.
Ground
Ring Terminal
Zip-Tie Harness
To Frame
Route Cables
Under Frame Rail
Route Through
Notch in Plastic
Into Air Box