Removing the stock assembly, Caution, 2.the stock heat shield and thermal insulation – Tomei Powered STRAIGHT DOWN PIPE for WRX STI USDM User Manual
Page 7: 3.tomei straight down pipe installation
1.REMOVING THE STOCK ASSEMBLY.
The following are basic instructions. For more details please refer to the vehicle's
official service manual.
1. Disconnect the negative battery terminal.
2. Remove the heat shield around the turbine (upper, lower and side) and then remove
the O2 sensor.
3. Remove the catalyst.
・Take care when removing the nuts and bolts as these will be reused when installing the product.
・The removed catalyst and attached gasket will not be reused.
CAUTION
・ When jacking up the vehicle, pay close attention to where you place the jack.
Incorrect placement of the jack can warp and/or damage the vehicle
Ensure rigid jack stands are in place before commencing any work.
2.THE STOCK HEAT SHIELD AND THERMAL INSULATION
・ The lower and side heat shield removed in step 1 can be safely stored away as these will not
be reused during the installation of this product.
※ Only the upper heat shield will be reused when installing this product.
・ Depending on the application, you may need to apply additional thermal insulation after removing
the heat shield. These items, such as exhaust wrap, should be applied prior to installing
this product.
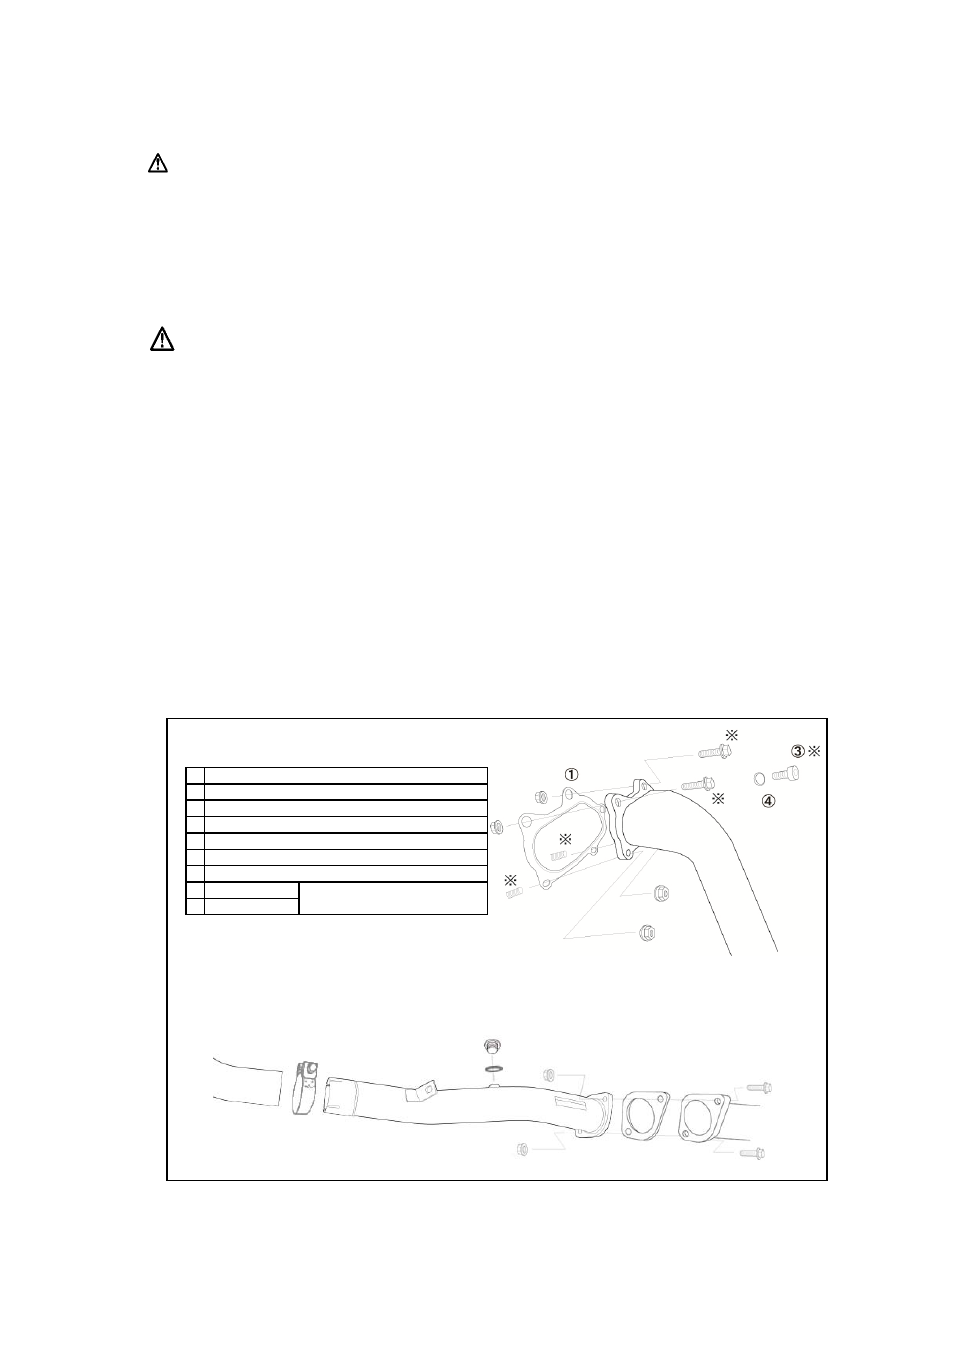
3.TOMEI STRAIGHT DOWN PIPE INSTALLATION
【Positioning of the components】
The positioning of each part is shown below together with the torque specifications.
Stock parts should be used for nuts, bolts and gaskets without a part number.
① Turbine Gasket
② Muffler Gasket
③ Cap Bolts【34.0~39.0N・m(3.5~4.0kgf-m)】
④ Disc Spring
⑤ Flange Bolt
⑥ Flange Nut 【34.0~39.0N・m(3.5~4.0kgf-m)】
⑦ Clamp Band【25.0N·m(2.6kgf-m)】
⑧ Blind Plug
Use when not installing
⑨ Copper Washer an A/F meter
※
For areas affected by high temperatures
apply the included Smooth Bolt Paste
to prevent the parts from becoming seized.
7
⑤※
⑤※
⑥
⑥
⑦
⑧
⑨
②