Installation instructions – Qmark Open Coil Electric Duct Heaters User Manual
Page 2
INSTALLATION
INSTRUCTIONS
Unpacking the Heater
1. Remove the shipping covers just before installation.
2. Inspect the heater carefully and report any damage to the
manufacturer.
DO NOT INSTALL A DAMAGED HEATER.
Important Notes
Heater Position
1. The axis of the duct must always be perpendicular to the face
of the heater.
2. All heaters are made non-sensitive to air flow direction without
impairing safety. The same heater could be installed in a hori-
zontal or vertical duct.
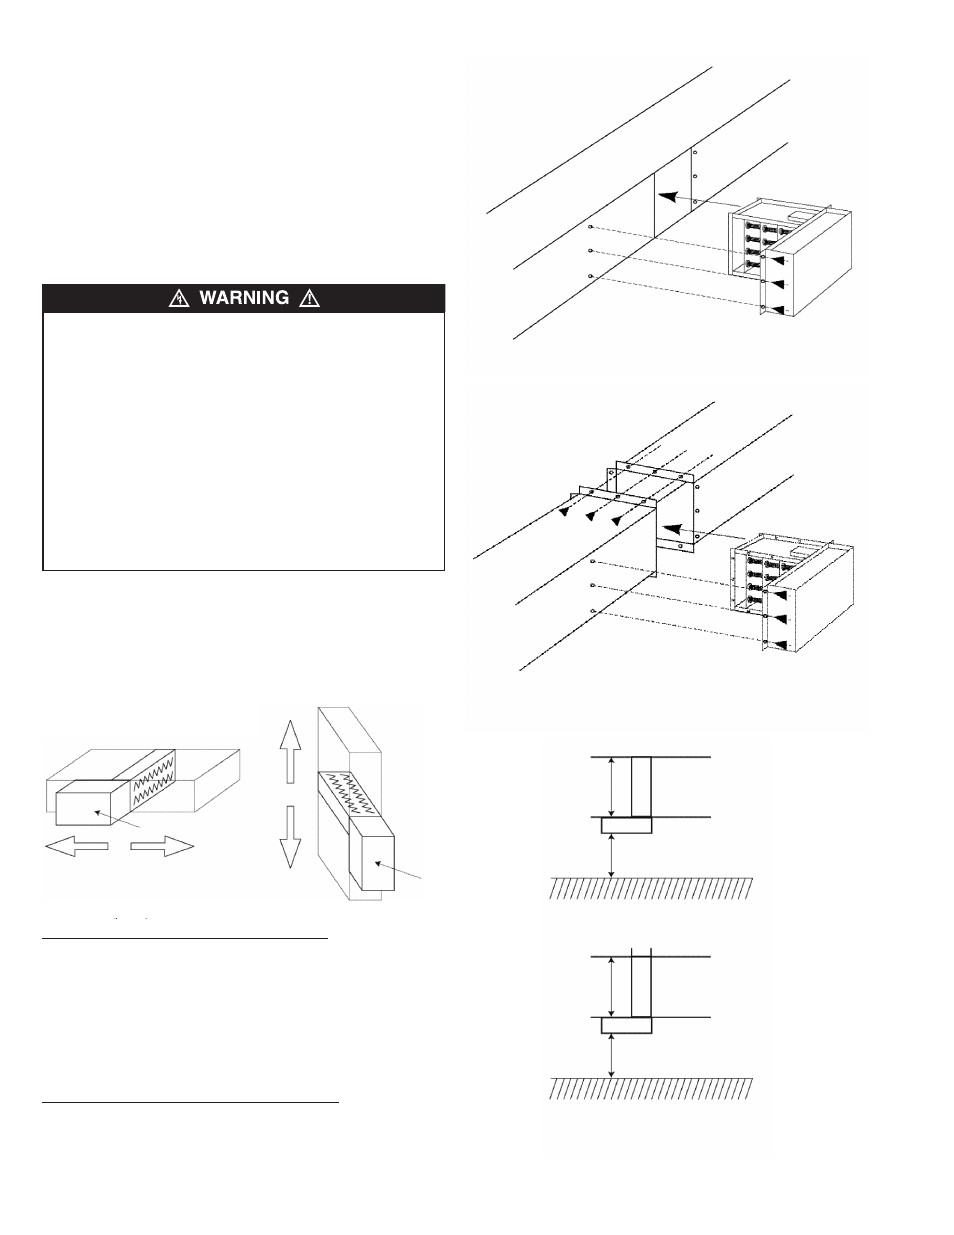
Model SC or ST (Slip-in type, See Figure 2)
3. Cut an opening in the side of the duct.
4. Slip the heater into the duct until the hole is completely
covered by flanges around the heater.
5. Fasten the heater to the duct with sheet metal screws and seal
openings with a suitable sealing compound.
6. If the heater is heavy, use additional hangers to support the
heater.
Model FC or FT (Flanged Type, See Figure 3)
7. Flange both ends of the duct outwards on three sides to match
the heater’s flanges.
1.
Do not install a duct heater in a vertical duct directly above
a ceiling diffuser or an opening in the ceiling.
2. Do not install standard heaters outdoors. Order a heater
with weatherproof control box instead.
3. Do not install spray humidifiers upstream of duct. Install it
downstream instead.
4. Do not cover the control box with thermal insulating
materials.
5. Use special air intake louvers of weatherproof construction
for preheat duct heaters to avoid intake of water or snow
particles.
6. Make sure that motorized damper blades are not blocked
with snow or dirt. Inspect the dampers regularly to ensure a
suitable airflow.
2
Duct
Heater
Figure 2: Installation of Slip-in Type SC or ST
Duct
Heater
Figure 3: Installation of Flanged Type FC or FT
Air Flow
Air
Flow
Heater
Heater
Figure 1: Mounting Position
Heater
Heater
Dim. “W”
Dim. “W”
Dim. “W” + 10”
24”
Type SC or ST
Type FC or FT
Obstruction
Obstruction
Figure 4: Minimum Distance for Safety and Service