Dell Dimension 4300 User Manual
Page 85
Adding Parts
85
FILE LOCATION:
FILE LOCATION:
FILE LOCATION:
FILE LOCATION: C:\Projects\Green_Lantern_solutions\2H930c31.fm
D E L L C O N F I D E N T I A L – P R E L I M I N A RY 1 1 / 2 0 / 0 1
D E L L C O N F I D E N T I A L – P R E L I M I N A RY 1 1 / 2 0 / 0 1
D E L L C O N F I D E N T I A L – P R E L I M I N A RY 1 1 / 2 0 / 0 1
D E L L C O N F I D E N T I A L – P R E L I M I N A RY 1 1 / 2 0 / 0 1
7
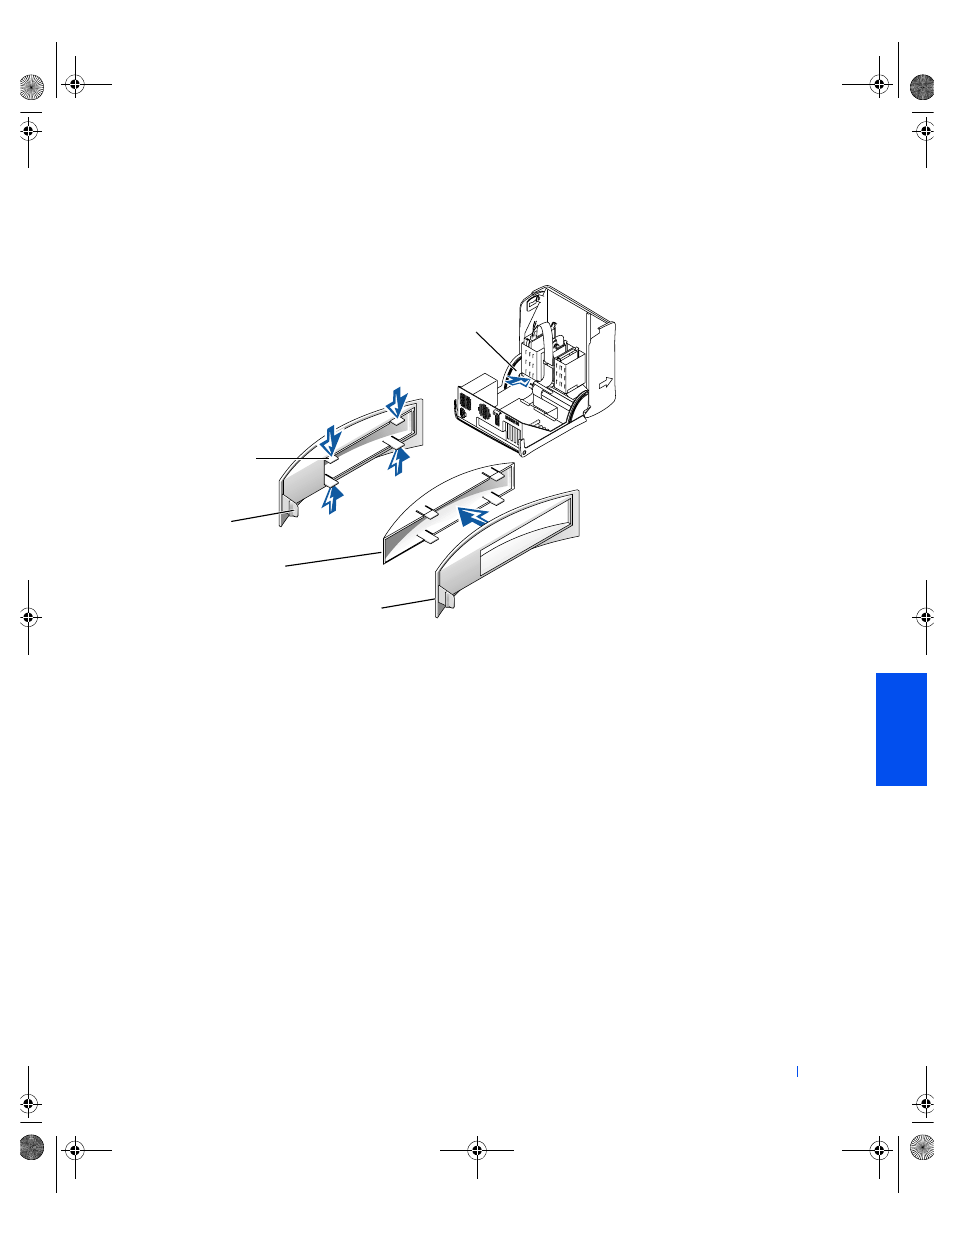
To remove the drive-bay cover panel, press the four tabs and pull the
insert away from the panel.
8
Remove the two short, green plastic rails from the inside of the drive
cage.
These rails are not attached to the drive cage with screws. To remove
the rails, firmly pull the rails from the drive cage.
9
Attach the rails to the drive using the two captive screws on each rail.
Ensure that the rail tabs are positioned at the back of the drive.
securing tabs (4)
drive-bay cover panel
front-panel insert
securing tab
remove front panel
insert through here
front panel insert
2H930bk1.book Page 85 Tuesday, November 20, 2001 5:02 PM
- Inspiron 530 (2 pages)
- OptiPlex 755 (528 pages)
- OptiPlex 755 (82 pages)
- OptiPlex 755 (45 pages)
- OptiPlex 755 (248 pages)
- OptiPlex 755 (622 pages)
- OptiPlex 760 (76 pages)
- OptiPlex 760 (203 pages)
- OptiPlex 745 (360 pages)
- OptiPlex 745 (428 pages)
- OptiPlex 745 (212 pages)
- OptiPlex 780 (89 pages)
- OptiPlex 780 (10 pages)
- OptiPlex 780 (74 pages)
- OptiPlex 780 (80 pages)
- OptiPlex 780 (73 pages)
- OptiPlex 780 (40 pages)
- OptiPlex 780 (14 pages)
- OptiPlex GX620 (338 pages)
- OptiPlex GX620 (221 pages)
- OptiPlex GX620 (294 pages)
- Inspiron 530 (226 pages)
- OptiPlex 960 (Late 2008) (16 pages)
- OptiPlex GX260 (100 pages)
- OptiPlex GX260 (235 pages)
- OptiPlex FX160 (Late 2008) (20 pages)
- OptiPlex FX160 (Late 2008) (132 pages)
- OptiPlex FX160 (20 pages)
- OptiPlex 210L (258 pages)
- OptiPlex 210L (150 pages)
- OptiPlex 210L (130 pages)
- OptiPlex 210L (128 pages)
- OptiPlex 210L (300 pages)
- OptiPlex 320 (44 pages)
- OptiPlex 320 (140 pages)
- OptiPlex 320 (132 pages)
- OptiPlex 320 (312 pages)
- OptiPlex 320 (266 pages)
- OptiPlex 320 (356 pages)
- OptiPlex GX240 (121 pages)
- OptiPlex GX240 (86 pages)
- OptiPlex GX240 (283 pages)
- OptiPlex GX240 (298 pages)
- OptiPlex GX240 (182 pages)
- OptiPlex GX240 (144 pages)