Dell PowerVault 110T LTO2 (Tape Drive) User Manual
Page 31
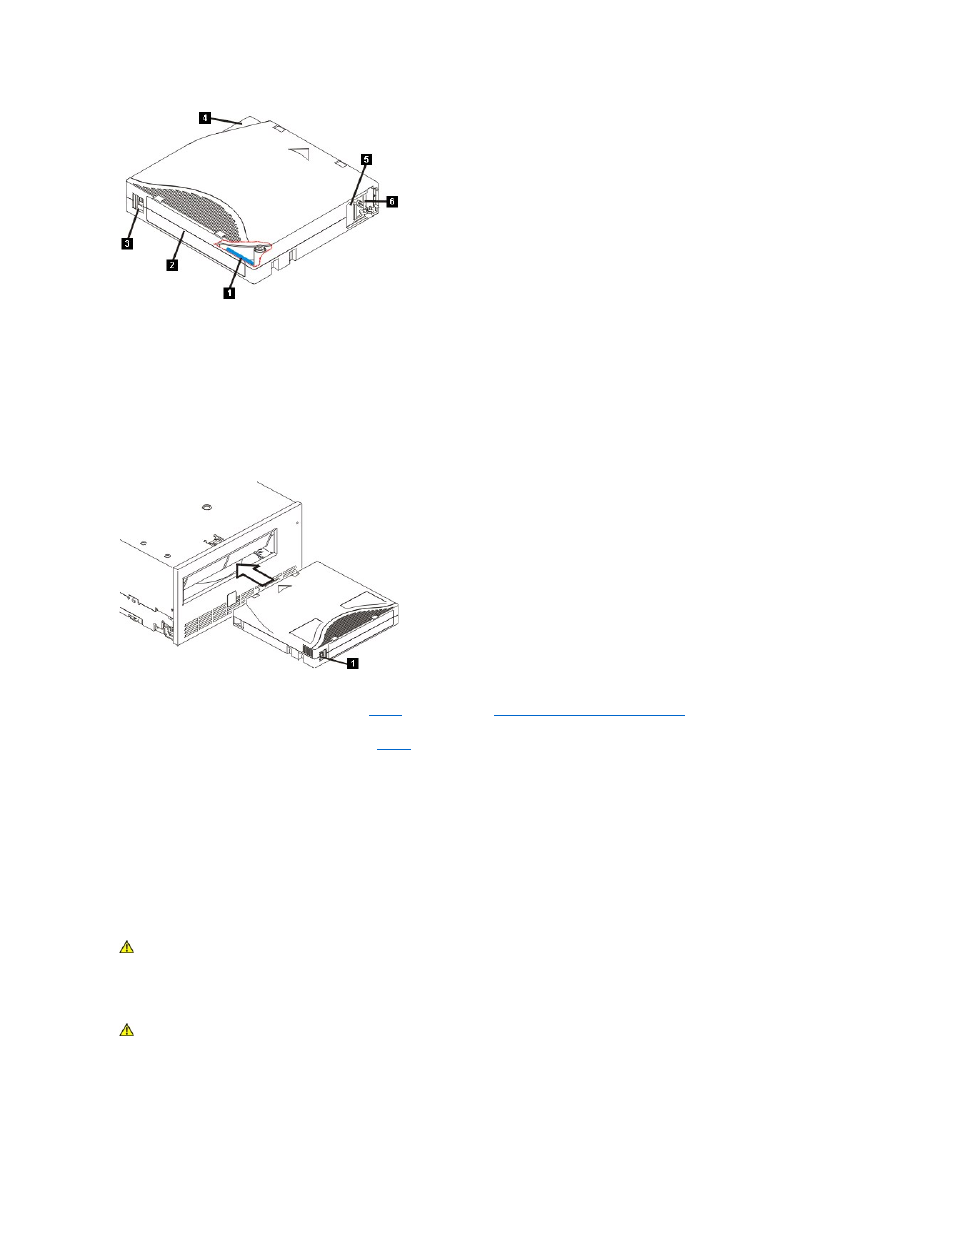
1. LTO cartridge memory
2. Label area
3. Write-protect switch
4. Insertion guide
5. Cartridge door
6. Leader pin
Loading a Tape Cartridge
Figure 4. Loading
1. Ensure that the tape drive is powered on (the status light is solid green).
2. Ensure that the write-protect switch (see number 1 in
Setting the Write-Protect Switch on Cartridges
).
3. Grasp the cartridge so that the write-protect switch faces you.
4. Slide the cartridge into the tape load compartment (see
Notes:
a. If the cartridge is already in the ejected position and you want to reinsert it, remove the cartridge then insert it again.
b. If the cartridge is already loaded and you cycle the power (turn it off, then on), the tape will reload.
Unloading a Tape Cartridge
1. Ensure that the tape drive is powered on (the status light is solid green).
2. Press the eject button. The drive rewinds the tape and partially ejects the cartridge. The status light flashes green while the tape rewinds, then goes out before the
cartridge partially ejects.
3. After the cartridge partially ejects, grasp the cartridge and remove it.
Whenever you unload a tape cartridge, the tape drive writes any pertinent information to the cartridge memory.
Setting the Write-Protect Switch on Tape Cartridges
The position of the write-protect switch on the tape cartridge determines whether you can write to the tape:
l
If the switch is set to locked (solid red padlock), data cannot be written to the tape.
l
If the switch is set to unlocked (black void), data can be written to the tape.
CAUTION: Do not remove a tape cartridge while the drive activity indicator is on.
CAUTION:Write-protection will not prevent a cartridge being erased by bulk-erasure or degaussing. Do not bulk erase Ultrium format cartridges. This
will destroy pre-recorded servo information and render the cartridge unusable.