Installing external drives – Dell PowerVault 110T LTO2 (Tape Drive) User Manual
Page 14
2. The single-character display becomes blank (not lit).
3. The status light briefly becomes solid amber, then becomes solid green.
Installing External Drives
Installing the Tape Backup Software
Refer to your Tape Backup Software documentation for full details of how to install and operate your backup software application. For the latest supported software versions,
go to
Installing the Drive - Prerequisites
The tape drives are Ultra160 SCSI devices designed to operate on a low voltage differential SCSI bus (LVD) with a burst transfer rate of 160 MB/sec. Do not use the drive on a
single-ended SCSI bus as performance is restricted. Do not use on the same bus as other single-ended devices as this will switch the LVD's host adapter into single-ended
mode and restrict performance. We recommend that a dedicated host bus adapter is used for the tape drive.
Your computer must have a properly installed and configured SCSI host adapter or a SCSI controller on the motherboard (SCSI-2 or SCSI-3 compliant) with driver software that
supports the tape drive. Check the server documentation for the specification of any built-in SCSI channels. Do not connect to a RAID controller channel; these are for disk
drives only. Consult your supplier for details.
The tape drive will attach to a computer with a HD-68 LVD SCSI connector (68 pins). If your server or host bus adapter is equipped with a very high density (VHD) wide SCSI
connector, you will need to order a 68-pin HD-to-VHD converter or 68-pin HD-to-VHD cable.
Installing the Drive - Step-By-Step Instructions
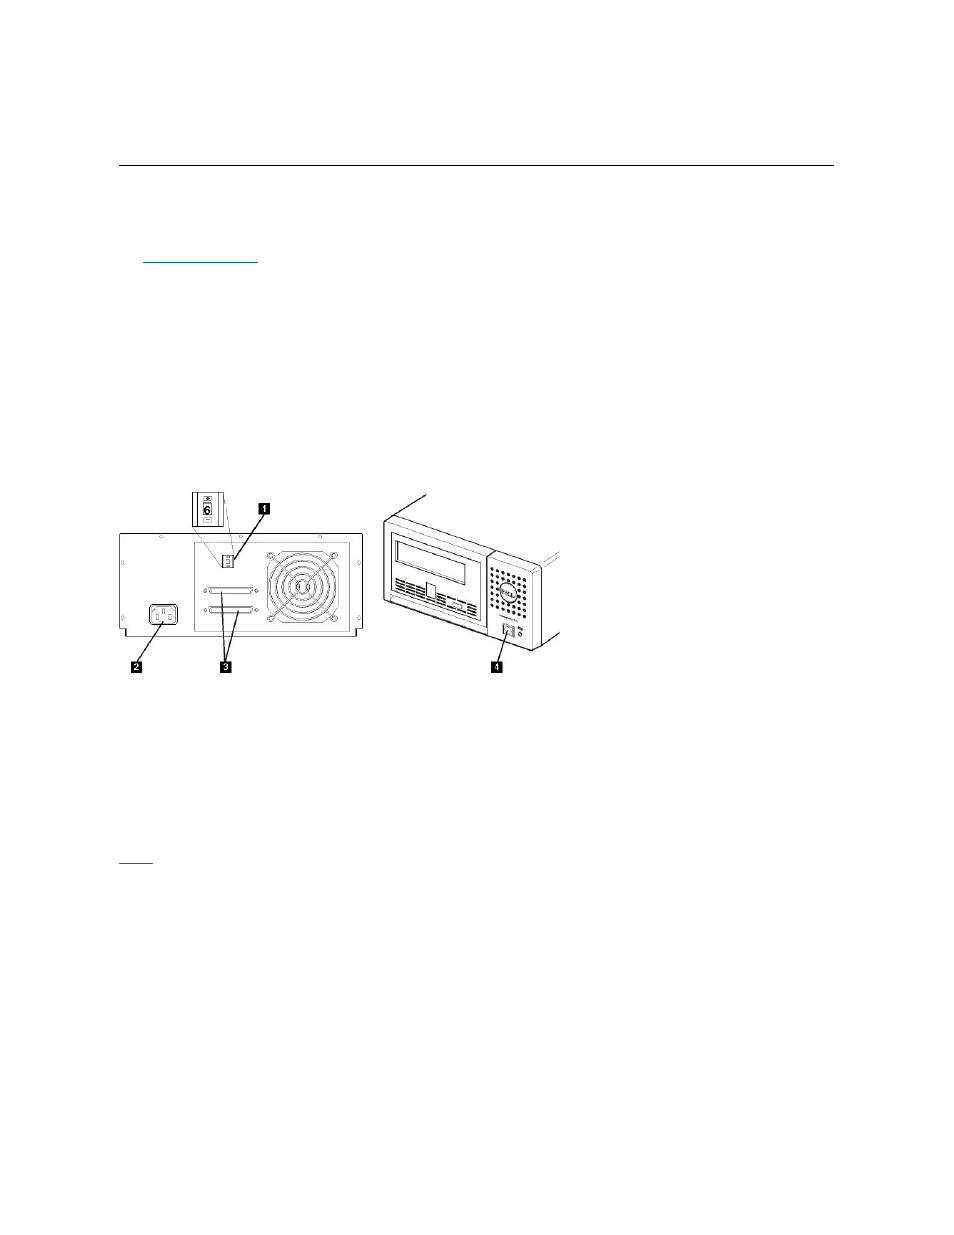
Figure 7. Rear Panel of the External Tape Drive
1. SCSI Address Switch
2. Power Receptacle
3. External SCSI Connectors
4. Power On/Off Button
Step 1 - Setting the SCSI ID. Your tape drive is shipped with a default SCSI ID of 6, but it can be assigned any unused ID between 0 and 15. Do not use SCSI ID 7, which is
reserved for the SCSI controller, or SCSI ID 0, which is typically assigned to the boot disk. We do not recommend installing the drive onto a narrow SCSI bus, as this will
restrict performance.
Determine whether you need to change the SCSI ID from the default of 6.
Change the tape drive's SCSI ID, if necessary. Use a small screwdriver or a ball-point pen to press the indented SCSI ID selector buttons on the rear panel (see number 1 in
checked at power-on. To change the SCSI ID after installation, power down both the computer and the tape drive, change the drive's SCSI ID, power up the tape drive, and
then power up the computer.
Step 2 - Positioning the Tape Drive. Position the tape drive anywhere that is convenient to the host. The only restrictions are the length of the power cord and the length of
the SCSI cable. Recommended locations are:
l
Away from high-traffic areas, especially if the floor is carpeted.
l
Out of computer rooms to avoid toner and paper dust. Do not store paper supplies next to any unit.
l
Away from moving air, such as doorways, open windows, fans, and air conditioners.
l
Off the floor.
l
In a horizontal position.
l
Where the tape cartridge can easily be inserted.
The tape drive should not be stacked. Do not place anything on top of the unit.
Step 3 - Connecting Power. An external DELL PowerVault 110T LTO-2 drive will operate using any voltage in the range 100-240 volts (50-60 Hz). No adjustment is needed.
To connect your drive to the power supply, proceed as follows: