Replacing the system board – Dell Dimension 5150C User Manual
Page 35
Removing and Installing Parts: Dell Dimension 5150C Service Manual
file:///T|/htdocs/systems/dim5150C/en/sm/parts1.htm[10/31/2012 8:21:07 AM]
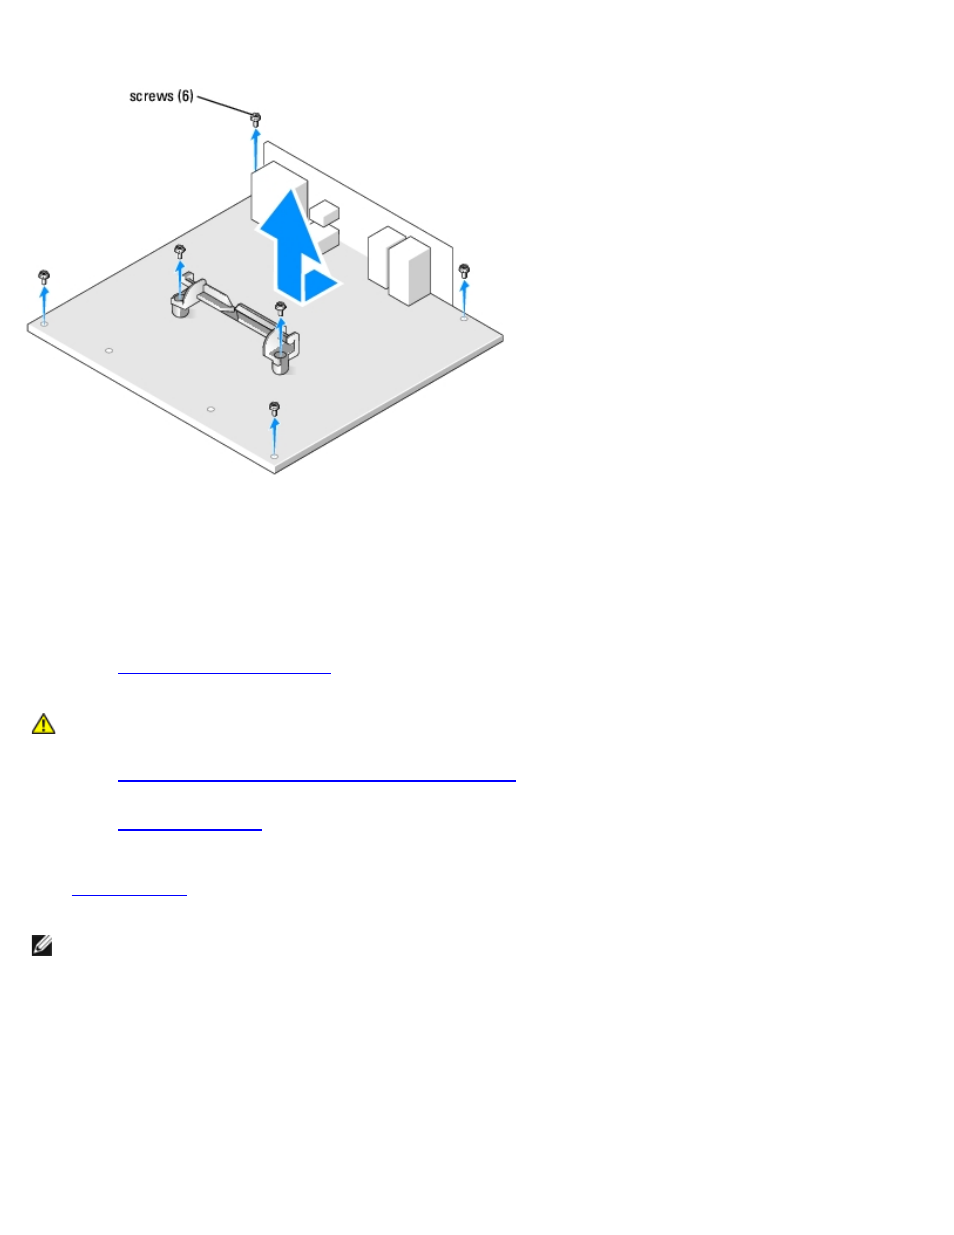
8. Lift the system board out of the computer.
9. Place the system board that you just removed next to the replacement system board.
Replacing the System Board
1. Transfer components from the existing system board to the replacement system board:
a.
and install them on the replacement system board.
CAUTION:
The heat-sink assembly and processor package can get hot. To avoid burns, ensure that the
assembly and package have had sufficient time to cool before you touch them.
b.
Remove the heat-sink assembly and processor package
from the existing system board and transfer them to the
replacement system board.
c.
from the existing system board and transfer it to the replacement system board.
2. Configure the settings of the replacement system board.
3.
on the replacement system board so that they are identical to the ones on the existing system board.
NOTE:
Some components and connectors on the replacement system board may be in different locations from
corresponding connectors on the existing system board.
4. Orient the replacement system board by aligning the slots in the bottom of the board to the tabs on the computer.
5. Slide the system board down onto the pins.
6. Replace the screw that holds the system board down.
7. Reconnect the modem cable and ground wire to the modem:
a. Reconnect the modem cable from the modem.
b. Use a size #1 screwdriver to remove the screws securing the modem and ground wire to the system board, and