Microprocessors – Dell POWEREDGE 1855 User Manual
Page 61
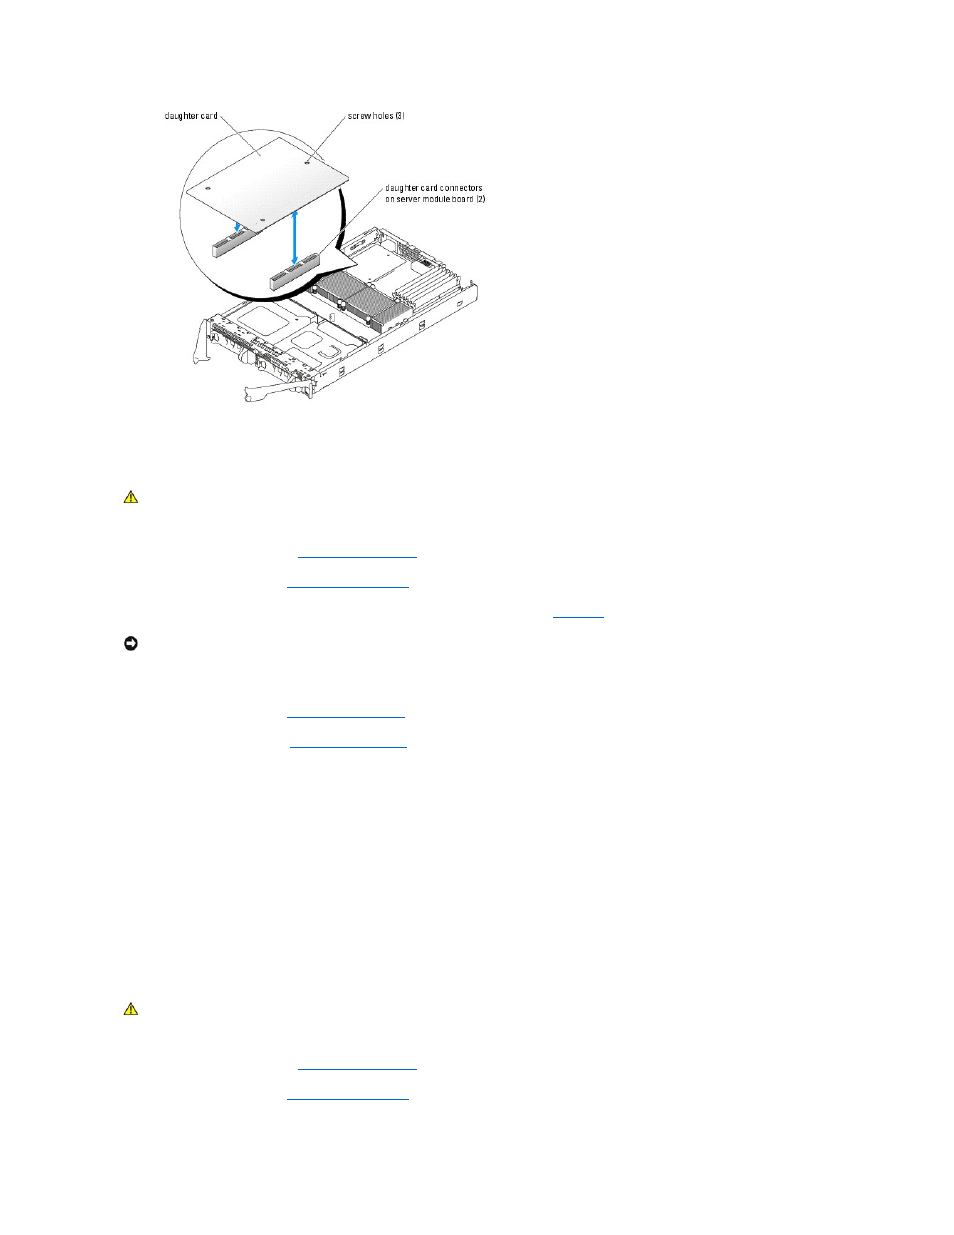
Removing a Daughter Card
1.
Remove the server module. See "
."
2.
Open the server module. See "
."
3.
Remove the three screws that secure the daughter card to the server module board. See
4.
Lift up the daughter card from its connector and remove it from the server module board.
5.
Close the server module. See "
."
6.
Install the server module. See "
."
Microprocessors
It is possible to upgrade your processor(s) to take advantage of future options in speed and functionality. Each processor and its associated internal cache
memory are contained in a pin grid array (PGA) package that is installed in a ZIF socket on the system board.
The following items are included in the processor upgrade kit:
l
Processor
l
Heat sink
l
Thermal grease
Removing the Processor
1.
Remove the server module. See "
."
2.
Open the server module. See "
."
CAUTION:
Many repairs may only be done by a certified service technician. You should only perform troubleshooting and simple repairs as
authorized in your product documentation, or as directed by the online or telephone service and support team. Damage due to servicing that is not
authorized by Dell is not covered by your warranty. Read and follow the safety instructions that came with the product.
NOTICE:
Hold the daughter card by its edges only.
CAUTION:
Many repairs may only be done by a certified service technician. You should only perform troubleshooting and simple repairs as
authorized in your product documentation, or as directed by the online or telephone service and support team. Damage due to servicing that is not
authorized by Dell is not covered by your warranty. Read and follow the safety instructions that came with the product.